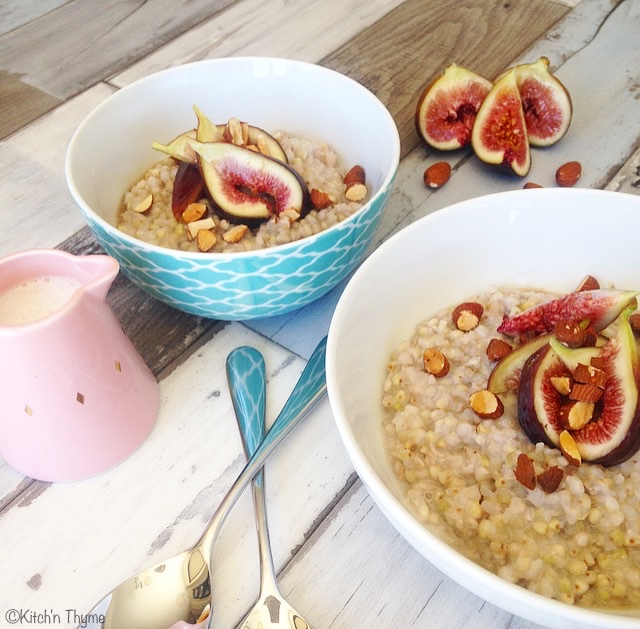
Buckwheat Porridge with Figs & Roast Almonds

Buckwheat Porridge How gorgeous is this beautiful simple, super quick & easy breakfast! Figs are one of my favourites! I love them! And it’s fig season now and just the time to be using them in your kitchen! I got a beautiful big punnet really cheaply at my local farmers market last weekend…..I just love farmers markets.

There’s just something so wonderful buying produce straight from the farmer! It looks fresher, tastes fresher, stays fresher for longer and is mostly spray free or organic and cheaper! I love that the tops come on the beetroots (we keep them and add them into juices or cook with them!), the beets feel hard and crispy not old and wilted and soft! The silverbeet isn’t wrapped in plastic, it’s vibrant and crisp and ready to chomp on! And the herbs – they are a real size bunch of herbs! Not in teeny tiny plastic packets or a measly few sprigs in a plastic sleeve, these herbs are the real deal, about 3 or 4 times the size!

I could go on and on!!! But I digress…..back to breakfast!!!….But just go and hunt down a local farmers market when you can! Ok!

Buckwheat is a pseudo grain that I grew up on! We would probably eat this breakfast 1-2 a week. Recently it’s come into vogue and is considered a very healthy food. Related to rhubarb, buckwheat is actually the seed of a flowering plant! In some circles it isn’t considered part of a Paleo diet, but it is most definitely Gluten Free and suitable for baking and for the likes of this yummy porridge.

Being high in protein, a rich source of iron, zinc, manganese, copper, magnesium, & fiber, it has many wonderful health properties.

Instead of just typical oats for breakfast, I love to mix it up with using different grains for my family. Growing up, we used to have Millet & Polenta in much the same way. And it is thoroughly delicious also! I’ll post those recipes in another post!

So below I will give you 2 different methods. Growing up my mum didn’t have a Thermomix so I’m showing you the traditional method in the oven. I will say too that I want my children to know how to do things in the traditional methods of an oven or stove, so that they can then appreciate the Thermomix for how fast it truly is! You can also do this buckwheat on the stove, just on a gentle simmer, but you have to make sure you don’t forget it, you’ll need to stir it quite frequently!

Buckwheat - uncoookedBuckwheat cooked     


You will see above the buckwheat ready to go into the oven and then freshly cooked, straight out of the oven and ready to eat! Yum!
Buckwheat Porridge w Fresh Figs & Roasted Almonds
Serves 4
A wonderful Gluten Free alternative to Oat Porridge
Write a review
Print
Prep Time
2 min
Cook Time
20 min
Total Time
22 min
Prep Time
2 min
Cook Time
20 min
Total Time
22 min
Ingredients
  1. 200g Raw Buckwheat Kernels
  2. 550-600g Water
  3. pinch Celtic Sea Salt
  4. 40g Maple Syrup, Honey or Coconut Flower Nectar
  5. 250g Coconut Cream, plus extra for serving
  6. 2 tsp Vanilla Essence
  7. 4-6 Fresh Figs, quartered or cut into eighths
  8. 20g Roasted Almonds, roughly chopped
Thermomix Method
  1. Place the buckwheat, water and salt into the mixing bowl of the Thermomix and cook 20 Mins/100°/Reverse/Speed 2.
  2. Add the maple, coconut cream and vanilla and cook a further 2 Mins/100°/Reverse/Speed 2.
  3. Serve with chopped fresh figs, roasted almonds and extra coconut cream.
Oven Method
  1. Preheat the oven to 180°.
  2. Lightly spray a 1.5L stoneware baking dish with olive oil. Place the buckwheat, water and sea salt in the dish.
  3. Bake for 45-60 minutes or until all the water is absorbed. If you cover with a lid or aluminium foil it will only take 30-40 minutes to cook. I don't have a lid for mine, so I just bake it without.
  4. Remove from the oven. Add the maple, coconut cream and vanilla and stir to combine.
  5. Serve with chopped fresh figs, roasted almonds and extra coconut cream.
Notes
  1. Please note, you can change the consistency of this porridge by adding more or less water, depending on the desired consistency. You can also pre-chop the grains slightly before cooking if you would like it more porridge consistency. I quite like the texture of the individual grains so I like to leave them whole.
  2. You can sub the fresh figs for fresh pairs or bananas, strawberries or any other in season fruit.
Kitch'n Thyme https://kitchnthyme.com.au/

Broccoli & Golden Beetroot Salad w. Green Goddess Dressing

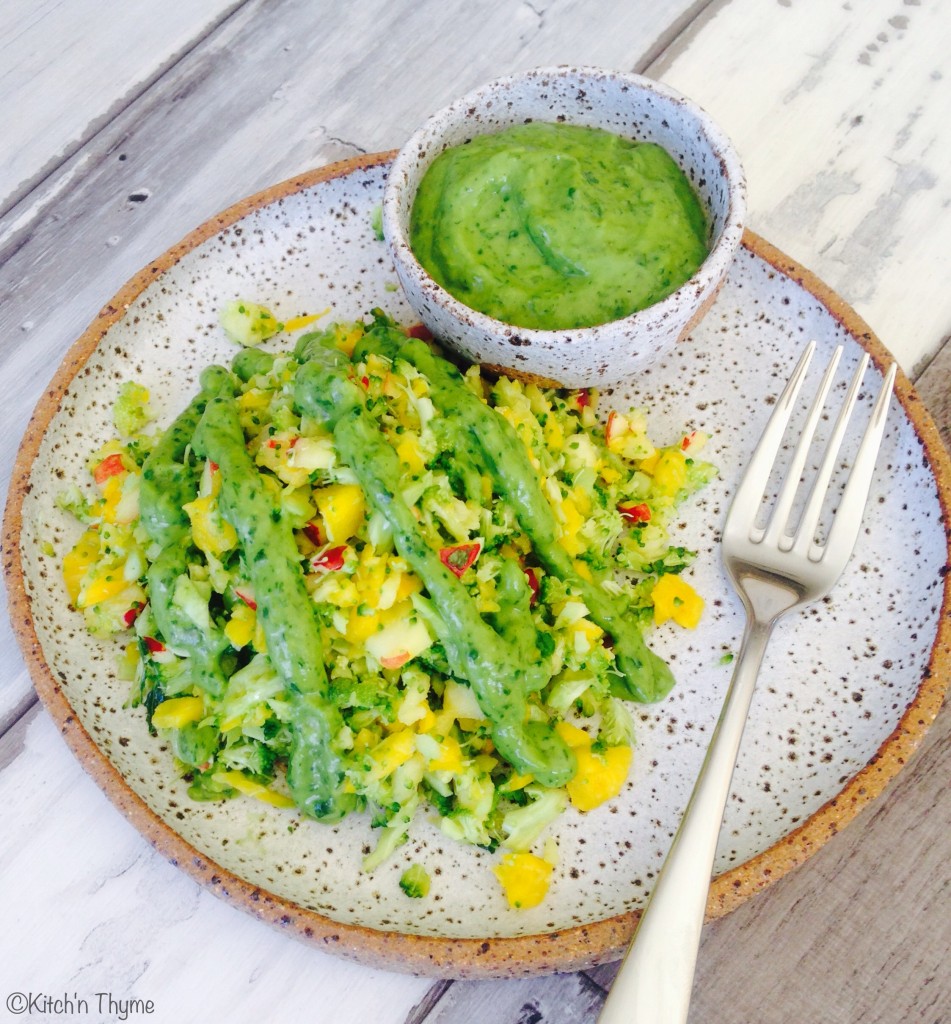
Golden Beetroot & Broccoli Salad At the recent Thermomix Spectacular on the Sunshine Coast, I teamed up with my beautiful friend from over at Desperate Healthwives. We had a gorgeous simple Raw/Paleo, Nut Butter/Nut Milk stand. Along with that gorgeous Raw Macadamia Salted Caramel that I know many of you wanted to lick the plate off, we did this gorgeous fresh salad! It’s a bit of a take on the classic Thermomix Beetroot Salad. We’ve jazzed it up with gorgeous Golden Beetroots that are in season at the moment mixed with fresh spray free broccoli and of course this to die for Green Goddess Dressing! The original credit for the dressing goes to Oh She Glows. If you google green goddess dressing you can read about the history of this awesome dressing too! I’ve converted it to a recipe for the Thermomix and we have added in some fresh Coriander along with the other herbs! I use honey for a touch of sweetener, obviously if you’re vegan you can substitute with some maple syrup. It is 100% lick the bowl material!! Drizzled over this salad it’s a perfect match made in heaven! I know it sort of looks a bit like green slop on a plate, but when you taste it, you completely forget that you are eating green sludge!….Saying that, just look how vibrant green it is! Really you can’t get more ‘real’ food than that! The avocado makes it oh so creamy & smooth, yet it’s still so light….and you almost want to drink it! Enjoy!

Golden Beetroot & Broccoli Salad w Green Goddess Dressing
Serves 4
This gorgeous salad is oh so refreshing and nourishing!
Write a review
Print
Prep Time
5 min
Total Time
10 min
Prep Time
5 min
Total Time
10 min
Salad
  1. 200g Broccoli, roughly chopped
  2. 1 Medium Golden (yellow) Beetroot, peeled & quartered
  3. 1 Red Apple, cored & quartered
  4. 1/4 Red Onion
  5. 2-3 sprigs fresh Coriander, leaves only
  6. 2 Tbsp Olive Oil
  7. 1 Tbsp Lemon Juice or Apple Cider Vinegar
  8. 1/2 tsp Celtic Sea Salt
Dressing
  1. 1 Garlic Clove, peeled
  2. 150g Avocado (Approx 2 Med), peeled
  3. 3 Spring Onions (green part only)
  4. 1/2 Bunch Coriander leaves
  5. 1/2 Bunch Basil leaves
  6. 1/2 Bunch Italian Parsley leaves
  7. 60ml Extra Virgin Olive Oil
  8. 2 Tbsp Lemon Juice
  9. 1 Tbsp Apple Cider Vinegar
  10. 80ml Water
  11. 1 tsp Honey (or Maple Syrup if vegan)
  12. 1 tsp Celtic Sea Salt
  13. pinch Cayenne Pepper
Salad
  1. Place all ingredients into mixing bowl and chop 3-5 Sec/Speed 4. Scrape down the sides of the bowl and chop a further 1-2 Sec/Speed 4, or until desired consistency is achieved. Be careful not to over process or it will turn into a dip - delightful as that may be!!
  2. Serve straight away with the dressing or cover and place in the fridge until serving.
Dressing
  1. Place the garlic into the mixing bowl and chop 3 Sec/Speed 7. Scrape down the sides of the bowl.
  2. Add the remaining ingredients and process 10-15 Sec/Speed 7. If some of the dressing is left unprocessed on the sides of the bowl just scrape down the sides and process a further 3 Sec/Speed 7.
  3. Drizzle over the salad and serve extra on the side! You will be licking the plate!!
  4. Store in an airtight container in the fridge. Will keep for about 5 days.
Notes
  1. You can add more water, vinegar, or lemon depending on how runny you would like it and your personal tastebuds.
Kitch'n Thyme https://kitchnthyme.com.au/

Chocolate Almond Milk

Choco Almond Milk
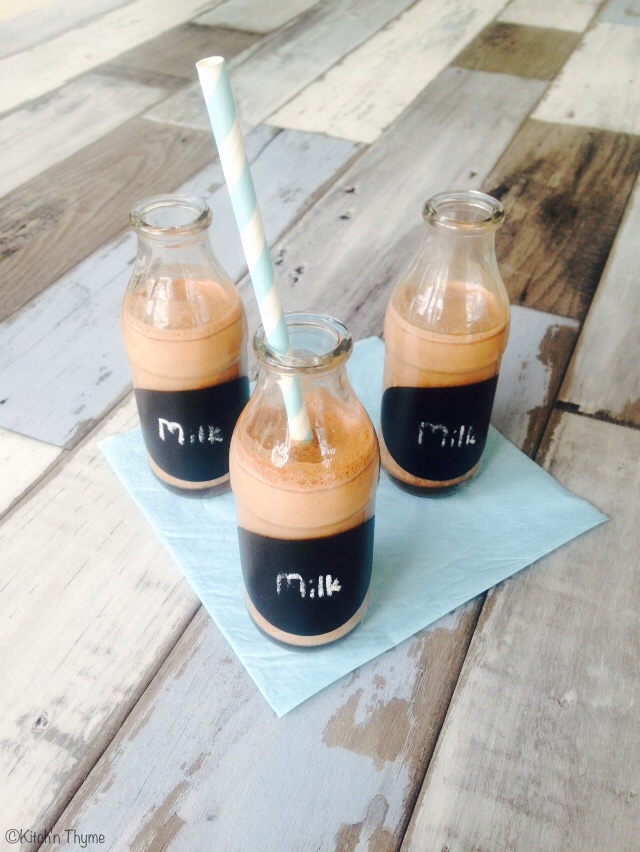
 I love this!!…We love this! My little family loves it! It’s so delicious and SO easy to make! So perfect for a birthday party where either your family or your guests are dairy free. Or even if not dairy free, why not mix things up and do something different to normal dairy milk. Nuts are full of good fats, protein and good carbohydrates and make up part of a balanced diet. Also, regular bought junky chocolate flavoured milks are full of all sorts of rubbish, including preservatives, additives, colours, flavours, and refined sugars! I just love that this milk is only sweetened with a little maple syrup and is completely free of all the junk! It’s real food!

If you are concerned about the caffeine content in the raw cacao powder, consider replacing it with carob powder! Yum!

I served something similar to these at my son’s 1st birthday party! I added coconut milk which made it that little bit thicker and creamier. You can do that if you like, but honestly this milk is just perfect as is!

20 - Choc Coconut Milks

I designed a Vintage Hot Air Balloons party for him and it was A-M-A-Z-I-N-G! You can see a little bit of the cake in the picture above that I made, yes its got that sugary icing and all, but cake decorating is one of my ‘other’ little things I like to dabble in for the creativeness!….And my son hadn’t had any gluten, dairy or sugar before he was 1, so his cake was the basket, it was a GF, DF, chocolate cake, sweetened with a little honey! He LOVED it!! But more on parites in another post!!!

Choco Almond Milk w Dino Cookies

I made some of this milk last week along with these dinosaur cookies! Aren’t they just gorgeous! They are a Spelt Choc Chip, Cranberry & Macadamia cookie (my husbands favourite!) – I’ll get to the recipe soon! My little boy who is now 2 1/2 thought it was Christmas!

You can make my pure Almond Milk here.

Chocolate Almond Milk
Yields 1
Dairy-free Almond Milk turned into guilt-free Chocolate Milk! Perfect in smoothies, with cookies or for parties!
Write a review
Print
Ingredients
  1. 170g (1 Cup) Raw Almonds
  2. 1 Tbsp Coconut Oil
  3. 1 1/2 tsp Vanilla Essence
  4. ½ tsp Celtic Sea Salt
  5. 1 L Filtered Water
  6. 3 Tbsp Maple Syrup
  7. 2 Tbsp Raw Cacao Powder
Instructions
  1. Place the almonds into a bowl, cover with filtered water and leave to soak overnight (or for at least 12 hours).
  2. Drain the almonds and place into the bowl of the Thermomix and mill 7-10 Sec/Speed 9.
  3. Add the oil, vanilla, salt and water & blend 1 minute/Speed 9.
  4. Strain the milk through a nut milk bag or muslin cloth. Keep the almond pulp for throwing into cookies, cakes, biscuits etc. (You can freeze it to save for use another day too!)
  5. Pour the almond milk back into the mixing bowl and add the maple syrup and cacao. Blend 5 Sec/Speed 7.
  6. Refrigerate until chilled, then shake well before serving.
Notes
  1. Pure Almond Milk recipe here: Almond Milk
  2. Will keep in the fridge for approx. 3 days.
Kitch'n Thyme https://kitchnthyme.com.au/

Raw Salted Macadamia Caramel

Raw Salted Maca Cara 4I was driving home recently dreaming of this delicious date caramel I’d had at my friends house a couple of years ago! I didn’t have her recipe, so I came home and decided to have a play around. I wanted something with macadamias as they just lend themselves so perfectly to something so creamy and dreamy!

I also had the idea initially of making more of a sweet dip, but then my thoughts drifted to Maca powder and it’s wonderful caramel tones.  Maca powder is a great source of vitamins, energy boosting properties, has benefits for the skin, helps to increase energy, and helps with womens & mens health & reproductive health. I love chucking it into foods when I can!

So here is the result! Icky, sticky, goopy, mouth- watering, finger -licking goodness! I can guarantee you won’t be able to resist going in for a second spoonful! I gave the recipe to my best friend Jessie of Desperate Healthwives who made it straight away and thought she’d died and gone to heaven! Ha! And I must admit she took the above photo! It’s just so beautiful I had to use it!

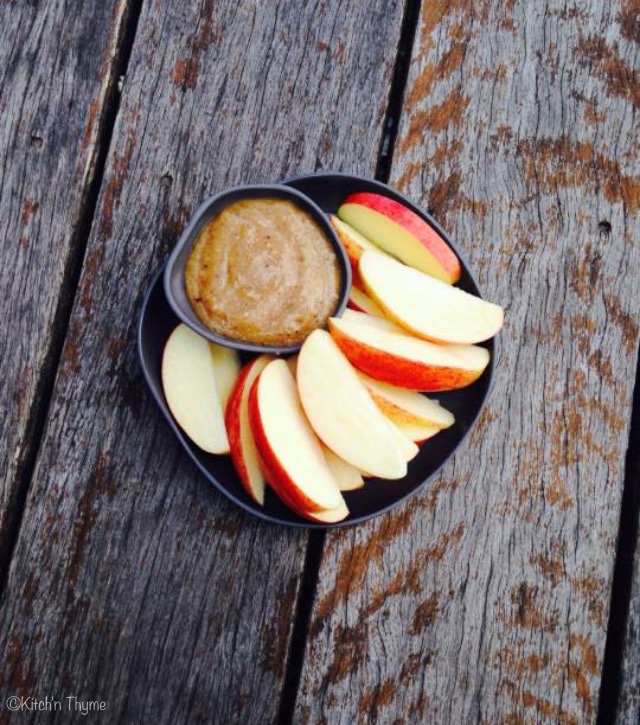
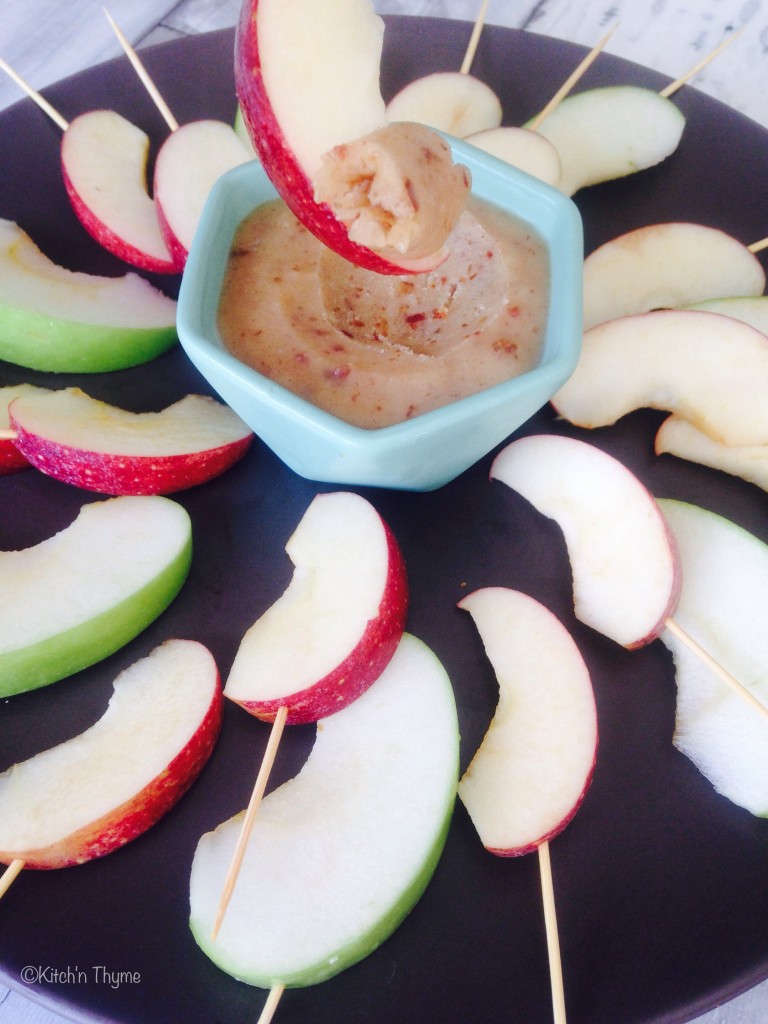
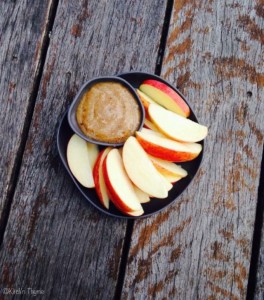
Apples are of course the classic combo with caramel however you can use whatever fruit you desire! Apples, pears, bananas, strawberries etc all work beautifully!  You’ve all seen those caramel apples in the supermarket – sugar upon sugar! This is a little different, but we works so well and is such a wonderful alternative with only a little maple syrup to sweeten. You could reduce the maple or use honey or rice malt syrup. I tend not to be a big promoter of rice malt syrup as its so highly processed. I’ll talk more on sugars in another blog post.

Raw Salted Maca Cara 2
It’s absolutely perfect just freshly made and dipped into! However, look at what happens after you’ve left it in the fridge for a little while! Gorgeous and firmer in texture it becomes more like a spread! There is something about this that I just love! It’s smooth and rich and you can use your chosen fruit as the perfect little implement to scrape up the perfect amount! So try both ways and see which you love you the most!


Raw Salted Macadamia Caramel
Oooey gooey raw nut caramel for dipping freshly cut fruit into!
Write a review
Print
Total Time
2 min
Total Time
2 min
Ingredients
  1. 150g Raw Macadamias
  2. 2 - 3 Medjool Dates
  3. 60g (4 Tbsp) Coconut Oil
  4. 40g (2 Tbsp) Maple Syrup
  5. 1 tsp Vanilla Essence
  6. 1 tsp Maca Powder
  7. 1/8 tsp Celtic Sea Salt
Instructions
  1. Place the macadamias into the bowl of the Thermomix and mill 6 Sec/Speed 9.
  2. Scrape down the sides of the bowl and process for 10 Sec/Speed 4.
  3. Scrape down the sides again and process a further 30-40 Sec/Speed 6 or until a nice nut butter consistency forms.
  4. Add all the remaining ingredients and process 40 Sec/Speed 6-7.
  5. Serve with freshly chopped fruit such as apples, pears, strawberries, bananas etc.
  6. For a firmer texture, you can place it into the fridge for approx. 30 mins or until set firm.
Notes
  1. You can easily turn this into a Chocolate Version too by adding 2 Tbsp of Raw Cacao Powder in with all the other ingredients. Yum!
Kitch'n Thyme https://kitchnthyme.com.au/

Orange Cinnamon & Coconut ‘Hot Cross Bun’ Chocolates

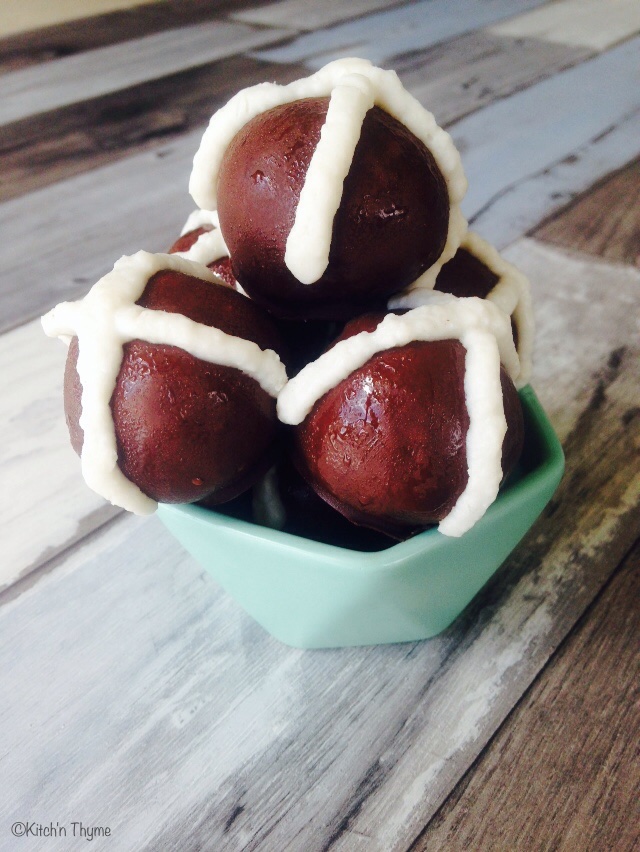
Hot Cross Bun Chocolates

I just had to do something really chocolatey for Easter!! I can’t help myself creating! I wonder if there is some name for that problem! haha

These are really simple to make! You will need my Coconut Butter for these!

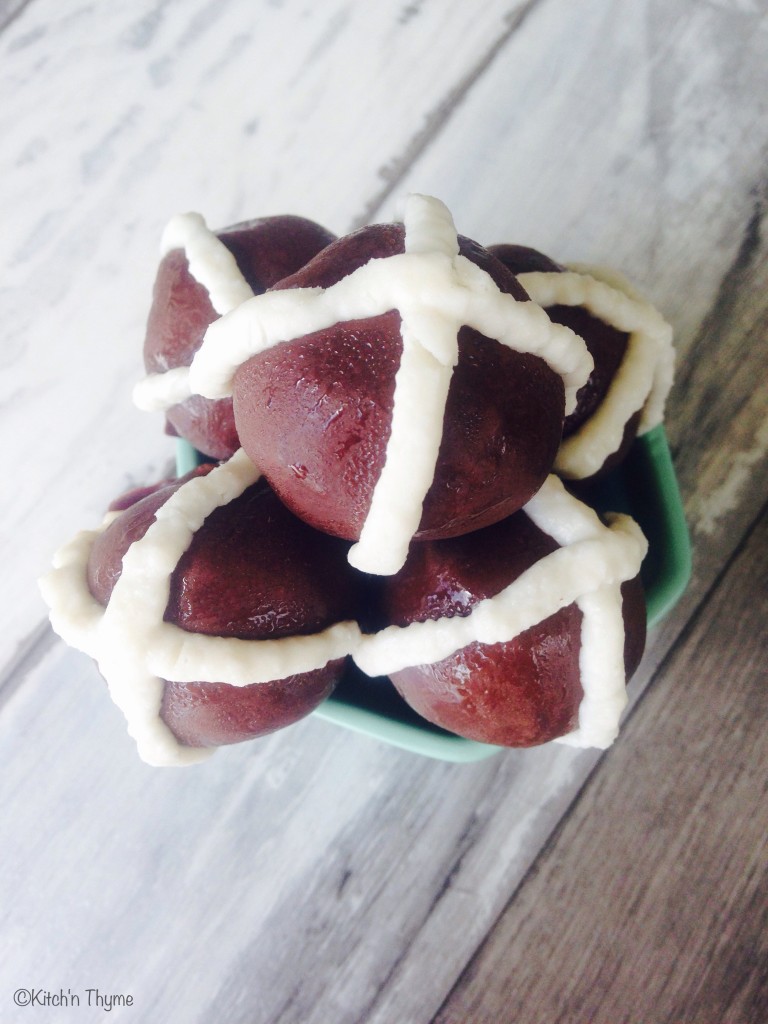
Hot Cross Bun Chocolates 2

And it’s a bit kitch with the crosses but how cute! Dont’ they just look adorable!

All grain free, dairy free and refined sugar free! Enjoy!

Orange Cinnamon & Coconut 'Hot Cross Bun' Chocolates
Yields 14
These are a cheeky little chocolate take off of a Hot Cross Bun! With lovely Cinnamon & Orange Easter flavours that are sure to delight! You'll need my Coconut Butter to make these!
Write a review
Print
Chocolates
  1. 200g Coconut Butter
  2. 3 Tbsp Coconut Cream
  3. 2 tsp Maple Syrup
  4. 20g Orange Juice
  5. 1 tsp Orange Zest
  6. 1/4 tsp Cinnamon
  7. 100g Organic Dark Chocolate (70%)
Crosses
  1. 50g Coconut Butter
  2. 2 tsp Maple Syrup
  3. 3 Tbsp Coconut Cream
Instructions
  1. To make the chocolates place all the ingredients except for the chocolate into the mixing bowl and mix 10 Sec/Speed 4.
  2. Place into the fridge for 30 mins -1 hour to chill. Once chilled sufficiently, roll the mix into 14 even small bit sized balls.
  3. Break the chocolate into small pieces and mill 10 Sec/Speed 9. Then melt the chocolate 2 Mins/50°/Speed 2, scraping down the sides of the bowl closer to the finish time.
  4. Pour into a shallow bowl and dip the chocolates one at a time into the chocolate to thoroughly coat, before placing onto a baking paper lined rack or tray to set. You can place them in the fridge to set a bit quicker.
  5. Once the chocolates are set, place the coconut butter, maple and coconut cream into the Thermomix and mix 10 Sec/Speed 3-4.
  6. Place into a piping bag fitted with a plain nozzle and pipe little crosses on the chocolates. Place back into the fridge to completely set, then transfer into an airtight container.
Notes
  1. I couldn't find all my piping bags when I made these, so I popped the icing into a little glad bag and cut a little hole off one corner and used that to pipe the crosses! Little more rustic but still works a treat!
  2. Don't forget you'll need my Coconut Butter to make these!
Kitch'n Thyme https://kitchnthyme.com.au/

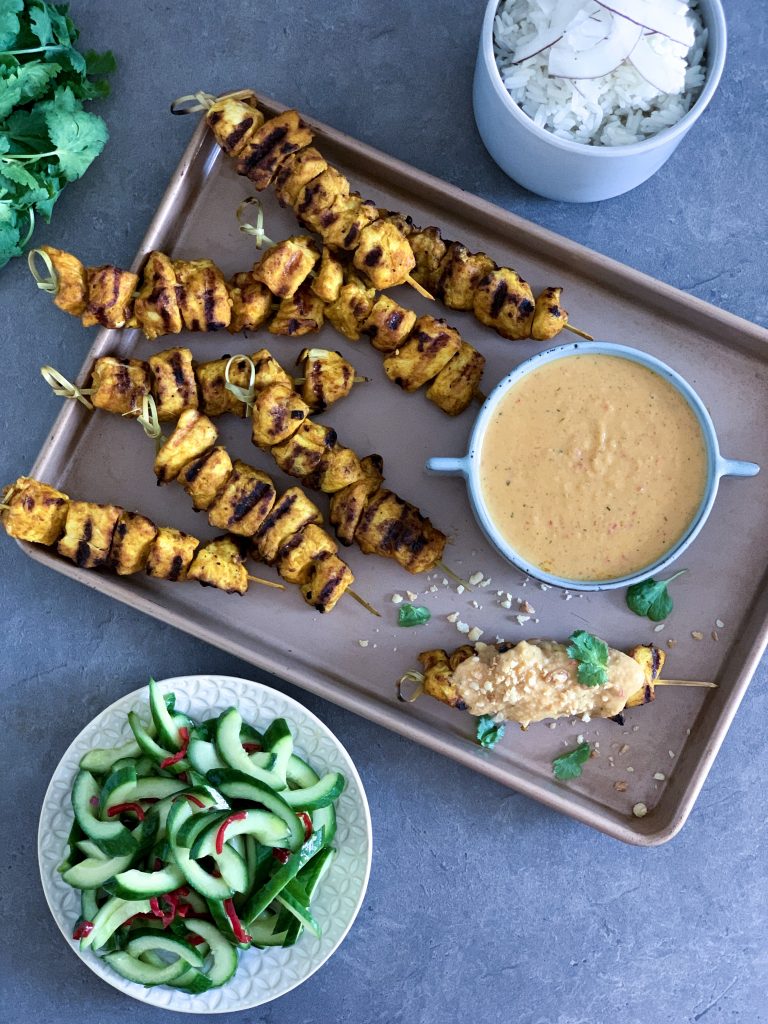
Chicken Satay Sticks w Macadamia Satay Sauce, Cucumber & Chilli Pickle & Coconut Rice

**January 2019 update!** This recipe was originally posted in March 2015. I really felt that the photos needed updating, so i’ve rephotographed the recipe. All the ingredients remain the same, however I have finally added my method for my cucumber pickle that I’ve always made along side satay sticks and my method for the BEST Coconut Rice! The story below is as it was from 4 years ago!**
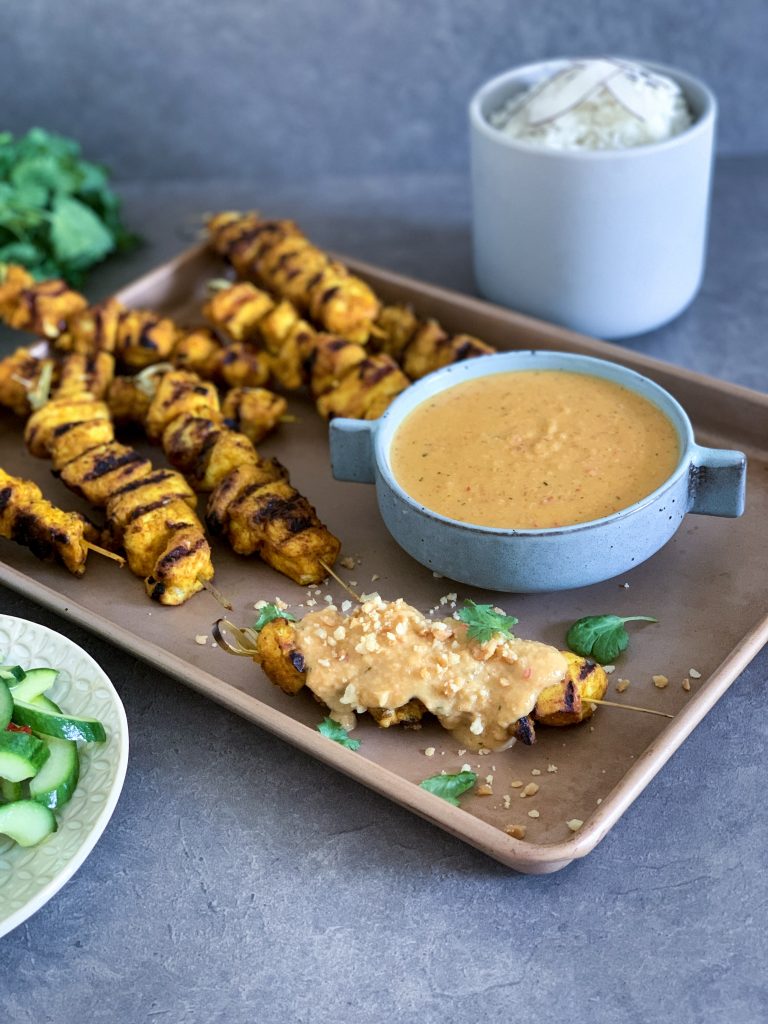
As I mentioned in my Tom Kha Gai (Thai Chicken Coconut Soup) post, Thai food is a real favourite! I just love the complexity of the flavours yet the perfect balance of flavours. Saying that, this satay sauce has more of a Malaysian influence! 😂

When I travelled all around Thailand a few years ago (almost 10 yrs ago now!!!) with my husband I think I must have had Chicken Satay at almost every restaurant! I really love it! I found it quite different however to the Western versions that we are used to here in Australia. Everything is sweetened up a little more over here!

This satay sauce version of mine I developed when I worked fulltime at the health retreat. As we don’t use peanuts at the retreat, I made it with macadamias as a replacement for the peanuts! And it’s amazing!!!

Peanuts a tendency to soak up aflatoxins from fungus in the soil. This is rather questionable. Being from the legume family and not really a nut, they have quite a porous shell, making them more susceptible to soaking up pesticides and bacteria as well, just one reason why organic is ultra important. Of course, we also know of the scrutiny they receive for being so allergenic too! We don’t have any allergies in our family, however they are not something we eat very much of – more on the occasional side! If we do have them, they must be organic peanuts! And saying that I’ve recently developed the best Satay Sauce using peanuts more specifically for Vietnamese Rice Paper Rolls!

This satay sauce sauce as I said above, has some of what I would call Malaysian flavours, but I still use coconut milk, more like the Thai version rather than soy sauce.

The marinade for the chicken is super easy and just flavours that meat up a little more than just leaving it plain.

I use chicken thighs as I find them more flavoursome, however you can use chicken breast or tenderloins, but just remember to reduce the cooking time to about 2-3 minutes each side.

You can serve this dish traditionally with Cauliflower Rice for a lower carb version, or just as they are with the sauce with and the cucumber pickle!

Print

Chicken Satay Sticks w Macadamia Satay Sauce, Cucumber & Chilli Pickle & Coconut Rice

Delicious peanut free satay sauce!

  • Author: Gabrielle

Ingredients

Chicken Skewers

  • 4 Organic Chicken Thighs or 2 Chicken Breasts
  • 1 tsp Coriander
  • 1 tsp Turmeric
  • 1 tsp Sweet Paprika
  • 2 Cloves Garlic
  • 4 Eschalots
  • 1 tsp Celtic Sea Salt
  • 2 tsp Olive Oil
  • 8 medium bamboo skewers (preferably soaked in water for 20 mins)

Satay Sauce

  • 300g Macadamias
  • 2 Medium Red Onions
  • 4 Cloves Garlic
  • 2 Long Red Chillies, seeds removed
  • 2 Stalks Lemongrass
  • 100g Olive Oil
  • 2 tsp Tamarind Pulp
  • 1 Tbsp Lime Juice
  • 1 tsp Lime Zest
  • 1 Tbsp Coconut Palm Sugar
  • 2 1/2 tsp Celtic Sea Salt
  • 150-200g Coconut Milk

Coconut Rice

  • 250g Coconut Milk 
  • 220g Water 
  • 220g Jasmine Rice
  • 1/2 tsp Celtic Sea Salt 
  • 1 tsp Honey or Raw Sugar

Cucumber Pickle 

  • 2 Lebanese Cucumbers, deseeded and sliced on the diagonal
  • 1 Red Cayenne Chilli, deseeded and sliced
  • 1 Tbsp Rice Wine Vinegar
  • 1 tsp Honey
  • 1/2 tsp Celtic Sea Salt
  • 1 tsp Olive Oil 

Instructions

Chicken Skewers

  1. Chop the chicken into 3-4cm cubes and place into a large mixing bowl. Place the eschalots, garlic, spices, salt and olive oil into the Thermomix and chop 5-10 Sec/Speed 7. Add to the bowl with the chicken and stir to combine well. Let marinate for 4-6 hours or overnight.
  2. Thread 5-6 pieces onto medium sized skewers. Preheat a chargrill or barbeque grill on high. Cook the chicken for approximately 4 minutes each side or until the meat is cooked through evenly.

Sauce

  1. Preheat the oven to 180°C. Line a baking tray with baking paper and roast the macadamias for 10 minutes or until golden brown. Remove from the oven to cool slightly.
  2. Place 50g of the macadamias into the Thermomix and chop 15-20 sec/Speed 4. Set aside.
  3. Place the remainder of the nuts into the Thermomix and mill 10 Sec/Speed 9. Scrape down the sides of the bowl then process 40 Sec/Speed 4-5 until nut butter forms. Set aside.
  4. Place the onion, garlic, chilli, lemongrass and olive oil into the Thermomix and chop 10 Sec/Speed 7. Then sauté 10 Mins/100°/Speed 1.
  5. Add the all the remaining ingredients along with the reserved nut butter and cook 5 Mins/80°/Sp 1.
  6. Once cooked pour into a serving bowls and sprinkle with the reserved chopped macadamias.
  7. Serve with coconut rice or Cauliflower Rice.

Notes

  • Serve with my Cauliflower Rice for a low carb version!
  • You can double my Coconut Rice to serve more people.

Nutrition

  • Serving Size: 4

Hazelnut & Cacao Nib Bliss Balls

imageThis beautiful bliss ball recipe came about recently when I was going to make my Paleo Chocolate Mango Tart. I had planned to make a batch of bliss balls that day also. The filling for the tart was sitting in the Thermomix and upon a second glance I all of a sudden had a ‘uh huh’ moment! This would make the perfect start to some delightful bliss balls! Yummo! So the whole tart went immediately out the window! Well thankfully, not really! I added a few more things to the mix and by golly it was delicious!

I add a few medjool dates and almond meal, along with the cacao nibs which add a gorgeous crunch to each bite, and a lovely bitterness!image

For the bliss balls I’ve reduced the maple syrup a little to 80g instead of 120g in the tart filling, as I like them to be more of an energy pick me up rather than an actual treat! I’m not a big sweet tooth, so I don’t mind it a little richer. It’s up to you.

You can also add in a protein powder to give them an extra protein kick for a post workout snack or for busy mums and breastfeeding mums! They are a little more fudgey with the protein powder. Try both and see which you prefer.

I then roll them in roasted hazelnuts! I love hazelnuts with chocolate or carob. (You can definitely use carob powder for these too!) They are just so good with the extra crunch on the outside! You could leave them with no coating or use coconut perhaps.

Hazelnut & Cacao Nib Bliss Balls
Yields 50
Crunchy, nutty, creamy bliss balls! Almost a little Ferrero rocher like!
Write a review
Print
Ingredients
  1. 140g Roasted Hazelnuts
  2. 80g Coconut Oil
  3. 80g Coconut Milk
  4. 80g Maple Syrup
  5. 50g Raw Cacao Powder
  6. 1 tsp Vanilla Essence
  7. pinch salt
  8. 200g Almond Meal
  9. 4 Medjool Dates
  10. 40g Cacao Nibs
  11. 100g Protein Powder (optional)
Instructions
  1. To make the filling, place 60g of the hazelnuts into the Thermomix and mill 10 Sec/Speed 9.
  2. Add the oil, milk, maple, cacao powder, vanilla, salt and dates and cook 2 Mins/50°/Speed 3.
  3. Add the almond meal & cacao nibs (& protein powder if using) and process 10 Sec/Speed 4-5/Reverse.
  4. Refrigerate for 30 minutes to chill. Once chilled the mixture will be much easier to roll.
  5. Place the remaining 80g hazelnuts into the Thermomix and chop 15-20 Sec/Speed 4.
  6. Place into a shallow bowl for rolling. Take small spoonfuls of the chilled mixture and roll into balls. Finish by rolling in the hazelnut crumbs and refrigerate until firm.
Notes
  1. My original version didn't have protein powder in them, however you can add it if you want to boost the protein content. They are a little more fudgey in texture with the protein!
Kitch'n Thyme https://kitchnthyme.com.au/

Hazelnut & Macadamia Dukkah

Dukkah Dukkah is such a wonderful spice mix! Originating in the middle east, there are many different varieties, in terms of nuts used and spices used, but the basic ingredients will usually always have coriander, cumin, and pepper. Some then add fennel and other spices.

Perfect over grilled meats (fish, chicken, lamb), eggs, sprinkled over salads or open sandwiches, even over the top of a pumpkin soup! There are many uses!

I love spices and flavoursome accompaniments to a dish and this is one of them! You can play with whatever nut combo you like. This is my version, and I love it!

Please be aware that this recipe was made in the TM31 so you may need to reduce the time of this step. Watch this stage closely, being careful to not over process the nuts. You want them still to be somewhat chunky in texture.

Dukkah 2

Hazelnut & Macadamia Dukkah
Delicious on fish, chicken, poached eggs, sourdough toast etc!
Write a review
Print
Total Time
5 min
Total Time
5 min
Ingredients
  1. 2 Tbsp Coriander Seeds
  2. 2 Tbsp Cumin Seeds
  3. 1/4 tsp Black Peppercorns
  4. 80g Roasted Hazelnuts
  5. 80g Roasted Macadamias
  6. 40g Toasted Sesame Seeds
  7. 1/2 tsp Celtic Sea Salt
  8. 1/4 tsp White Pepper Powder
Instructions
  1. Add the coriander, cumin and peppercorns to the bowl of the Thermomix and dry roast 3 Mins/120°/Speed 1.
  2. Mill 20 Sec/Speed 9.
  3. Add the hazelnuts & macadamias and grind 15 Sec/Speed 4. (Please be aware that this recipe was made in the TM31 so you may need to reduce the time of this step. Watch this stage closely, being careful to not over process the nuts. You want them still to be somewhat chunky in texture.)
  4. Add the remaining ingredients and mix 6 Sec/Speed 3/Reverse.
Notes
  1. Please be aware that this recipe was made in the TM31 so you may need to reduce the time of this step. Watch this stage closely, being careful to not over process the nuts. You want them still to be somewhat chunky in texture.
Kitch'n Thyme https://kitchnthyme.com.au/

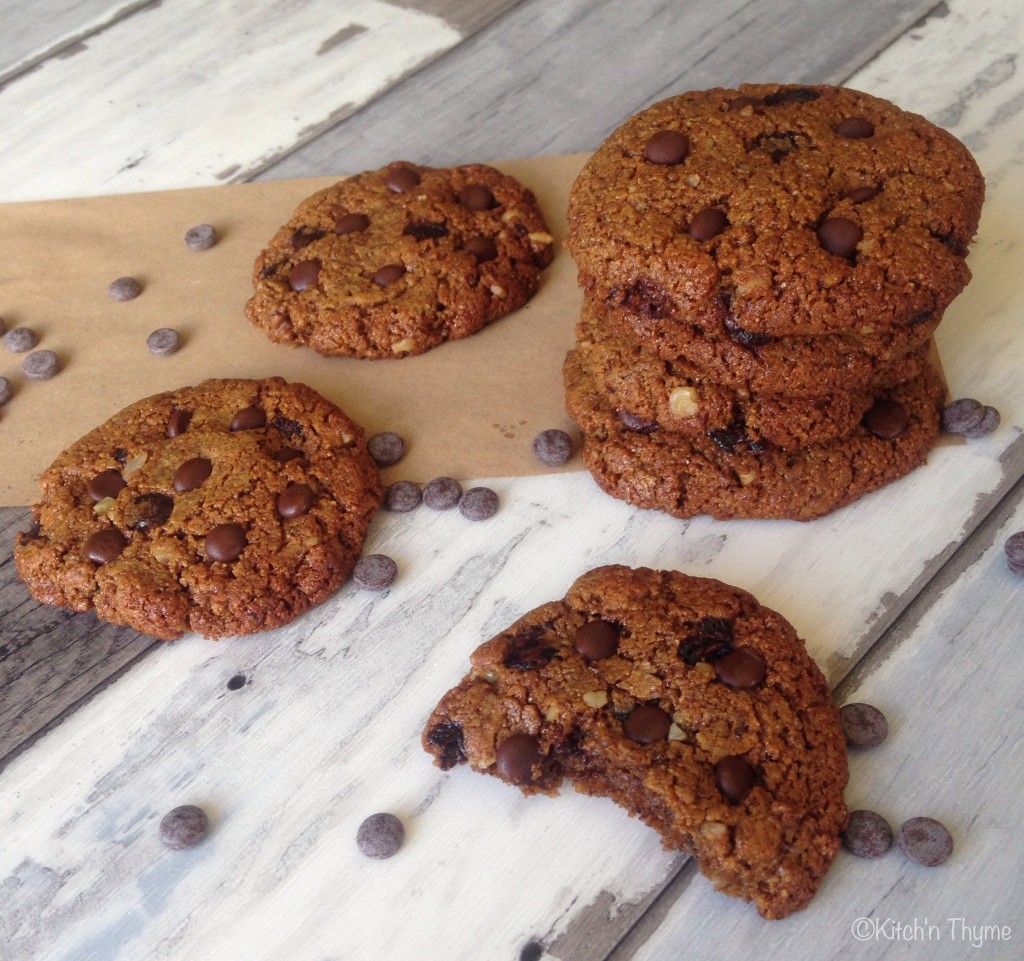
Paleo Pumpkin & Walnut Chocolate Chip Cookies

photoI’m soooooo excited!!! After countless experiments I finally present to you my humble Paleo Pumpkin & Walnut Chocolate Chip Cookies!

I have tried so many different things! A multitude of flours, sweeteners & fats! At one stage I had what my nieces and nephews termed a “Moofie”! A cross between a cookie and a muffin! I almost ran with that as they were delicious, but not 100% what I was looking for! I was looking for a crispy, golden, crunchy PALEO cookie! What I will say is that they will go softer once they are stored, but they are still deliciously beautiful! Just eat them fresh on the day of baking if you want that beautiful crispy texture!

I tried many different prototypes with almond meal but it wasn’t until I had an epic light bulb moment and decided to try them with almond butter. It came about because I was thinking of adding walnut butter to the mix for flavour! I suddenly realised nut butter might be the secret! Roasted almond butter. And oh, you can’t imagine the joy when I pulled out perfectly ‘normal’ looking cookies out of the oven! They were golden, and looked crispy! I just about dove in right there to try them! Once they had cooled sufficiently so I wouldn’t get burnt,  I snatched one right then and there!….Wow! Something magical had happened! The almond butter had done it! I was so elated! After all my attempts with many complex ratios and multiple ingredients, I ended up with a delightful cookie from the simplest of ingredients! There is really not much to these cookies at all! I am ridiculously excited to share this beautiful recipe with you! I’ve added no extra oils to the cookies. It rely’s completely on that from the almond butter. Because the almonds are roasted, this also helps to release even more of those beautiful oils from the nuts, which is why no other oil is needed.

To make you own almond butter, just place about 450-500g roasted almonds in the Thermomix and mill 10 Sec/Speed 9. Scrape down the sides and process for about 1 minute/Speed 8 or until a beautiful butter consistency is achieved!

As I love to do, I wanted vegetables in them, in particular pumpkin, firstly because I think its a perfect match (chocolate & pumpkin), and to increase the nutritional benefit! I mean, if I’m going to give these to my family, I will still always want a treat to be of some benefit! Hiding a vegetable in a cookie so that no one will ever know is perfect! My little boy just loves them! I still talk about the fact that even good treats we need to balance with lots of vegetables and proteins etc, and I try to teach him the difference between a bought cookie and one that mummy makes! Mummy’s have a healthier sweetener, and a small amount at that, and nuts that will make him strong etc!

I’ve used about 100g pumpkin puree in this recipe. You can actually increase the pumpkin to 200g with no problems. They are just a little more crunchy with 100g, whereas with 200g they are a little more moist in the middle! Completely up to you! If you have a whole lot of pumpkin to use, go the whole 200g! I just steamed the pumpkin in the Thermomix for about 15 minutes/Varoma/Speed 2, then pureed for about 5 Sec/Speed. I steamed about 300g. Depending on the pumpkin it will probably reduce by 1/3.

The walnuts just make them! After all, pumpkin and walnuts is such a beautiful marriage. But you could use whatever nut you fancy!

I hope you enjoy these cookies as much as we are!

photo0

Paleo Pumpkin & Walnut Chocolate Chip Cookies
Yields 28
A deliciously moist, subtly spicy pumpkin cookie!
Write a review
Print
Prep Time
10 min
Cook Time
15 min
Prep Time
10 min
Cook Time
15 min
Ingredients
  1. 120g Coconut Palm Sugar
  2. 450g Roasted Almond Butter
  3. 2 Organic Eggs
  4. 1/4 tsp Cinnamon
  5. 1/8 tsp Allspice
  6. 1 tsp Bicarb Soda
  7. 100g Pumpkin Puree
  8. 50g Chocolate Chips (naturally sweetened, dairy free)
  9. 50g Walnuts (roughly chopped)
Instructions
  1. Preheat the oven to 180°C. Line large baking trays with baking paper or lay your oven Thermomat on a tray.
  2. Place the sugar into the Thermomix and mill 10 Sec/Speed 9.
  3. Add the almond butter, the eggs, spices, bicarb, & pumpkin and mix 10 Sec/Speed 5.
  4. Add the chocolate chips and walnuts and mix a further 10 Sec/Speed 5.
  5. Once combined, place Tbsp sized amounts onto your baking sheet. Flatten out a little with your fingers to form a more flattened disc.
  6. Place into the hot oven and bake for 10-15 minutes or until the edges turn golden brown.
  7. Remove from the oven and whilst warm top with a few extra chocolate chips if you desire.
  8. Let cool on the trays for 5-10 minutes, before transferring to a cooling rack to cool completely.
  9. Store in an airtight container.
Kitch'n Thyme https://kitchnthyme.com.au/

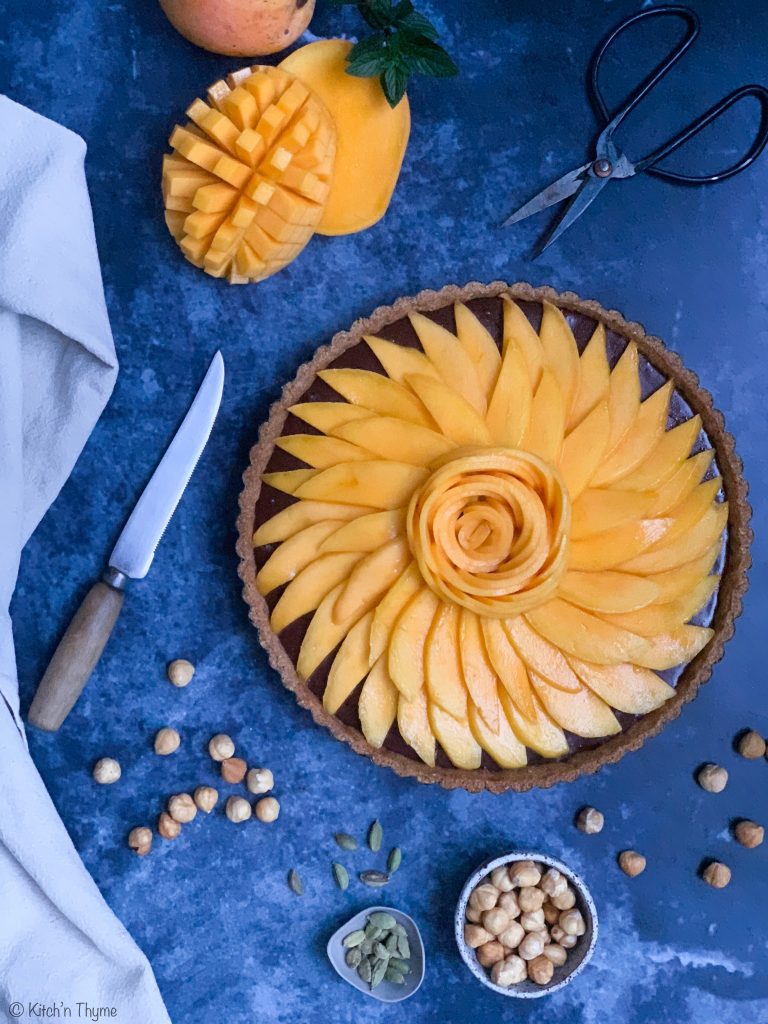
Paleo Chocolate Mango Tart with Cardamon Crust

Make the most of summer mangoes with this guilt free creamy decadent chocolate fruit tart! 

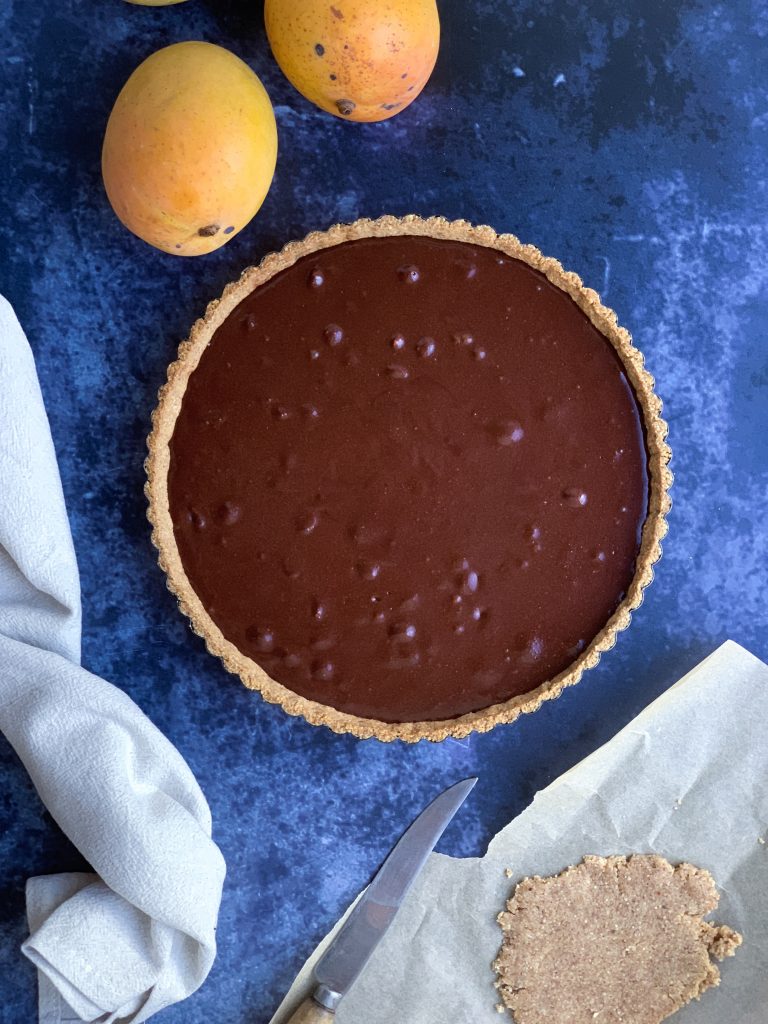
**January 2019 update!** This recipe was originally posted in February 2015. I really felt that the photos needed updating, so i’ve rephotographed the recipe. All the ingredients remain the same, but I’ve slightly increased the filling ingredients. The story below is as it was from 4 years ago!**

This delightful chocolate tart came about a few weeks ago when I realised I was about to walk out the door empty handed to a meeting where all involved were meant to be bringing a bite to eat!

I had an abundance of ripe mangoes in my fruit bowl fresh from the property of the health retreat we work on!…..Bowen mangoes and all! Massive, juicy, sweet, full of flavour!  My husband knows how much I love mangoes, so he picked me a couple of huge bags of them! I was stoked!  

I had to make something delicious to honour these beautiful possessions! I immediately dreamed up this gorgeous tart and got busily to work in my kitchen! After an amazingly successful quick stint in the kitchen, this emerged! I did a little happy dance!

The subtly aromatic cardamon crust pairs so beautifully with the mango!

The chocolate filling is very rich, but the mango just lightens it up beautifully! I absolutely love fruit focussed desserts so this is definitely my kind of indulgence! The natural beauty of fruit is Superb!

This tart is so everything free that perhaps I’m even happy for my kiddies to have a little slice for breakfast! 🙈🙊

Play around with the fruit…it’s delicious with raspberries!…here’s the recipe for those! Paleo Chocolate Raspberry Tarts. And it would be equally delightful with any other berries!

Enjoy! Gabrielle 👩‍🍳

Print

Paleo Chocolate Mango Tart

Make the most of summer mangoes with this guilt free creamy decadent chocolate fruit tart! 

  • Author: Gabrielle Tobin
  • Prep Time: 00:10
  • Cook Time: 00:22
  • Total Time: 32 minutes
  • Yield: 8
  • Category: Dessert

Ingredients

BASE:

240g Almonds

160g Brazil Nuts

1 Egg

2 Tbsp Coconut Oil

1 Tbsp Maple Syrup

3/4 – 1 tsp Ground Cardamon 

1 tsp Vanilla Bean Paste or Essence

pinch salt

FILLING:

160g Hazelnuts, roasted

120g Coconut Oil

120g Coconut Milk

180g Maple Syrup (approx. 5 Tbsp)

75g Raw Cacao Powder

1 tsp Vanilla Bean Paste or Essence

pinch salt

TOPPING:

3-4 Large Mangoes, sliced thinly

Instructions

CRUST

  1. Preheat the oven to 180°C. Lightly spray a 26cm round tart shell with oil spray.
  2. Place the almonds and the brazils into the Thermomix and mill 10 Sec/Speed 9.
  3. Add the remaining ingredients and process 5-10 Sec/Speed 5 or until the mixture comes together.
  4. Turn the mixture out onto a sheet of baking paper and roughly bring together to form a ball. Place another sheet of baking paper on top and flatten. Using a rolling pin, roll the mixture out to approximately 3mm thickness. Roll in different directions, to ensure even thickness.
  5. Gently peel off the top sheet of baking paper. Lift up the crust, by the bottom sheet of baking paper and gently flip the crust side over a rolling pin. Place it over the tart shell evenly and gradually roll the rolling pin away, easing the crust into the shell.
  6. Peel off the baking paper and if you have any broken spots you can easily patch it with your hands, and a little left over crust if necessary. If you find this difficult to do without breaking the crust, you can press the mixture into your tart case.
  7. Trim the edges neatly, then place a round of baking paper over the base followed by baking beads or chickpeas. Blind bake for 10 minutes. Remove the baking weights and bake for a further 10 mins. Remove from the oven and cool completely.

FILLING

  1. To make the filling, place 120g of the hazelnuts into the Thermomix and mill 10 Sec/Speed 9.
  2. Add all the remaining ingredients and cook 2 Mins/50°/Speed 3.
  3. Using a knife, chop the remaining 40g hazelnuts in halves. (You can do this in the Thermomix, however I prefer to have this quite precise, as it’s really nice biting into the whole chunks of hazelnuts.) Add to the Thermomix and mix 5 Sec/Speed 2/Reverse.
  4. Pour the filling into the cooled tart shell and set in the fridge for 1 hr or so until firm.
  5. Top decoratively with the sliced mango and serve straight away.

Notes

  • You can make the tart shell and fill with the filling a day ahead but top with the mango just before serving so it is nice and fresh!
  • Refrigeration Time: 1 Hour