Sweet Potato Rostis, Baby Chard, Poached Eggs, Coriander Pesto & Toasted Pepitas

fullsizerender-3Beautiful lazy weekend mornings call for soft poached eggs drizzling their goodness over warm rostis! Then topped with pesto and crunchy things what more could one need! 

I’ve been wanting to share my coriander pesto with you all for such a long time and it’s finally here! 

Coriander is such a wonderful herb! It’s one of my favourites! 

Coriander can help chelate heavy metals helping to detox them out of the body, so this one is definitely worth eating!

You could use it on pizza, as a spread on crusty sourdough, in a galette, the options are bountiful!

My kids really love dipping vege sticks into it so that is a massive win for me! I hope you enjoy it as much as we do! 

Sweet Potato Rostis, Baby Chard, Poached Eggs, Coriander Pesto & Toasted Pepitas
Serves 6
Delicious poached eggs atop potato rostis with simple coriander pesto
Write a review
Print
Prep Time
20 min
Prep Time
20 min
Coriander Pesto
  1. 100g Coriander Leaves (approx 2-3 large bunches)
  2. 2 Cloves Garlic, peeled
  3. 150g Roasted Macadamias (To Roast: 10-15 Mins 180ºC)
  4. 1/2 tsp Celtic Sea Salt
  5. 2 tsp Lemon Juice
  6. 2 tsp Savoury Yeast Flakes
  7. 100g Olive Oil
Sweet Potato Fritters
  1. 600g Sweet Potato, peeled & grated
  2. 2 Organic Eggs, lightly beaten
  3. Salt & Pepper to taste
  4. 2-4 Tbsp Olive Oil or Coconut Oil, for frying
Poached Eggs
  1. 1 Tbsp White Wine Vinegar
  2. 1 tsp Celtic Sea Salt
  3. 12 Organic Eggs
Instructions
  1. To make the coriander pesto, place all the ingredients into the bowl of the Thermomix and Chop 5-8 Sec/Speed 7. Set aside.
  2. Place the grated sweet potato into a medium bowl and add the lightly beaten egg. Season with salt and pepper and stir well to combine.
  3. Place a 1-2L pot filled with water on high heat. Place the vinegar and salt into the water and bring to the boil.
  4. To make the rostis, heat the oil in a large frypan over medium heat and place 2 Tbsp amounts into the pan. Flatten into a nice round shape and pan fry until golden on both sides. You should end up with about 12 rostis.
  5. To toast the pepitas, pan fry on a medium heat for 1-2 minutes, tossing until golden all over.
  6. Crack 8-12 eggs into a medium bowl, being careful not to seperate the yolk from the white. Once the water has boiled, briefly stir the water in a circular motion with a spoon, adding the eggs gently and as close to the water as possible, into the whirlpool. Continue to stir gently for about another 5-10 seconds once the eggs are in to stop them settling immediately on the base of the pot.
  7. Reduce the heat to medium and poach for approximately 3-4 minutes or until cooked to your liking. Take out and drain on absorbent paper towel.
  8. To serve, place 2 rostis on a plate, top with the baby swiss chard leaves or baby spinach and place 2 eggs on top. Rest a spoonful of the pesto on the eggs and sprinkle with the pepitas. Wahlah your breakfast is ready to devour!
Notes
  1. You can poach the eggs as per the Thermomix method, however I love my method for a perfect cafe style poached egg where the white fully encapsulates around the yolk!
  2. You can use Apple cider vinegar in the poaching water but it can turn the colour of the water slightly pink, as with Pink himalayan salt also.
Kitch'n Thyme https://kitchnthyme.com.au/

Organic Italian Shakshuka w Coriander Pepper Black Salt

Shakshuka
Ever wondered what to do with that leftover bolognaise sauce? Turn it into these gorgeous baked eggs! I love baked eggs! It’s such a lovely way to eat eggs when you’re bored of fried, poached and scrambled! With all the other wonderful flavours combining with runny yoked eggs there’s not much not to love! and packed with veggies, herbs, olives and topped with feta etc they make the perfect start to any day! My kids even love this and that’s a winning start to the day being packed with great nutrition for growing minds!

I’ve made many versions of baked eggs over the years! When I worked at the health retreat fulltime I used to make a delicious creamy spinach baked eggs, or sometimes a beautiful Moroccan capsicum & lamb sausage shakshuka! I’m salivating right now thinking about the options!

I was dreaming this morning of serving this with a fresh zesty avocado, finger lime and green chilli salsa! Yum!…But then I realised I had left my bag of finger limes in the fridge at work and the avocados aren’t quite ripe enough! So there…a more simple yet delicious coriander, pepper & black salt had to suffice!

Obviously I did this with leftovers, however I’m going to give you the recipe for my Bolognaise Sauce. It’s totally delicious and well worth making whether for bolognaise sauce or baked eggs!

And no, I don’t cook it in the Thermomix. You see, I ain’t no Chef if I don’t have a pan in ma hand! I seriously love my Thermomix, but there are just some things that must be done on the stove! And for me this is one of them! My Thermomix is my apprentice here, so it does the chopping! I prefer getting a nice caramelisation on the onions and garlic with loads of olive oil for a bolognaise sauce. It’s really important to do this otherwise the onions will be bitter and not reduce their sweetness. I could do it in the Thermo but it will take longer than a frypan where there is more surface area! You can of course leave the Thermomix to cook for longer and eventually you will get a better caramelisation but there’s just something about stirring a pot that I love at times too! Its theraputic! And you know what??? That is AOK! If you like to roast a chook or beef in the oven, then do so, make your gorgeous gravy or a salad in the Thermomix and call it a night. You don’t have to use your Thermomix for everything! If it is helping you in some small way to find more time to do the things you love, save you money, keep you healthier, etc etc then my job is done!

Shakshuka 2

For making my organic lasagne, I don’t mind doing the meat sauce in the thermomix. I don’t mind if that is a bit runnier in consistency. It will continue to cook down and reduce in the oven to get the correct balance of sweetness and flavour.

Ok, so lets get on with it! I must go and remove my toddler from standing on my bench where he is walking softened butter everywhere!….Look he’s only trying to reach the sourdough bread dough! He loves to cook with me!…Yes all day long!….I’ll strive to embrace the chaos today, for oneday they will wake and move mountains! Enjoy!

Organic Italian Shakshuka
Serves 8
My beautiful Bolognaise Sauce leftovers turned into perfect Baked Eggs! Reader Kylie says: "We loved this recipe - the kids devoured it with toast for dipping. A delicious twist to the traditional Bolognese that the whole family will love. Can be made in one big pot for convenience and don't leave off the garnishes as they are essential." The 4 Blades Magazine, July 2016
Write a review
Print
Prep Time
15 min
Cook Time
20 min
Total Time
35 min
Prep Time
15 min
Cook Time
20 min
Total Time
35 min
Bolognaise Sauce
  1. 4 Tbsp Extra Virgin Organic Olive Oil
  2. 2 Brown Onions, halved
  3. 6 Cloves Garlic, peeled
  4. 1 Zucchini, chopped into 3-4cm pieces
  5. 2 Medium Carrots, chopped into 3-4cm pieces
  6. 2 tsp Dried Basil
  7. 2 tsp Dried Oregano
  8. 1 tsp Dried Italian Herbs
  9. 500g Organic Beef Mince
  10. 60ml Organic Red Wine (optional)
  11. 2 Tbsp Vegetable or Beef Stock Paste
  12. 2 Tbsp Tomato Paste
  13. 500ml Roast Tomato Pasta Sauce
  14. 10 Kalamata Olives, pitted and halved
  15. 8 Sundried Tomatoes, roughly cut with scissors
  16. 4 Large Tomatoes, halved
  17. 2 Sprigs Fresh Rosemary
  18. 2 Sprigs Fresh Thyme
  19. 4 Sprigs Fresh Basil or Italian Parsley
Shakshukas
  1. 16 Organic Eggs
  2. Extra Olive Oil for drizzling
  3. 100g Feta Cheese
  4. 1 Green Chilli, sliced on a diagonal
  5. 1/2 Bunch Coriander leaves, for serving
  6. Organic Crusty Sourdough, for serving
Coriander, Pepper Black Salt
  1. 1/2 Bunch Coriander Stalks, sliced very finely
  2. 1 tsp Freshly Ground Black Pepper
  3. 1 Tbsp Black Salt Flakes
Bolognaise Sauce
  1. In a large frypan, heat the olive oil over medium heat. Place the onions into the Thermomix bowl and chop 3 Sec/Speed 7. Add the onion to the pan, cooking for 4-6 minutes or until the onions are translucent and caramelised nicely. Add the garlic and cook for a further minute or two. Just be careful not to burn the garlic as it will become bitter.
  2. Place the zucchini and carrots into the Thermomix and chop 5 Sec/Speed 4-5 (or until fairly finely chopped). Add to the pan and sweat off until translucent.
  3. Add the dried herbs before adding the mince to the pan and stirring, cook for a further 2 minutes or until browned.
  4. Add the wine (if using) and sauté for another 2-3 minutes or until the liquid is reduced.
  5. Reduce the heat to low, add the stock paste, tomato paste, pasta sauce, olives and sundried toms.
  6. Place the fresh tomatoes into the Thermomix and chop 5 Sec/Speed 5 before adding to the frypan and reducing the sauce for 20 minutes.
  7. Towards the end, place the herbs into the Thermomix and chop 3 Sec/Speed 7 or finely chop with a knife. Stir through the sauce to finish.
Shakshuka
  1. Preheat the oven to 200°C and place an even amount of sauce into 8 mini cast iron frypans.
  2. Using a spoon, make indents in the mince, then crack 2 eggs into each mini frypan.
  3. Place into the hot oven and cook for 15-17 minutes or until the whites have just set.
  4. Remove from the oven, drizzle with oil, top with crumbled feta, chilli, fresh coriander and the black salt and serve with crusty bread.
Notes
  1. *This is my full bolognaise sauce recipe which is why it serves 8. I can usually make 3-4 shakshukas with our leftover bolognaise sauce.
  2. * Make my Roast Tomato Pasta Sauce here!
Kitch'n Thyme https://kitchnthyme.com.au/

Paleo Chocolate Raspberry Tarts (Gluten Free, Primal)

Choc Raspb Tarts 2So I can’t really remember the first time I made these delightful tarts, however I do remember one of the most recent times when I made them! It was for my sons 3rd birthday last year! To set the scene a little, I decided to buy year passes to our local zoo, and take along a picnic lunch, a perfect simple birthday cake and these pretty little things!

Well that particular day turned out to be a scorching 30°C day! I got up early before it was that hot, baked a delicious flourless 2 tier chocolate cake, my old recipe that I used to do every week at the health retreat. I topped it with a beautiful dairy free chocolate ganache. Not realising how hot the day would be I poured it on, decorated it with all manner of adorable edible flowers, chocolate shards, raspberries, strawberries and blueberries! It looked a real picture!!….But if only I had one! In it went into the container…we packed up and off we went to the zoo. Off we went into the zoo to catch the croc show and low and behold what did I leave in the car, but the cake!!!!!!

Back to the car after only what seemed like 1/2 an hour and I grabbed that little darling, opened it’s lid….and what did I find??? A great big puddle of slidden, sloppy, melted, ganache drenched decadent deliciousness!!! And with that we sang Happy Birthday Z!! It almost seemed unbelievable, but I assure you there was no fixing that leaning tower of cake puddle! My dearest friends who know how perfectionistic I am, gave me an extra tight squeeze, helped me realise it wasn’t the end of the world…almost…and we just slapped it onto our plates…not it wasn’t even sliceable! What we ate was something delicious, despite its unfavourable looks!

That night I brought the remainder home, chucked it into the Thermomix and chopped it all up, then rolled it into balls and froze them. Oh my word, how a seemingly total disaster can be turned into pure delight. This was one of them! Fudgy, rich, and ultra delicious!
Choc Raspb Tarts
What did end up as pretty as a picture and a total hit were these awesome Choc Raspberry Tarts!!

It’s acutally the filling of the Paleo Chocolate Mango Tart with the base of the Lemon Tart combined with seasonal raspberries on top! Blueberries on top would be just as delish!

So here you are! Enjoy!


Paleo Chocolate Raspberry Tarts
Yields 18
Delicious healthy nutella-like filling topped with juicy sweet raspberries!
Write a review
Print
Prep Time
15 min
Cook Time
15 min
Total Time
40 min
Prep Time
15 min
Cook Time
15 min
Total Time
40 min
Sweet Shortcrust Pastry
  1. 50g Coconut Palm Sugar
  2. 150g Almond Meal
  3. 50g Coconut Flour
  4. 30g Arrowroot
  5. 100g Organic Butter
  6. 1/2 Lemon, zested
  7. 1 Organic Egg, lightly beaten
Filling
  1. 60g Hazelnuts, roasted
  2. 80g Coconut Oil
  3. 80g Coconut Milk
  4. 120g Maple Syrup (approx. 5 Tbsp)
  5. 50g Raw Cacao Powder
  6. 1 tsp Vanilla Essence
  7. pinch salt
  8. 250g Fresh Raspberries
Pastry
  1. Place the sugar into the Thermomix bowl and mill 10 Sec/Speed 9.
  2. Add the almond meal, coconut flour, arrowroot, butter and lemon zest to the bowl and blend 10 Sec/Speed 6.
  3. Add the egg and Knead 15 Sec.
  4. Wrap in plastic wrap, flatten, and place in the refrigerator for 30 minutes to chill.
  5. Preheat the oven to 160°C.
  6. Once the dough is chilled, roll out to 2-3mm thickness between 2 sheets of baking paper.
  7. Peel off the top sheet of baking paper, and using an 8cm round pastry cutter, cut 18 circles from the pastry. You may need to re-roll to get the 18 circles.
  8. Place the cut circles back into the fridge for 5 mins to firm slightly before pressing into 7cm fluted tart shells. Neatly trim the tops and if there are any tares, just use a little of the excess dough to carefully patch it, being careful to maintain an even thickness.
  9. Bake in the preheated oven for 15 minutes or until golden brown.
  10. Remove from the oven, let sit in the moulds for 5-10 minutes before removing to a wire rack to cool completely.* (They will feel very soft as soon as you take them out of the oven but as they cool, the base will harden. If the underside of the bases still feels a little damp once cool, you can turn them upside down and return to the oven for 5 or so minutes to dry out a little further.)
Filling
  1. If you need to roast the nuts, place onto a baking tray and roast for 10-15 minutes on 180°C. Let cool before using your hands to rub the nuts together to get rid of the skins.
  2. Place the hazelnuts into the Thermomix and mill 10 Sec/Speed 9.
  3. Add all the remaining ingredients and cook 2 Mins/50°/Speed 3.
  4. Pour the filling into the cooled tart shells and set in the fridge for 30 mins before topping each tart with 3 raspberries and returning to the fridge to set firm.
Notes
  1. *They will feel very soft as soon as you take them out of the oven but as they cool, the base will harden. If the underside of the bases still feels a little damp once cool, you can turn them upside down and return to the oven for 5 or so minutes to dry out a little further.
  2. *This is the same filling as I use in my Paleo Chocolate Mango Tart
  3. *This is the same base as I use in my Lemon Tart
Kitch'n Thyme https://kitchnthyme.com.au/

Butter Chicken

Butter Chicken 3

BUTTER CHICKEN!!!!!!! A nut free version.

Yes it’s finally here!!! My Butter Chicken recipe has made it up onto the blog! I’ve been wanting to share this one with you for a loooooonnnng time! But do you think I could get around to it!!! Let’s just say that I’ve been taking my time perfecting the recipe to which I now think is pretty pretty amazing!!

I don’t use cashews in my butter chicken. Some recipes and restaurants do and many don’t. Rumour has it that nuts started being introduced to Butter Chicken in the 1970’s in New Delhi for one reason or another, but it wasn’t like the traditional curry. I prefer not to because I think it changes the sauce in a number of ways. It makes the sauce thicker, and changes the flavour. It gives it a very thick mouth feel. I myself prefer a more authentic smooth tomato cream sauce….albeit with absolutely no change to the flavour!! I like to leave the nuts for a beautiful Korma curry!

It’s important in a butter chicken and in any curry for that matter, to cook off the aromatics well. So that’s the onion and garlic etc. If not cooked off enough, they will leave a bitter aftertaste and also won’t release all their intended sweetness.

Butter Chicken 1

The spices also need to be thoroughly cooked off too! If not, you can end up with quite a powdery mouth feel, not nice! So whether you’re making a curry in a Thermomix or in a saucepan, make sure you cook off the onions and spices well…please! I try to keep the spices fairly straight forward in this recipe without compromising flavour…so that you don’t have to buy a trillion different packets! You can add more cayenne if you like your curry a little hotter.

I also cook the tomatoes off for a few minutes too. This will help the tomatoes to release their sweetness and cook of any tart element.

You won’t get a butter chicken quite the colour of the one you eat at the Indian restaurant unless you use tandoori food colouring. They also marinate the chicken in the colour before grilling in the Tandor (you can grill the chicken first if you like before adding in to the sauce to finish cooking). I prefer not to use colours in my cooking, so we just have it a little more orange in colour!

I choose to use chicken thigh. I prefer it for its superior flavour and tenderness. You can use breast if you would prefer, just reduce the final cooking stage to about 10-12 minutes.

You can very easily make it completely dairy free by replacing the butter with coconut oil and the cream with coconut cream.

You can serve the curry with my Cauliflower Rice (which I keep plain with no coriander and capsicum etc for this recipe) or Basmati Rice and of course a good dollop of Cucumber Raita. (I’ll definitely put up my recipe for that soon too!)

This recipe feeds 6-8, so more than what my young family needs for 1 meal, so we eat half and freeze the other half for a rainy day or for a friend in need! I love having meals in the freezer for when you get in the door late or have a crazy day at home etc, it makes such a difference in helping the home to run smoothly!

I really hope you love my family favourite curry as much as we do!

Butter Chicken
Serves 6
Beautiful tender chicken cooked in a spicy tomato cream sauce.
Write a review
Print
Cook Time
35 min
Cook Time
35 min
Ingredients
  1. 800g-1kg Organic Chicken Thigh, diced into 4-5cm pieces
  2. 1 tsp Cumin
  3. 1 tsp Coriander
  4. 1 tsp Smoked Paprika
  5. 15g Olive Oil
  6. 20g Lemon Juice
Sauce
  1. 1 Medium Brown Onion, halved
  2. 3 Cloves Garlic, peeled
  3. 15g (3cm knob) Ginger
  4. 100g Organic Butter
  5. 30g Olive Oil
  6. 2 tsp Garam Masala
  7. 1 tsp Cumin
  8. 1 tsp Smoked Paprika
  9. 1 tsp Turmeric
  10. 1 tsp Fennel Seeds
  11. 1/2 tsp Coriander
  12. 1/8-1/4 tsp Cinnamon
  13. 5 Cardamon Pods
  14. pinch chilli powder or cayenne pepper
  15. 200g Crushed Tomatoes
  16. 30g Tomato Paste
  17. 300g Organic Cream
  18. 2 tsp Celtic Salt
  19. 1 tsp Honey
Instructions
  1. Place the chicken, spices, olive oil & lemon into a medium bowl and mix well to combine. Place in the fridge to marinate for 3 hours or overnight.
  2. Place the onion, garlic & ginger into the Thermomix bowl and chop 3 Sec/Speed 7.
  3. Add the butter & olive oil and cook 7 Mins/120°/Speed 1/MC Off.
  4. Add the spices* and cook a further 3 Mins/100°/Speed 1/MC Off.
  5. Add the crushed tomatoes and tomato paste and cook 5 Mins/100°/Speed 1, then blend 1 Min/Speed 8.
  6. Scrape down the sides of the bowl and the lid. Add the pre-marinated chicken, cream, salt & honey and cook 17 Mins/100°/Speed 1/Reverse.
  7. Pour into a Thermoserver and garnish with fresh Coriander. Serve with steamed basmati rice or cauliflower rice and cucumber raita.
Notes
  1. *Once you've cooked the spices off and cooked the tomatoes, you can choose to take out the cardamom pods before blending, or leave them in for an extra punchy spice flavour.
  2. If you're using canned tomatoes, you can use the whole 400g tin, but it will just encourage a little more of a tomato flavour. I choose to freeze the other half for another meal of butter chicken.
  3. This recipe feeds 6-8, so more than what my young family needs for 1 meal, so we eat half and freeze the other half for a rainy day or for a friend in need! I love having meals in the freezer for when you get in the door late or have a crazy day at home etc, it makes such a difference in helping the home to run smoothly!
Kitch'n Thyme https://kitchnthyme.com.au/

Lemon Tart (Gluten Free & Refined Sugar Free, Primal)

Lemon Tart

Who doesn’t love a good citrus tart?

Such a beautiful French dessert that is the perfect way to end any meal or on any afternoon tea menu!

This beautiful creation of mine is one of my husbands favourite! He is an absolute lover of lemon!

I’ve always made it with my Sweet Spelt Shortcrust, however I’m somewhat trying to lower any gluten content for a few reasons at the moment. So I’ve made a delicious Paleo crust that is a really lovely compromise!
Lemon Tart 2
The filling is delectably smooth! It used to take me a long time over the stove to whisk it so constantly and I love that the Thermomix makes it so much quicker and I don’t have to watch it! If you like a lemon tart with a lot of lemon curd then double the curd to make it thicker.

It’s important to use a mild flavoured honey in this as a strong honey can easily over power that beautiful lemon flavour that we want to hero! 😉

Because I use butter in the curd it isn’t completely Paleo, but you just can’t have a lemon tart without butter!!! I absolutely love good fats, and I can’t bare to cook without them! They have amazing health benefits! More on that in another post though!

I hope you enjoy this is as much as we do!

Lemon Tart
Yields 8
The most perfectly smooth, naturally sweetened, tangy and delectable Lemon Tart ever!
Write a review
Print
Prep Time
1 hr
Cook Time
20 min
Total Time
1 hr 20 min
Prep Time
1 hr
Cook Time
20 min
Total Time
1 hr 20 min
Sweet Shortcrust Pastry
  1. 50g Coconut Palm Sugar
  2. 150g Almond Meal
  3. 50g Coconut Flour
  4. 30g Arrowroot
  5. 100g Organic Butter
  6. 1/2 Lemon, zested
  7. 1 Organic Egg, lightly beaten
Filling
  1. 200g Lemon Juice, strained
  2. 200g Organic Butter
  3. 150g Organic Honey
  4. 1 1/2 Lemons, zested
  5. 1 Tbsp Cornflour
  6. 5 Organic Eggs
Pastry
  1. Place the sugar into the Thermomix bowl and mill 10 Sec/Speed 9.
  2. Add the almond meal, coconut flour, arrowroot, butter and lemon zest to the bowl and blend 10 Sec/Speed 6.
  3. Add the egg and Knead 15 Sec.
  4. Wrap in plastic wrap, flatten, and place in the refrigerator for 30 minutes to chill.
  5. Preheat the oven to 160°C and spray a 26cm tart case with oil spray.
  6. Once the dough is chilled, roll out to 5mm thickness between 2 sheets of baking paper.
  7. Peel off the top sheet of baking paper, and transfer pastry to prepared tart case and peel the bottom sheet of baking paper off, pushing the pastry down gently to fit the case evenly. If there are any tares, just use a little of the excess dough to carefully patch it, being careful to maintain an even thickness.
  8. Place back into the fridge to chill for 15 minutes before baking for 15 minutes.
  9. Remove from the oven and cool.
Filling
  1. Place the juice, butter, honey and zest into the bowl of the Thermomix and heat 3 Mins/60°/Speed 2.
  2. Mix 50 Sec/Speed 3, adding the cornflour first, then the eggs 1 at a time through the hole in the mixing bowl lid. Once the eggs are completely incorporated, cook for 8 Mins/80°/Speed 3.
  3. Pour into the cooled tart case and gently agitate it the case to even the filling mixture out. Set aside to cool and then place into the fridge to set completely.
  4. Once set, approx. 1 hr, cut into slices and serve with fresh cream or yoghurt.
Notes
  1. Make sure to use a mild flavour honey so that it doesn't over power the flavour!
Kitch'n Thyme https://kitchnthyme.com.au/

Chilli Con Carne

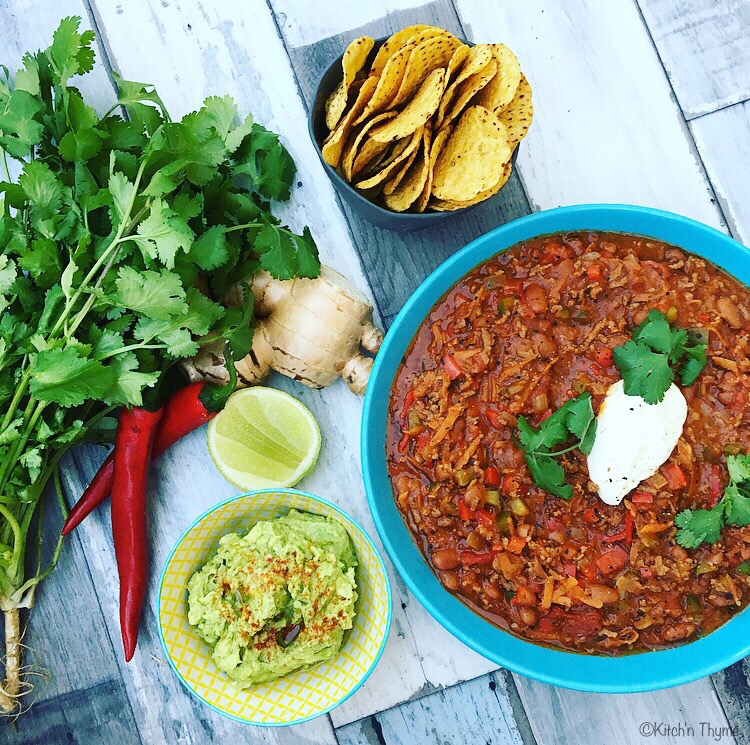
Chilli Con Carne upgradedThis dish brings back many memoires for me! Growing up, my mum used to make a delicious vegetarian version. It was such a staple in our house and one that I remember fondly!
I’ve added in a few things and made it more traditional with the organic beef, but essentially it still has all those same hearty flavours that remind you of home! 

Some people put cinnamon in chilli con carne. I personally don’t, but you are more than welcome to add some in if you like. I absolutely love cinnamon, but am not a huge fan of too much in savoury dishes like this!

There are all different consistencies to the perfect chilli, mine isn’t runny, but it’s not super thick either.

I use Mexe-beans (Pinto beans) rather than Red Kidney Beans and I don’t drain them. The liquid is just water, spices and salt, (no sugar or nasty flavourings), so I add it in for that perfect consistency and extra flavour. You can use Red kidney beans if you like, but I find them a bit more floury than Pinto beans. 

I also love the basil and oregano that I put in mine! It adds a beautiful flavour! I tend to not make it too hot with the chilli. 1-2 is enough for me as this suits my little boys taste buds too! But feel free to increase the chilli if you like your food hotter! 

Chilli Con Carne upgraded 2

It’s starting to get cooler now, and this beauty is the perfect winter warmer! 

So what are you waiting for?!!  Go cook it! Go right now!! 

Chilli Con Carne
Serves 4
My take on this classically perfect winter warmer!
Write a review
Print
Prep Time
5 min
Cook Time
30 min
Total Time
35 min
Prep Time
5 min
Cook Time
30 min
Total Time
35 min
Ingredients
  1. 2 tsp Cumin Seeds
  2. 2 tsp Coriander Seeds
  3. 1/4 tsp Black Peppercorns
  4. 1 Large Carrot, cut into 3-4cm lengths
  5. 1 Green Capsicum, quartered & deseeded
  6. 1 Red Capsicum, quartered & deseeded
  7. Few sprigs Fresh Coriander, inclu stems and roots
  8. 2 Medium Brown Onions, halved
  9. 3cm Knob Ginger
  10. 2 Cloves Garlic
  11. 1-2 Long Red Cayenne Chillies, adjust to taste
  12. 1/8-1/4 tsp Cayenne Pepper
  13. 2 Tbsp Extra Virgin Olive Oil
  14. 500g Organic Beef, partially frozen, cut into pieces
  15. 1 Tbsp Dried Basil
  16. 1 Tbsp Dried Oregano
  17. 400g Can Mexe Beans, Red Kidney Beans or Black Beans
  18. 2 x 400g Can Organic Chopped Tomatoes
  19. 4 Tbsp Organic Tomato Paste
  20. 2 tsp Celtic Sea Salt
Instructions
  1. Place the spices into the mixing bowl and dry roast 2 Mins/120°/Speed 1. Allow to cool slightly then insert measuring cup and mill 1 Min/Speed 9. Transfer into a bowl and set aside.
  2. Without cleaning the bowl, place half of the beef into mixing bowl and chop Turbo/0.5Sec/3 Times to mince. Transfer to the bowl with the spices and repeat the same mincing process with the remaining beef before adding to the bowl with the beef and spices.
  3. Without rinsing the bowl, place the carrot, capsicums and coriander into mixing bowl and chop 5 Sec/Speed 4. Transfer into the bowl with the spices and set aside.
  4. Place brown onion, ginger, garlic, red chillies, cayenne pepper and olive oil into mixing bowl and chop 3 Sec/Speed 7. Scrape down sides of mixing bowl with spatula and sauté 6 Mins/120°/Speed 1, placing simmering basket instead of measuring cup onto mixing bowl lid.
  5. Insert the butterfly. Add the beef mince, spice and carrot/capsicum mix, basil & oregano and cook 10 Mins/100°/Reverse/Speed 1.
  6. Add the mexe beans (or kidney beans), chopped tomatoes, tomato paste, and salt. Cook 10 Mins/90°/Reverse/Speed 1, placing simmering basket instead of measuring cup on to mixing bowl lid.
  7. Serve with corn chips, guacamole, sour cream or your favourite sides!
Notes
  1. *You can use Organic Beef Mince however it does tend to really mince it further. If time permits, I suggest making your own mince!
  2. *If you prefer a slightly thicker consistency only add 1 x 400g Can Organic Tin Tomatoes.
  3. *For Paleo & Ketogenic, omit the beans and serve with cauliflower chips or rice or other suitable option.
Kitch'n Thyme https://kitchnthyme.com.au/

Buckwheat Porridge with Figs & Roast Almonds

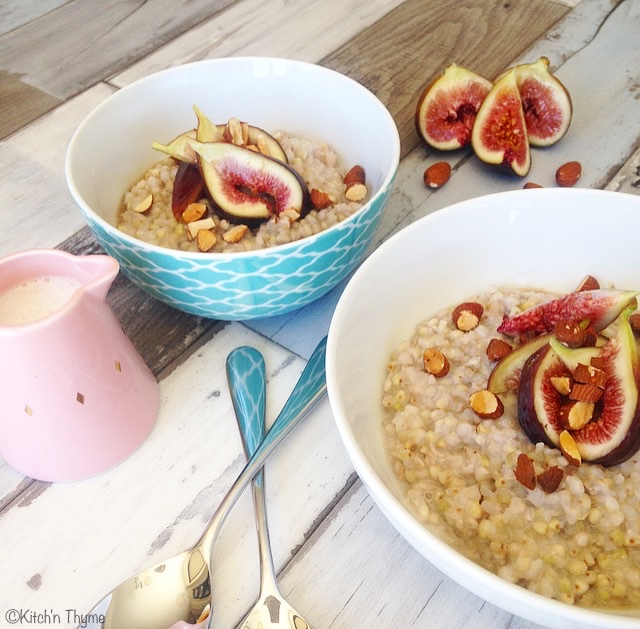
Buckwheat Porridge How gorgeous is this beautiful simple, super quick & easy breakfast! Figs are one of my favourites! I love them! And it’s fig season now and just the time to be using them in your kitchen! I got a beautiful big punnet really cheaply at my local farmers market last weekend…..I just love farmers markets.

There’s just something so wonderful buying produce straight from the farmer! It looks fresher, tastes fresher, stays fresher for longer and is mostly spray free or organic and cheaper! I love that the tops come on the beetroots (we keep them and add them into juices or cook with them!), the beets feel hard and crispy not old and wilted and soft! The silverbeet isn’t wrapped in plastic, it’s vibrant and crisp and ready to chomp on! And the herbs – they are a real size bunch of herbs! Not in teeny tiny plastic packets or a measly few sprigs in a plastic sleeve, these herbs are the real deal, about 3 or 4 times the size!

I could go on and on!!! But I digress…..back to breakfast!!!….But just go and hunt down a local farmers market when you can! Ok!

Buckwheat is a pseudo grain that I grew up on! We would probably eat this breakfast 1-2 a week. Recently it’s come into vogue and is considered a very healthy food. Related to rhubarb, buckwheat is actually the seed of a flowering plant! In some circles it isn’t considered part of a Paleo diet, but it is most definitely Gluten Free and suitable for baking and for the likes of this yummy porridge.

Being high in protein, a rich source of iron, zinc, manganese, copper, magnesium, & fiber, it has many wonderful health properties.

Instead of just typical oats for breakfast, I love to mix it up with using different grains for my family. Growing up, we used to have Millet & Polenta in much the same way. And it is thoroughly delicious also! I’ll post those recipes in another post!

So below I will give you 2 different methods. Growing up my mum didn’t have a Thermomix so I’m showing you the traditional method in the oven. I will say too that I want my children to know how to do things in the traditional methods of an oven or stove, so that they can then appreciate the Thermomix for how fast it truly is! You can also do this buckwheat on the stove, just on a gentle simmer, but you have to make sure you don’t forget it, you’ll need to stir it quite frequently!

Buckwheat - uncoookedBuckwheat cooked     


You will see above the buckwheat ready to go into the oven and then freshly cooked, straight out of the oven and ready to eat! Yum!

Buckwheat Porridge w Fresh Figs & Roasted Almonds
Serves 4
A wonderful Gluten Free alternative to Oat Porridge
Write a review
Print
Prep Time
2 min
Cook Time
20 min
Total Time
22 min
Prep Time
2 min
Cook Time
20 min
Total Time
22 min
Ingredients
  1. 200g Raw Buckwheat Kernels
  2. 550-600g Water
  3. pinch Celtic Sea Salt
  4. 40g Maple Syrup, Honey or Coconut Flower Nectar
  5. 250g Coconut Cream, plus extra for serving
  6. 2 tsp Vanilla Essence
  7. 4-6 Fresh Figs, quartered or cut into eighths
  8. 20g Roasted Almonds, roughly chopped
Thermomix Method
  1. Place the buckwheat, water and salt into the mixing bowl of the Thermomix and cook 20 Mins/100°/Reverse/Speed 2.
  2. Add the maple, coconut cream and vanilla and cook a further 2 Mins/100°/Reverse/Speed 2.
  3. Serve with chopped fresh figs, roasted almonds and extra coconut cream.
Oven Method
  1. Preheat the oven to 180°.
  2. Lightly spray a 1.5L stoneware baking dish with olive oil. Place the buckwheat, water and sea salt in the dish.
  3. Bake for 45-60 minutes or until all the water is absorbed. If you cover with a lid or aluminium foil it will only take 30-40 minutes to cook. I don't have a lid for mine, so I just bake it without.
  4. Remove from the oven. Add the maple, coconut cream and vanilla and stir to combine.
  5. Serve with chopped fresh figs, roasted almonds and extra coconut cream.
Notes
  1. Please note, you can change the consistency of this porridge by adding more or less water, depending on the desired consistency. You can also pre-chop the grains slightly before cooking if you would like it more porridge consistency. I quite like the texture of the individual grains so I like to leave them whole.
  2. You can sub the fresh figs for fresh pairs or bananas, strawberries or any other in season fruit.
Kitch'n Thyme https://kitchnthyme.com.au/

Broccoli & Golden Beetroot Salad w. Green Goddess Dressing

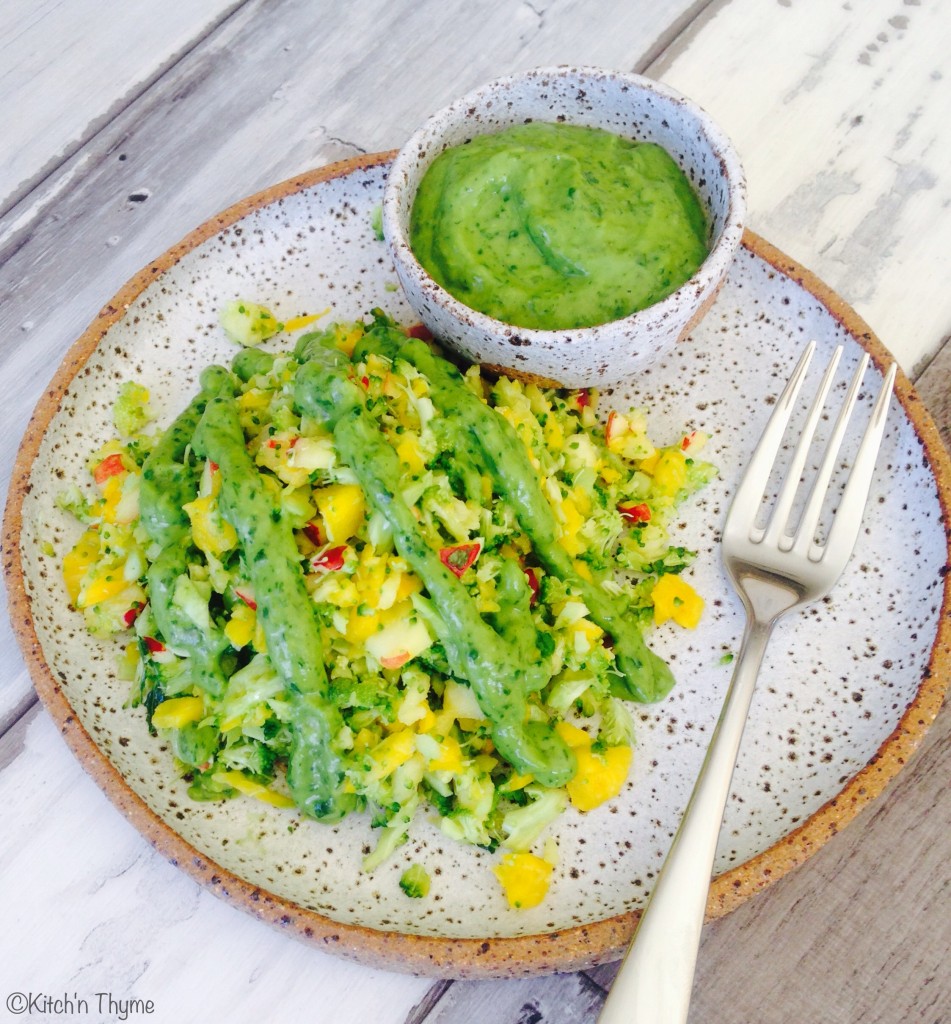
Golden Beetroot & Broccoli Salad At the recent Thermomix Spectacular on the Sunshine Coast, I teamed up with my beautiful friend from over at Desperate Healthwives. We had a gorgeous simple Raw/Paleo, Nut Butter/Nut Milk stand. Along with that gorgeous Raw Macadamia Salted Caramel that I know many of you wanted to lick the plate off, we did this gorgeous fresh salad! It’s a bit of a take on the classic Thermomix Beetroot Salad. We’ve jazzed it up with gorgeous Golden Beetroots that are in season at the moment mixed with fresh spray free broccoli and of course this to die for Green Goddess Dressing! The original credit for the dressing goes to Oh She Glows. If you google green goddess dressing you can read about the history of this awesome dressing too! I’ve converted it to a recipe for the Thermomix and we have added in some fresh Coriander along with the other herbs! I use honey for a touch of sweetener, obviously if you’re vegan you can substitute with some maple syrup. It is 100% lick the bowl material!! Drizzled over this salad it’s a perfect match made in heaven! I know it sort of looks a bit like green slop on a plate, but when you taste it, you completely forget that you are eating green sludge!….Saying that, just look how vibrant green it is! Really you can’t get more ‘real’ food than that! The avocado makes it oh so creamy & smooth, yet it’s still so light….and you almost want to drink it! Enjoy!

Golden Beetroot & Broccoli Salad w Green Goddess Dressing
Serves 4
This gorgeous salad is oh so refreshing and nourishing!
Write a review
Print
Prep Time
5 min
Total Time
10 min
Prep Time
5 min
Total Time
10 min
Salad
  1. 200g Broccoli, roughly chopped
  2. 1 Medium Golden (yellow) Beetroot, peeled & quartered
  3. 1 Red Apple, cored & quartered
  4. 1/4 Red Onion
  5. 2-3 sprigs fresh Coriander, leaves only
  6. 2 Tbsp Olive Oil
  7. 1 Tbsp Lemon Juice or Apple Cider Vinegar
  8. 1/2 tsp Celtic Sea Salt
Dressing
  1. 1 Garlic Clove, peeled
  2. 150g Avocado (Approx 2 Med), peeled
  3. 3 Spring Onions (green part only)
  4. 1/2 Bunch Coriander leaves
  5. 1/2 Bunch Basil leaves
  6. 1/2 Bunch Italian Parsley leaves
  7. 60ml Extra Virgin Olive Oil
  8. 2 Tbsp Lemon Juice
  9. 1 Tbsp Apple Cider Vinegar
  10. 80ml Water
  11. 1 tsp Honey (or Maple Syrup if vegan)
  12. 1 tsp Celtic Sea Salt
  13. pinch Cayenne Pepper
Salad
  1. Place all ingredients into mixing bowl and chop 3-5 Sec/Speed 4. Scrape down the sides of the bowl and chop a further 1-2 Sec/Speed 4, or until desired consistency is achieved. Be careful not to over process or it will turn into a dip - delightful as that may be!!
  2. Serve straight away with the dressing or cover and place in the fridge until serving.
Dressing
  1. Place the garlic into the mixing bowl and chop 3 Sec/Speed 7. Scrape down the sides of the bowl.
  2. Add the remaining ingredients and process 10-15 Sec/Speed 7. If some of the dressing is left unprocessed on the sides of the bowl just scrape down the sides and process a further 3 Sec/Speed 7.
  3. Drizzle over the salad and serve extra on the side! You will be licking the plate!!
  4. Store in an airtight container in the fridge. Will keep for about 5 days.
Notes
  1. You can add more water, vinegar, or lemon depending on how runny you would like it and your personal tastebuds.
Kitch'n Thyme https://kitchnthyme.com.au/

Raw Salted Macadamia Caramel

Raw Salted Maca Cara 4I was driving home recently dreaming of this delicious date caramel I’d had at my friends house a couple of years ago! I didn’t have her recipe, so I came home and decided to have a play around. I wanted something with macadamias as they just lend themselves so perfectly to something so creamy and dreamy!

I also had the idea initially of making more of a sweet dip, but then my thoughts drifted to Maca powder and it’s wonderful caramel tones.  Maca powder is a great source of vitamins, energy boosting properties, has benefits for the skin, helps to increase energy, and helps with womens & mens health & reproductive health. I love chucking it into foods when I can!

So here is the result! Icky, sticky, goopy, mouth- watering, finger -licking goodness! I can guarantee you won’t be able to resist going in for a second spoonful! I gave the recipe to my best friend Jessie of Desperate Healthwives who made it straight away and thought she’d died and gone to heaven! Ha! And I must admit she took the above photo! It’s just so beautiful I had to use it!

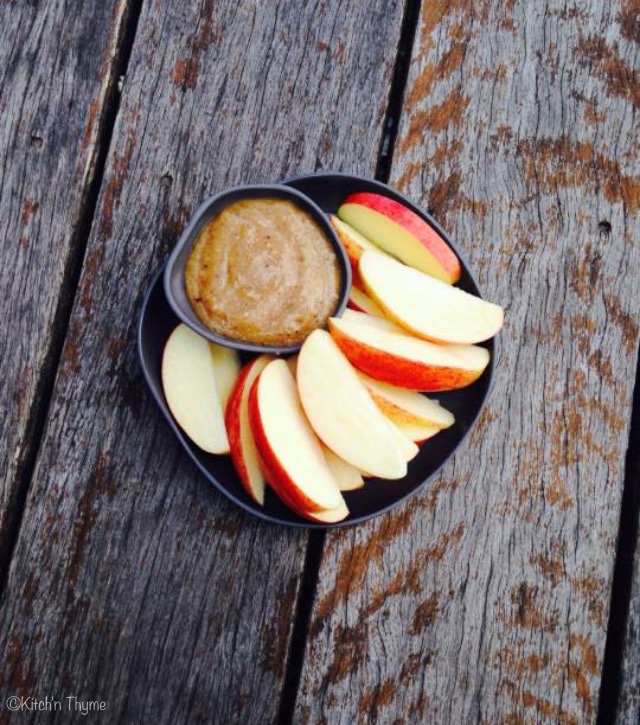
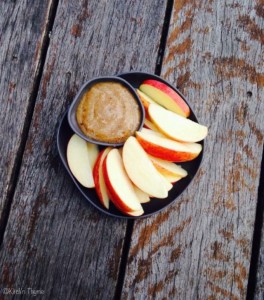
Apples are of course the classic combo with caramel however you can use whatever fruit you desire! Apples, pears, bananas, strawberries etc all work beautifully!  You’ve all seen those caramel apples in the supermarket – sugar upon sugar! This is a little different, but we works so well and is such a wonderful alternative with only a little maple syrup to sweeten. You could reduce the maple or use honey or rice malt syrup. I tend not to be a big promoter of rice malt syrup as its so highly processed. I’ll talk more on sugars in another blog post.

Raw Salted Maca Cara 2
It’s absolutely perfect just freshly made and dipped into! However, look at what happens after you’ve left it in the fridge for a little while! Gorgeous and firmer in texture it becomes more like a spread! There is something about this that I just love! It’s smooth and rich and you can use your chosen fruit as the perfect little implement to scrape up the perfect amount! So try both ways and see which you love you the most!


Raw Salted Macadamia Caramel
Oooey gooey raw nut caramel for dipping freshly cut fruit into!
Write a review
Print
Total Time
2 min
Total Time
2 min
Ingredients
  1. 150g Raw Macadamias
  2. 2 - 3 Medjool Dates
  3. 60g (4 Tbsp) Coconut Oil
  4. 40g (2 Tbsp) Maple Syrup
  5. 1 tsp Vanilla Essence
  6. 1 tsp Maca Powder
  7. 1/8 tsp Celtic Sea Salt
Instructions
  1. Place the macadamias into the bowl of the Thermomix and mill 6 Sec/Speed 9.
  2. Scrape down the sides of the bowl and process for 10 Sec/Speed 4.
  3. Scrape down the sides again and process a further 30-40 Sec/Speed 6 or until a nice nut butter consistency forms.
  4. Add all the remaining ingredients and process 40 Sec/Speed 6-7.
  5. Serve with freshly chopped fruit such as apples, pears, strawberries, bananas etc.
  6. For a firmer texture, you can place it into the fridge for approx. 30 mins or until set firm.
Notes
  1. You can easily turn this into a Chocolate Version too by adding 2 Tbsp of Raw Cacao Powder in with all the other ingredients. Yum!
Kitch'n Thyme https://kitchnthyme.com.au/

Orange Cinnamon & Coconut ‘Hot Cross Bun’ Chocolates

Hot Cross Bun Chocolates

I just had to do something really chocolatey for Easter!! I can’t help myself creating! I wonder if there is some name for that problem! haha

These are really simple to make! You will need my Coconut Butter for these!

Hot Cross Bun Chocolates 2

And it’s a bit kitch with the crosses but how cute! Dont’ they just look adorable!

All grain free, dairy free and refined sugar free! Enjoy!

Orange Cinnamon & Coconut 'Hot Cross Bun' Chocolates
Yields 14
These are a cheeky little chocolate take off of a Hot Cross Bun! With lovely Cinnamon & Orange Easter flavours that are sure to delight! You'll need my Coconut Butter to make these!
Write a review
Print
Chocolates
  1. 200g Coconut Butter
  2. 3 Tbsp Coconut Cream
  3. 2 tsp Maple Syrup
  4. 20g Orange Juice
  5. 1 tsp Orange Zest
  6. 1/4 tsp Cinnamon
  7. 100g Organic Dark Chocolate (70%)
Crosses
  1. 50g Coconut Butter
  2. 2 tsp Maple Syrup
  3. 3 Tbsp Coconut Cream
Instructions
  1. To make the chocolates place all the ingredients except for the chocolate into the mixing bowl and mix 10 Sec/Speed 4.
  2. Place into the fridge for 30 mins -1 hour to chill. Once chilled sufficiently, roll the mix into 14 even small bit sized balls.
  3. Break the chocolate into small pieces and mill 10 Sec/Speed 9. Then melt the chocolate 2 Mins/50°/Speed 2, scraping down the sides of the bowl closer to the finish time.
  4. Pour into a shallow bowl and dip the chocolates one at a time into the chocolate to thoroughly coat, before placing onto a baking paper lined rack or tray to set. You can place them in the fridge to set a bit quicker.
  5. Once the chocolates are set, place the coconut butter, maple and coconut cream into the Thermomix and mix 10 Sec/Speed 3-4.
  6. Place into a piping bag fitted with a plain nozzle and pipe little crosses on the chocolates. Place back into the fridge to completely set, then transfer into an airtight container.
Notes
  1. I couldn't find all my piping bags when I made these, so I popped the icing into a little glad bag and cut a little hole off one corner and used that to pipe the crosses! Little more rustic but still works a treat!
  2. Don't forget you'll need my Coconut Butter to make these!
Kitch'n Thyme https://kitchnthyme.com.au/