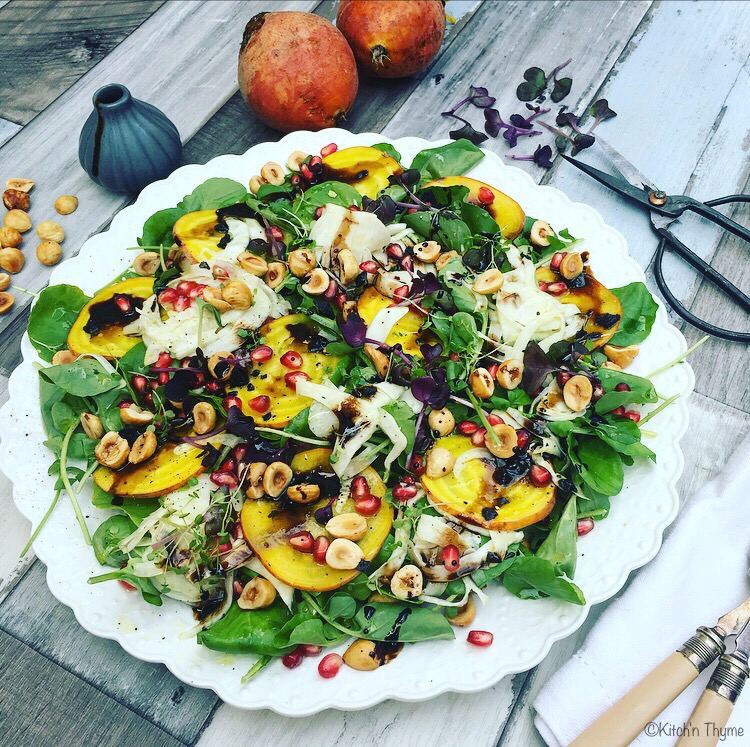
Watercress, Pickled Golden Beetroot & Fennel, Hazelnut & Pomegranate Salad w Balsamic Reduction

img_1283Imagine this gorgeous salad as part of a beautiful Christmas banquet. Adding so much colour, and fresh and light crunch this salad is one that pleases the eye and the palette! 

I’ve been getting such a gorgeous steady supply of these beautiful golden yellow coloured beetroots and I really love them! I love them because they are different, but they also have a slightly more subtle light flavour so they are perfect for a salad like this!

For this salad, I haven’t peeled the beets, as they washed up really nicely, but you could do that if you preferred. 

If you haven’t got roasted hazelnuts in the pantry just roast them for 10 minutes at 180ºC, or until golden in colour. The skins should begin to just fall on when rubbed gently.

There are a number of different ways to extract pomegranate seeds. I like to slice the top off, slice down the ridges, give a good tap and break the segments apart, letting all the seeds just pop out. Perhaps I should do a video on it sometime! 

The balsamic reduction is really straightforward to make in the Thermomix. Super easy! You just combine 500g balsamic & 50g honey into the Thermomix and cook 25-30 Mins/Varoma/Speed 3, with the simmering basket on top. 

img_1435

Watercress, Pickled Golden Beetroot & Fennel, Hazelnut & Pomegranate Salad w Balsamic Reduction
Serves 6
A delicious, punchy, fresh & crisp salad adaptable to any banquet celebration or for a quick lunch with friends!
Write a review
Print
Prep Time
20 min
Cook Time
10 min
Total Time
20 min
Prep Time
20 min
Cook Time
10 min
Total Time
20 min
Pickled Fennel & Beetroot
  1. 125ml Rice Wine Vinegar
  2. 125ml Water
  3. 1 Tbsp Honey
  4. 1/2 tsp Celtic Sea Salt
  5. 1/4 tsp Coriander Seeds
  6. 1/4 tsp Cumin Seeds
  7. 1/4 tsp Fennel Seeds
  8. 1 Star Anise
  9. 2 Pieces Orange Peel
Salad
  1. 1 Large Bunch Watercress
  2. 2 Medium Golden Beetroots
  3. 1 Medium Bulb Fennel
  4. 1/2 Pomegranate Seeds
  5. 50g Roasted Hazelnuts, halved
  6. 1-2 Tbsp Olive Oil
  7. Black Salt
  8. Micro Watercress
  9. Micro Radish
  10. 2 Tbsp Balsamic Reduction
Instructions
  1. Place the pickling ingredients into the thermomix and heat 10 Mins/100º/Speed 1.
  2. Finely slice the fennel on a mandolin and place into a small bowl.
  3. Finely slice the golden beetroot on a mandolin and place into another small bowl.
  4. Pour the pickling liquid over the fennel to cover and leave for 10 minutes. Strain the pickling liquid over the beetroot to cover and leave that to pickle for 10 minutes.
  5. Once the fennel and beetroot is pickled, set them aside for plating.
  6. Place the watercress on a large platter and arrange slices of the pickled beetroot nicely around the plate. Place handfuls of the pickled fennel around the platter. Sprinkle with the pomegranate seeds & roasted hazelnuts.
  7. Drizzle with a little olive oil and sprinkle with black salt.
  8. Top the salad with some delicate sprigs of the micro herbs and drizzle with the balsamic reduction.
  9. Serve immediately.
Kitch'n Thyme https://kitchnthyme.com.au/

Bone Broth v Stock – A Chef’s Perspective

Bone Broth

Perhaps some of you have been wondering the difference between a Stock or a Bone Broth! Hopefully this will provide a better understanding.

Stocks have been made for centuries long in the back of almost every good kitchen! They are the key to a plethora of amazing sauces and reductions. Sauces add flavour, moisture & harmony to a dish, and no great restaurant would be without them!

On the home front, I think many will remember their mum or grandma serving hearty nourishing brothy chicken or beef soups when unwell. It’s definitely not news to many that there are amazing healing properties in that pot of liquid gold! Over recent years, those with a keen knowledge of health have come to use and understand the incredible benefits of the amazing elixir that it is and it’s now even fashionable to sip on a cup of tasty broth! Who knew!

As a Chef, here are the main differences that I see between Stock versus Broth.
There are 3 different types of Stock or Broth. 
– Broth or Bouillon which is typically made from a whole meat like a whole chicken. It’s usually cooked for a short period of time and is usually fairly clear because of the high protein content. It has a strong flavour with underlying strength from the gelatinous meat. The tender meat can then be eaten also.
– Stock is usually made from the carcasses or bones of an animal with a small amount of meat (eg, necks, meaty ribs, shanks or wings), simmered for a short time and used in the production of soups and sauces.
– Bone Broth is also usually made from the carcasses and bones of an animal with a small amount of meat (eg. necks, meaty ribs, shanks or wings) and simmered for a long period of time for its health benefits and used as a nourishing drink or can be used in recipes where stock is required.
I won’t talk much more of Bouillon so I’m going to refer to Basic Stock as ‘Stock’ and Bone Broth as ‘Broth’ for the rest of the article, so you’re not confused!! 😉

When we talk stock we also differentiate between 2 very distinct types of stock. (These differences can be put into place when making a Bone Broth too.) Those 2 types are White Stocks and Brown Stocks.
White Stocks form the basis of many White Sauces (eg. Veloute) and soups. The unroasted bones and mirepoix (French term for carrots, celery and onion) are added to a stockpot with cold filtered water. This produces a nice white/clear colour. A Bouillon is made with unroasted meat and vegetables also.
Brown Stocks form the basis of brown soups, braises, casseroles and reductions and brown sauces. As the term suggests they are brown from the bones and mirepoix being roasted first. I tend to make brown stocks the most, as the caramelisation from roasting brings such full well rounded flavour.

Then we look at the simmering times for Stocks versus Bone Broths.

– Fish Stock would normally be simmered for about 30 minutes

– Chicken Stock for about 2-4 hours

– Beef or Lamb Stock about 6-8 hours.
Bone Broths on the other hand, are simmered for about 20-24 hours! You can get great flavour in a stock over just a few hours, but some much larger health benefits over a longer simmer.

Along with gelatine which heals the gut and collagen which cushion the joints and helps to heal cartilage, bone broths contain minerals (can’t have enough of them right!), and two important amino acids – Glycine and Proline.
Glycine has a whole range of health benefits, including:
– Reducing inflammation in the body
– Aiding with digestion
– Boosting immunity
– Protecting collagen in joints and
– Helping build lean muscle mass.
Proline also has a range of health benefits:
– Aids the body in breaking down proteins for use in healthy cells
– Helps in the formation of collagen and
– Essential to the maintenance of healthy skin and connective tissues.

Some suggest that the longer a stock simmers the higher in histamines it can become. A White Stock would tend to be lower in histamines. So if you are on a low-histamine type regime, you may wish to make a white stock and simmer for a shorter length of time, meaning more of a ‘stock’ or ‘bouillon’ as opposed to ‘broth’. For the GAPS introduction diet, it may also be more suitable to keep to a whiter/lower histamine type stock or bouillon, where we’re avoiding too much gelatin.

With a broth, it’s important to add the apple cider vinegar as it helps to release more minerals from the bones of the stock! Definitely don’t miss that step!

Traditionally when making stocks, you would’t salt a stock during the cooking process. You would normally season the dish you add the stock to to avoid an overly salty finished product. However, when I make bone broth, the amount of salt that I add is ok, and I will tend to add even more salt to the final dish. If you are making broth just to drink adding the salt is especially important during or after cooking as it will make it much more enjoyable to drink.

I hope this clears some of the confusion for some of you and I hope it inspires you to make some of your own bone broths!
Bone Broth 2

Brown Chicken Bone Broth
Yields 6
Beautiful flavoursome bone broth to add to all manner of different dishes or drink for healing and nourishment.
Write a review
Print
Prep Time
10 min
Cook Time
25 hr
Total Time
25 hr 10 min
Prep Time
10 min
Cook Time
25 hr
Total Time
25 hr 10 min
Ingredients
  1. 2kg Organic Chicken Bones or Frames (Approx 6 Carcasses)
  2. 1kg Organic Chicken Meat rich in collagen (eg. Necks or Wings)
  3. 1kg Mirepoix - 6 Celery Stalks, 4 Large Carrots, 2-3 Large Brown Onions
  4. 8 Cloves Garlic, peeled
  5. 2 Tbsp Olive Oil
  6. 8 Litres Cold Filtered Water
  7. 2 Tbsp Celtic Sea Salt (optional)
  8. 2 Tbsp Apple Cider Vinegar
  9. 1 Bouquet Garni - 2 Fresh or Dried Bay Leaves, Few Sprigs Parsley & Thyme
  10. 1/2 tsp Black Peppercorns
Instructions
  1. Preheat the oven to 180°C and line 3 large baking trays with baking paper.
  2. Place the chicken onto the trays and spray with olive oil fairly liberally.
  3. Cut the mirepoix into 3-4cm pieces, lightly drizzle with olive oil (optional) and place on a large baking tray lined with baking paper. Place the trays of chicken and mirepoix into the preheated oven and roast for 1 hour, turning the chicken bones a number of times during the hour to brown evenly.
  4. Once roasted, place into a large 11L stockpot.
  5. Add the filtered water, salt, vinegar, and bouquet garni (herbs) & peppercorns and let sit for 1 hour before bringing to the boil.
  6. Once boiling, reduce to a simmer and cook for a minimum of 12 hours and up to 24. The longer the stock cooks the more nutrient dense the broth will be.
  7. Once cooked, take off the heat and strain through a large strainer. Strain again through cheesecloth to remove any unwanted sediments.
  8. Pour into glass jars and seal. Store in the fridge for 3-4 days or freeze. It will freeze well for up to 3 months.
Notes
  1. You can use this recipe as a basis to make Beef or Lamb stock too. Just replace the chicken bones with beef or lamb and proceed.
  2. With a broth, it's important to add the apple cider vinegar as it helps to release more minerals from the bones of the stock! Definitely don't miss that step!
  3. Traditionally when making stocks, you would't salt a stock during the cooking process. You would normally season the dish you add the stock to to avoid an overly salty finished product. However, when I make bone broth, the amount of salt that I add is ok, and I will tend to add even more salt to the final dish. If you are making broth just to drink adding the salt is especially important during or after cooking as it will make it much more enjoyable to drink.
  4. I freeze my stock in Mason Ball jars. To do this without the glass shattering, pour the stock in leaving a good gap at the top for expansion, and let it cool slightly. Place the jar into the freezer without the lid to freeze first before placing the lid on afterwards.
Kitch'n Thyme https://kitchnthyme.com.au/

Real Dark Chocolate Easter Crème Eggs

Easter Creme Eggs 3I know that you will have all been hoping and waiting for these delectable little Easter treats, but I’m sure that many of you have seen the story about little Mavi that I have shared through our Go Fund Me page. If you haven’t, my dearest friends, who I hold very close to my heart and are like family to me along with all their extended families, very suddenly lost their precious 2 1/2 year old son in a tragic farm accident last Tuesday 15th March in rural NSW. It has been such an incomprehensibly sad time for my dear friends, for their extended family and for us as friends. The pain that we are feeling is nothing compared to their grief…we are just with them in spirit through tears and many many prayers.
Maverick Here is a picture of our beautiful most treasured and loved beyond measure Mavi.
Setting up the Go Fund Me page has taken up a large amount of my time and I apologise for getting this to you a little later than usual. But losing a child would have to be one of the worst possible things to go through in life, and as a friend you just want to be there to help, in some kind of small way. We have been thoroughly amazed to see the support network that have rallied behind them to ease their burdens slightly by generously donating to their fund. Between it being aired on the local TV station later this week and their local bank running a fundraiser too, it’s been truly wonderful to see that Aussie spirit of lending a helping hand so evident! If you feel compelled to donate or share please please do so. You can donate easily on the site or scroll to the bottom to copy and paste the link to share. Thankyou thankyou thankyou!

I truly hope that you will take the opportunity to create these beautiful little treats with your children over the coming Easter holidays. Make these together, cuddle your children extra tight, and nourish their hearts, minds and bellies.

I pray you have a safe, healthy & happy Easter and I send much love from my family to yours. Gabrielle xx

*****************A little about the Chocolates*****************************

With chocolate made from scratch from real ingredients these Easter eggs are the perfect treat to pull out and enjoy with your families this Easter.

I have this long time dream of one day being able to visit one of the amazing chocolate making establishments around the world. Perhaps the Callebaut factory in Belgium (right now I send so much love to all those that have suffered enormously over there….just such a sad world!!!) or some of the amazing places where chocolate is made in Switzerland or over Europe.

But for now having a go at making my own will have to suffice. Of course some of the steps like refining the chocolate to improve the taste and texture (called ‘Conching’) are quite tricky to do at home.
But hey this chocolate is real, without being loaded with unneccesary chemicals, preservatives and loads of sugar. This chocolate is good for your body, and is completely guilt-free.

When you buy a block of chocolate from the shops you’ve probably noticed that it has 3 big ingredients. Cacao paste (aka cocoa paste, cocoa mass, cocoa liquor), Cacao butter or cocoa butter, and sugar. So here I’m using cacao paste from Maretai Organics and Cacao Butter to make a great homemade version without all the added nasties. Cacao paste already has cacao butter in it, which is the fat, so unlike other raw chocolate recipes I use less cacao butter in a recipe that uses cacao paste to begin with.

My chosen sweetener that I use here is Coconut Nectar. You can substitute with coconut palm sugar however the mouth feel of the coconut nectar is just that much smoother and the overall texture of the chocolate is just sensational!

Easter Creme Eggs 2For the filling of these eggs, I’ve used a product called Coconut Paste. It’s not coconut butter, it’s finer and runnier, yet super duper creamy, smooth and just incredible. I buy the Loving Earth , I think it’s the best out there! The filling is dairy free, almost like a light caramel or a condensed milk in texture and then once set in the eggs in the fridge it turns fudgey and delightful.

If you don’t want to join these eggs together, you can just place some filling in the prepared chocolate shells and then once set in the fridge cover with chocolate to set. Up to you.

As much as I think making the chocolate from scratch is a whole lot of fun, if you can’t source the products in time for easter just do them at a later point over the holidays or use a good quality dark or organic chocolate. Enjoy!

Real Dark Chocolate Easter Creme Eggs
Yields 16
Deliciously creamy guilt free healthy Creme Easter eggs.
Write a review
Print
Prep Time
35 min
Cook Time
5 min
Total Time
40 min
Prep Time
35 min
Cook Time
5 min
Total Time
40 min
Ingredients
  1. Chocolate
  2. 150g Cacao Paste (I use Maretai Organics)
  3. 50g Cacao Butter
  4. 60g Coconut Flower Nectar or Coconut Palm Sugar
  5. 1/2 tsp Vanilla Powder
Creme Egg Filling
  1. 200g Coconut Paste (I use Loving Earth brand)
  2. 100g Coconut Nectar
  3. 100g Coconut Milk
  4. 2 tsp Vanilla Extract
  5. Extra Coconut Paste for drizzling
Instructions
  1. To make the chocolate place the cacao paste & cacao butter into the Thermomix bowl and mill 10 Sec/Speed 9.
  2. Add the coconut nectar and vanilla and melt and mix 5 Mins/37°/Speed 2.
  3. Pour the chocolate into a bowl and set aside for about 5-10 minutes to thicken slightly.
  4. Dampen a small piece of paper towel and wipe out the easter egg moulds with a little macadamia or rice bran oil. This will help the chocolates to release easily and also to give them a nice gloss.
  5. Pour the chocolate into medium easter egg moulds and swirl around until coated. Place in the fridge to set for about 5-10 minutes before repeating this step 2-3 times to get a good layer of chocolate in each mould. You may like to do this with a small paint brush to make sure you are getting a really even thick coating. Using a pastry scraper or a ruler drag across the chocolate to ensure a clean edge everytime you add a layer.
  6. You will need a total of 32 chocolate egg halves, so you may need to do this several times depending on how many moulds you have.
  7. Whilst your chocolate is setting, make the creme filling. Place the coconut paste, the nectar, coconut milk & vanilla into the Thermomix and mix 10-15 Sec/Speed 3. Set aside until ready to use.
  8. Gently un-mould the egg halves, being careful not to over handle as the heat from your hands will melt the chocolate. Place a small spoonful of the filling into each of the halves, levelling them off at the top. Sit the halves on a tray and carefully place them into the fridge to set for about 20 minutes or until the filling has hardened.
  9. To stick the two edges together, heat a baking tray slightly then place the halves briefly onto the tray to heat, then gently push the edges together, running your finger around the entire edges to seal properly.
  10. Place back into the fridge to set firm. You can serve them at this point or you can drizzle with a little extra coconut paste for a decorative finish.
Kitch'n Thyme https://kitchnthyme.com.au/

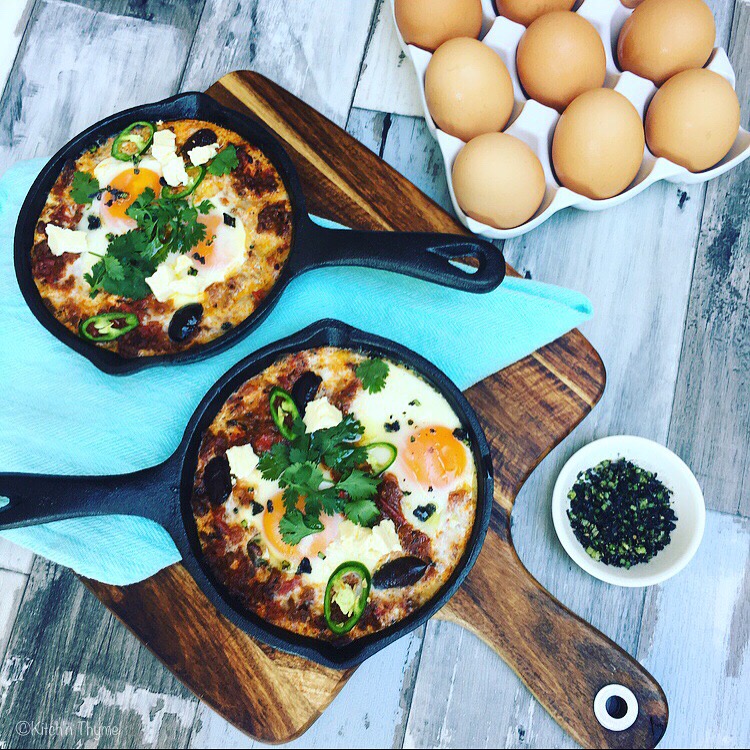
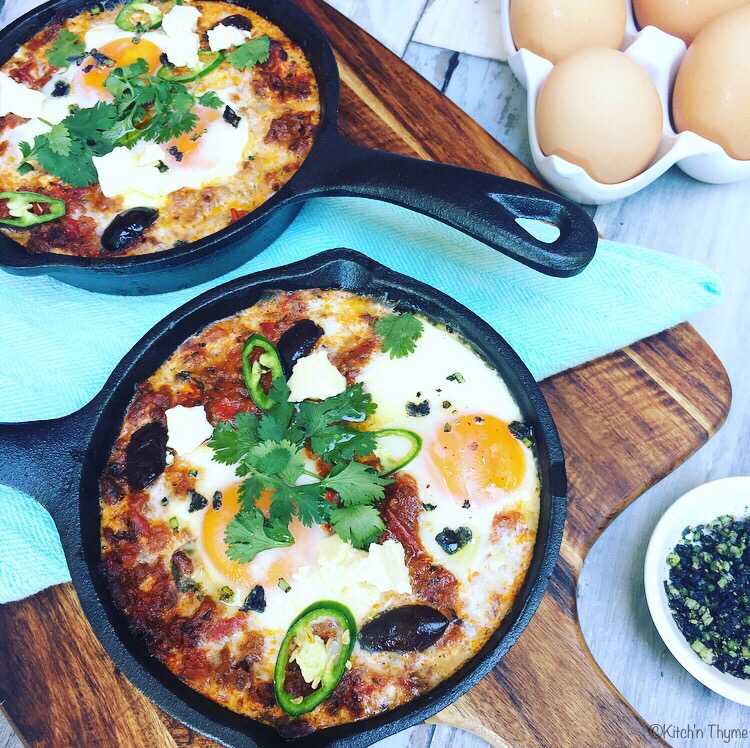
Organic Italian Shakshuka w Coriander Pepper Black Salt

Shakshuka
Ever wondered what to do with that leftover bolognaise sauce? Turn it into these gorgeous baked eggs! I love baked eggs! It’s such a lovely way to eat eggs when you’re bored of fried, poached and scrambled! With all the other wonderful flavours combining with runny yoked eggs there’s not much not to love! and packed with veggies, herbs, olives and topped with feta etc they make the perfect start to any day! My kids even love this and that’s a winning start to the day being packed with great nutrition for growing minds!

I’ve made many versions of baked eggs over the years! When I worked at the health retreat fulltime I used to make a delicious creamy spinach baked eggs, or sometimes a beautiful Moroccan capsicum & lamb sausage shakshuka! I’m salivating right now thinking about the options!

I was dreaming this morning of serving this with a fresh zesty avocado, finger lime and green chilli salsa! Yum!…But then I realised I had left my bag of finger limes in the fridge at work and the avocados aren’t quite ripe enough! So there…a more simple yet delicious coriander, pepper & black salt had to suffice!

Obviously I did this with leftovers, however I’m going to give you the recipe for my Bolognaise Sauce. It’s totally delicious and well worth making whether for bolognaise sauce or baked eggs!

And no, I don’t cook it in the Thermomix. You see, I ain’t no Chef if I don’t have a pan in ma hand! I seriously love my Thermomix, but there are just some things that must be done on the stove! And for me this is one of them! My Thermomix is my apprentice here, so it does the chopping! I prefer getting a nice caramelisation on the onions and garlic with loads of olive oil for a bolognaise sauce. It’s really important to do this otherwise the onions will be bitter and not reduce their sweetness. I could do it in the Thermo but it will take longer than a frypan where there is more surface area! You can of course leave the Thermomix to cook for longer and eventually you will get a better caramelisation but there’s just something about stirring a pot that I love at times too! Its theraputic! And you know what??? That is AOK! If you like to roast a chook or beef in the oven, then do so, make your gorgeous gravy or a salad in the Thermomix and call it a night. You don’t have to use your Thermomix for everything! If it is helping you in some small way to find more time to do the things you love, save you money, keep you healthier, etc etc then my job is done!

Shakshuka 2

For making my organic lasagne, I don’t mind doing the meat sauce in the thermomix. I don’t mind if that is a bit runnier in consistency. It will continue to cook down and reduce in the oven to get the correct balance of sweetness and flavour.

Ok, so lets get on with it! I must go and remove my toddler from standing on my bench where he is walking softened butter everywhere!….Look he’s only trying to reach the sourdough bread dough! He loves to cook with me!…Yes all day long!….I’ll strive to embrace the chaos today, for oneday they will wake and move mountains! Enjoy!

Organic Italian Shakshuka
Serves 8
My beautiful Bolognaise Sauce leftovers turned into perfect Baked Eggs! Reader Kylie says: "We loved this recipe - the kids devoured it with toast for dipping. A delicious twist to the traditional Bolognese that the whole family will love. Can be made in one big pot for convenience and don't leave off the garnishes as they are essential." The 4 Blades Magazine, July 2016
Write a review
Print
Prep Time
15 min
Cook Time
20 min
Total Time
35 min
Prep Time
15 min
Cook Time
20 min
Total Time
35 min
Bolognaise Sauce
  1. 4 Tbsp Extra Virgin Organic Olive Oil
  2. 2 Brown Onions, halved
  3. 6 Cloves Garlic, peeled
  4. 1 Zucchini, chopped into 3-4cm pieces
  5. 2 Medium Carrots, chopped into 3-4cm pieces
  6. 2 tsp Dried Basil
  7. 2 tsp Dried Oregano
  8. 1 tsp Dried Italian Herbs
  9. 500g Organic Beef Mince
  10. 60ml Organic Red Wine (optional)
  11. 2 Tbsp Vegetable or Beef Stock Paste
  12. 2 Tbsp Tomato Paste
  13. 500ml Roast Tomato Pasta Sauce
  14. 10 Kalamata Olives, pitted and halved
  15. 8 Sundried Tomatoes, roughly cut with scissors
  16. 4 Large Tomatoes, halved
  17. 2 Sprigs Fresh Rosemary
  18. 2 Sprigs Fresh Thyme
  19. 4 Sprigs Fresh Basil or Italian Parsley
Shakshukas
  1. 16 Organic Eggs
  2. Extra Olive Oil for drizzling
  3. 100g Feta Cheese
  4. 1 Green Chilli, sliced on a diagonal
  5. 1/2 Bunch Coriander leaves, for serving
  6. Organic Crusty Sourdough, for serving
Coriander, Pepper Black Salt
  1. 1/2 Bunch Coriander Stalks, sliced very finely
  2. 1 tsp Freshly Ground Black Pepper
  3. 1 Tbsp Black Salt Flakes
Bolognaise Sauce
  1. In a large frypan, heat the olive oil over medium heat. Place the onions into the Thermomix bowl and chop 3 Sec/Speed 7. Add the onion to the pan, cooking for 4-6 minutes or until the onions are translucent and caramelised nicely. Add the garlic and cook for a further minute or two. Just be careful not to burn the garlic as it will become bitter.
  2. Place the zucchini and carrots into the Thermomix and chop 5 Sec/Speed 4-5 (or until fairly finely chopped). Add to the pan and sweat off until translucent.
  3. Add the dried herbs before adding the mince to the pan and stirring, cook for a further 2 minutes or until browned.
  4. Add the wine (if using) and sauté for another 2-3 minutes or until the liquid is reduced.
  5. Reduce the heat to low, add the stock paste, tomato paste, pasta sauce, olives and sundried toms.
  6. Place the fresh tomatoes into the Thermomix and chop 5 Sec/Speed 5 before adding to the frypan and reducing the sauce for 20 minutes.
  7. Towards the end, place the herbs into the Thermomix and chop 3 Sec/Speed 7 or finely chop with a knife. Stir through the sauce to finish.
Shakshuka
  1. Preheat the oven to 200°C and place an even amount of sauce into 8 mini cast iron frypans.
  2. Using a spoon, make indents in the mince, then crack 2 eggs into each mini frypan.
  3. Place into the hot oven and cook for 15-17 minutes or until the whites have just set.
  4. Remove from the oven, drizzle with oil, top with crumbled feta, chilli, fresh coriander and the black salt and serve with crusty bread.
Notes
  1. *This is my full bolognaise sauce recipe which is why it serves 8. I can usually make 3-4 shakshukas with our leftover bolognaise sauce.
  2. * Make my Roast Tomato Pasta Sauce here!
Kitch'n Thyme https://kitchnthyme.com.au/

Paleo Chocolate Raspberry Tarts (Gluten Free, Primal)

Choc Raspb Tarts 2So I can’t really remember the first time I made these delightful tarts, however I do remember one of the most recent times when I made them! It was for my sons 3rd birthday last year! To set the scene a little, I decided to buy year passes to our local zoo, and take along a picnic lunch, a perfect simple birthday cake and these pretty little things!

Well that particular day turned out to be a scorching 30°C day! I got up early before it was that hot, baked a delicious flourless 2 tier chocolate cake, my old recipe that I used to do every week at the health retreat. I topped it with a beautiful dairy free chocolate ganache. Not realising how hot the day would be I poured it on, decorated it with all manner of adorable edible flowers, chocolate shards, raspberries, strawberries and blueberries! It looked a real picture!!….But if only I had one! In it went into the container…we packed up and off we went to the zoo. Off we went into the zoo to catch the croc show and low and behold what did I leave in the car, but the cake!!!!!!

Back to the car after only what seemed like 1/2 an hour and I grabbed that little darling, opened it’s lid….and what did I find??? A great big puddle of slidden, sloppy, melted, ganache drenched decadent deliciousness!!! And with that we sang Happy Birthday Z!! It almost seemed unbelievable, but I assure you there was no fixing that leaning tower of cake puddle! My dearest friends who know how perfectionistic I am, gave me an extra tight squeeze, helped me realise it wasn’t the end of the world…almost…and we just slapped it onto our plates…not it wasn’t even sliceable! What we ate was something delicious, despite its unfavourable looks!

That night I brought the remainder home, chucked it into the Thermomix and chopped it all up, then rolled it into balls and froze them. Oh my word, how a seemingly total disaster can be turned into pure delight. This was one of them! Fudgy, rich, and ultra delicious!
Choc Raspb Tarts
What did end up as pretty as a picture and a total hit were these awesome Choc Raspberry Tarts!!

It’s acutally the filling of the Paleo Chocolate Mango Tart with the base of the Lemon Tart combined with seasonal raspberries on top! Blueberries on top would be just as delish!

So here you are! Enjoy!


Paleo Chocolate Raspberry Tarts
Yields 18
Delicious healthy nutella-like filling topped with juicy sweet raspberries!
Write a review
Print
Prep Time
15 min
Cook Time
15 min
Total Time
40 min
Prep Time
15 min
Cook Time
15 min
Total Time
40 min
Sweet Shortcrust Pastry
  1. 50g Coconut Palm Sugar
  2. 150g Almond Meal
  3. 50g Coconut Flour
  4. 30g Arrowroot
  5. 100g Organic Butter
  6. 1/2 Lemon, zested
  7. 1 Organic Egg, lightly beaten
Filling
  1. 60g Hazelnuts, roasted
  2. 80g Coconut Oil
  3. 80g Coconut Milk
  4. 120g Maple Syrup (approx. 5 Tbsp)
  5. 50g Raw Cacao Powder
  6. 1 tsp Vanilla Essence
  7. pinch salt
  8. 250g Fresh Raspberries
Pastry
  1. Place the sugar into the Thermomix bowl and mill 10 Sec/Speed 9.
  2. Add the almond meal, coconut flour, arrowroot, butter and lemon zest to the bowl and blend 10 Sec/Speed 6.
  3. Add the egg and Knead 15 Sec.
  4. Wrap in plastic wrap, flatten, and place in the refrigerator for 30 minutes to chill.
  5. Preheat the oven to 160°C.
  6. Once the dough is chilled, roll out to 2-3mm thickness between 2 sheets of baking paper.
  7. Peel off the top sheet of baking paper, and using an 8cm round pastry cutter, cut 18 circles from the pastry. You may need to re-roll to get the 18 circles.
  8. Place the cut circles back into the fridge for 5 mins to firm slightly before pressing into 7cm fluted tart shells. Neatly trim the tops and if there are any tares, just use a little of the excess dough to carefully patch it, being careful to maintain an even thickness.
  9. Bake in the preheated oven for 15 minutes or until golden brown.
  10. Remove from the oven, let sit in the moulds for 5-10 minutes before removing to a wire rack to cool completely.* (They will feel very soft as soon as you take them out of the oven but as they cool, the base will harden. If the underside of the bases still feels a little damp once cool, you can turn them upside down and return to the oven for 5 or so minutes to dry out a little further.)
Filling
  1. If you need to roast the nuts, place onto a baking tray and roast for 10-15 minutes on 180°C. Let cool before using your hands to rub the nuts together to get rid of the skins.
  2. Place the hazelnuts into the Thermomix and mill 10 Sec/Speed 9.
  3. Add all the remaining ingredients and cook 2 Mins/50°/Speed 3.
  4. Pour the filling into the cooled tart shells and set in the fridge for 30 mins before topping each tart with 3 raspberries and returning to the fridge to set firm.
Notes
  1. *They will feel very soft as soon as you take them out of the oven but as they cool, the base will harden. If the underside of the bases still feels a little damp once cool, you can turn them upside down and return to the oven for 5 or so minutes to dry out a little further.
  2. *This is the same filling as I use in my Paleo Chocolate Mango Tart
  3. *This is the same base as I use in my Lemon Tart
Kitch'n Thyme https://kitchnthyme.com.au/

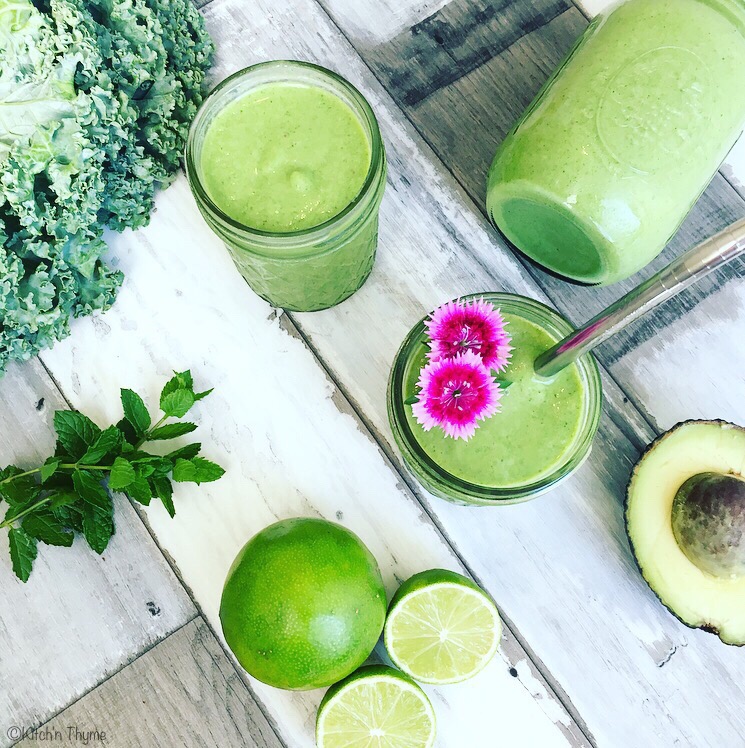
Lime & Coconut Green Smoothie

Green SmoothieGreen Smoothies!!! Ok, I’ve been meaning to get this up on the blog for about a year!…almost 2!!! haha

It should have been 1 of the first things I put up, but I wanted to do a really big post with a number of different flavours, but alas that might be another year away, so without further ado, I present you with one of the best green smoothies you will ever drink!!

We make them all the time in our house, my kids love them!! Well especially my little 17 month old! Mr 3 used to love them too, but he’s a little bit hit and miss these days! But alas that is fickle kids for you! Today he will drink a few sips and tomorrow he’ll drink a whole cup! The best thing I can do is to keep offering healthy food, it will pay off!

The key to a good or should I say great green smoothie is citrus, mint and parsley! These flavours disguise the strong flavour of spinach or kale and make it much more palatable. My favourite is lime, however orange, blood orange, lemon or grapefruit are also great!

Another essential ingredient in a green smoothie is avocado for creaminess! It is so much better with it!

Ice is also really important! The colder the smoothie the nicer it will be!

This is a bit strange but drinking through a straw also makes a green smoothie extra delicious! Try it and I’m sure you’ll know what I mean!

Here is a basic Green Smoothie guide:

Choose 400ml Base: Almond/Nut Milk, Coconut Cream/Milk, Coconut Water
Choose 100-200g Leafy Greens: Spinach, Asian greens, Cucumber, Zucchini, Celery
Choose 1 Citrus: Lime, Lemon, Grapefruit, Orange, Blood Orange
Choose 200-300g Fruits: Berries, Pineapple, Papaya, Mango, Peaches or Nectarines
Choose 1-2 Tbsp Thickeners: Chia or Hemp Seeds, Nut Butters
Choose a Power Up Booster: Mesquite, Lucuma, Maca Powder, Raw Cacao Powder, Medjool dates, Coconut oil, Acai, Cinnamon, Vanilla, Green Powders, or Protein Powders.

There are lots of others but this gives you a guide to go and create your own delightful flavours!

If you haven’t tried a green smoothie before, then give this one a go! It’s such a fabulous way of getting greens into the diet and is such a wonderful way to start the day! Adding some protein powder also makes it a perfect change to eggs for breakfast if you’re heading out the door and in a hurry!

Lime & Coconut Green Smoothie
Yields 1
Fresh, zesty, delicious green smoothie to start your day!
Write a review
Print
Prep Time
3 min
Total Time
5 min
Prep Time
3 min
Total Time
5 min
Ingredients
  1. 150g Frozen Bananas
  2. 1 Green Apple, cored & quartered, or Kiwi Fruit or Pear
  3. 1/2 Avocado
  4. 1 Lime, half skin removed
  5. 100g Ice
  6. 250ml Coconut Water
  7. 150ml Coconut Cream or Milk
  8. 4 Sprigs Fresh Mint, leaves only
  9. 4 Sprigs Fresh Italian Parsely, leaves only
  10. 1/2-3/4 Bunch Kale, de-veined
  11. 1 Tbsp Maple Syrup (optional)
Instructions
  1. Place all the ingredients into the Thermomix bowl and blend 1 Min/Speed 9.
  2. Pour into glasses and serve immediately.
Notes
  1. You can use water in place of the coconut water, but I do suggest adding the coconut cream/milk as it will make it nice and creamy.
Kitch'n Thyme https://kitchnthyme.com.au/

Sarah’s Paleo Nutella Cake

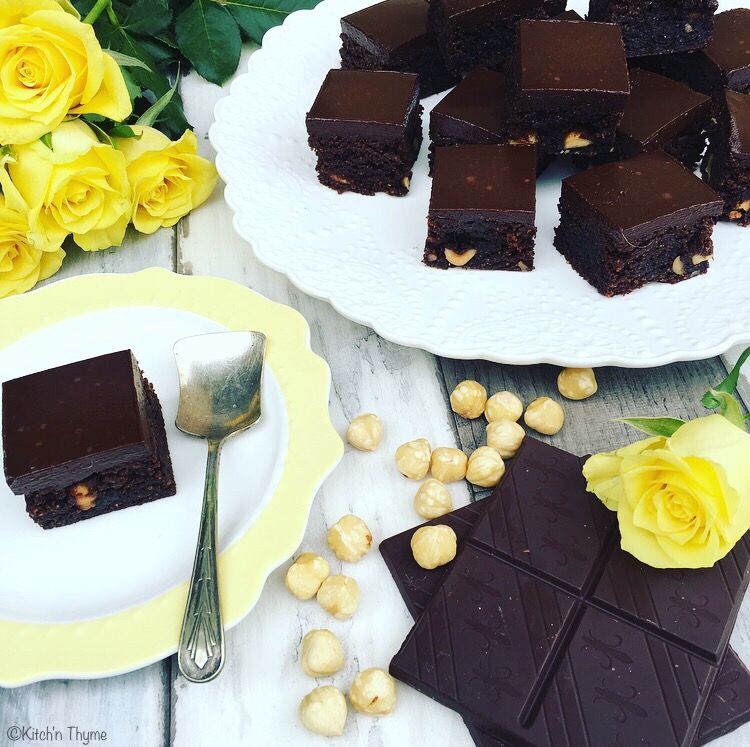
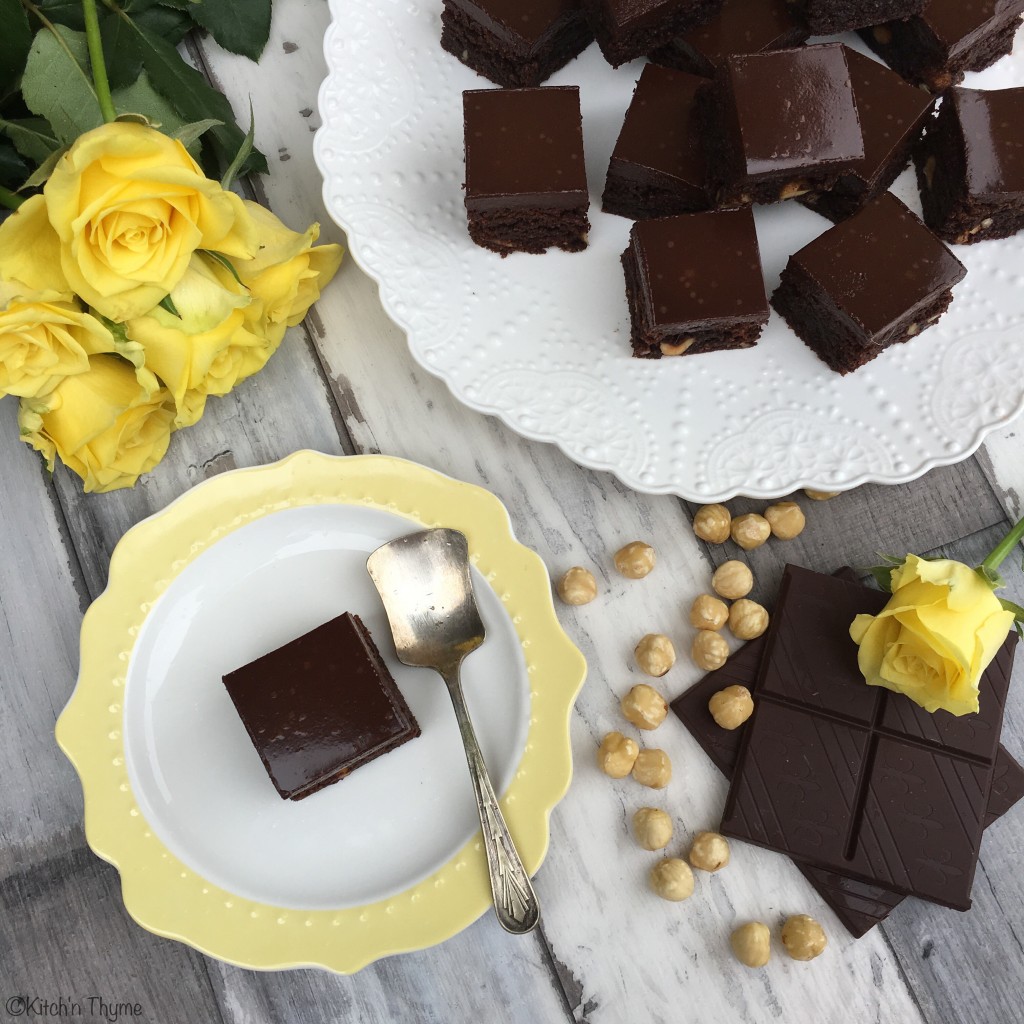
Nutella Cake 2Oh THIS!!!!! Yes this cake will suffice every single naughty nutella craving and every single chocolate craving!

It’s rich, decadently fudgy, brownie-like and yet delightfully healthier than a cake made with jarred crap!

The Nutella part is not that yucky stuff off the shelf! (Sorry if I offend any Nutella lovers!!) But I make my own healthier chocolate-hazelnut spread and use that in place! So if you can forget that it’s not out of a packaged jar, and delight yourself in the flavours that make you think all things nutella, I can tell you that you won’t be disappointed!!…And neither will your body! Shop bought Nutella is full of all sorts of trans-fats, white sugar and who knows what other junk! This is a much better option!!

In the title I’ve stated that it’s Paleo, now in my nutella recipe I do use organic butter as opposed to coconut oil, so more Primal than Paleo, and I do use Organic Dark Chocolate. If you want it to be completely Paleo, then use a dairy free dark chocolate of your choice.

So a bit of history, this gorgeous cake originates from my beautiful sister-in-laws kitchen. Sarah is a wonderful homely cook for her family. Her kitchen always smells of beautiful stocks simmering on the stove, hearty, flavoursome family meals and the sweet aroma of baked cakes or sweet delights! Oh and of course the fermenting crocks of kombucha and marinating feta! And albeit most of it is gluten free and grain free! 

We just love to cook together. With families to feed our individual homes centre much around the kitchen, and with our similar cooking styles, we have loads of fun when we get together!

Nutella Cake

This cake is best served straight from the fridge. You can leave it out, however the nutella softens and the cake texture is more like a cake. I prefer the more set nutella texture and that real fudgy brownie-like crumb!

Print

Sarah’s Paleo Nutella Cake

Deliciously fudgy healthy nutella cake perfect for just about any occasion!

  • Author: Kitch'n Thyme
  • Prep Time: 30
  • Cook Time: 30
  • Total Time: 60
  • Yield: 30

Ingredients

NUTELLA

  • 60g Roasted Hazelnuts
  • 75g Coconut Palm Sugar
  • 100g Organic 70% Dark Chocolate (Use Dairy Free for complete Paleo)
  • 100g Almond Milk
  • 70g Butter or Coconut Oil
  • 30g Raw Cacao Powder
  • 1 tsp Vanilla Essence

CAKE

  • 250g Cashew Butter
  • 160g Rice Malt Syrup
  • 100g Coconut Oil
  • 500g Nutella, plus extra for icing (Double batch of the above recipe)
  • 200g Almond Meal
  • 60g Coconut Flour
  • 2 tsp Baking Soda
  • 2 tsp Vanilla Essence
  • 120g Roasted Hazelnuts, halved

Instructions

NUTELLA

  1. Place the sugar into the mixing bowl and mill 10 Sec/Speed 9.
  2. Add the hazelnuts and mill 8 Sec/Speed 9.
  3. Add the dark chocolate and mill 10 Sec/speed 9.
  4. Add all the remaining ingredients and cook 6 Mins/60°/Speed 3.
  5. Place into jars and store in the fridge or set aside in a large bowl for use in the cake.

CAKE

  1. Begin by making a double batch of nutella. Set aside.
  2. Preheat the oven to 170°C and grease and line a large rectangular baking tray.
  3. If you need to make your own almond meal simply place 200g almonds into the bowl and mill 8 Sec/Speed 9. Set aside.
  4. If you need to make your own cashew butter, add 250g cashews to the mixing bowl. Mill 15 Sec/Speed 9. Scrape down the sides and continue 20 Sec/Speed 5 or until a nice nut butter consistency forms.
  5. Add the rice malt syrup & coconut oil and mix 1 Min/50°/Speed 3.
  6. Add the nutella (500g only) and mix 10 Sec/Speed 5. (Keep the excess nutella aside for icing later.)
  7. Add the almond meal, coconut flour, baking soda and vanilla and mix together 30 Sec/Speed 6. (As the mixture gets very very thick at this point, during this 30 seconds, you may like to get your spatula in through the mixing bowl lid to help stir the mixture through.)
  8. Add the hazelnuts and stir into the thick batter with a spatula. Pour into the prepared baking tray and bake for 30 minutes until golden brown and a skewer inserted comes out just clean. Leave the cake to cool in the baking tray for 1 hour.
  9. Spread the remaining nutella evenly over the cake. Tap the tray down gently on the bench to smooth out the icing and then place into the fridge to set.
  10. Once set, remove and slice into 30 squares (5 x 6) or 24 (4 x 6) larger squares and serve.

Notes

  • This cake will keep in the fridge well for up to a week or can be frozen. Perfect for lunchboxes.

Basil Mayo

Basil Mayo
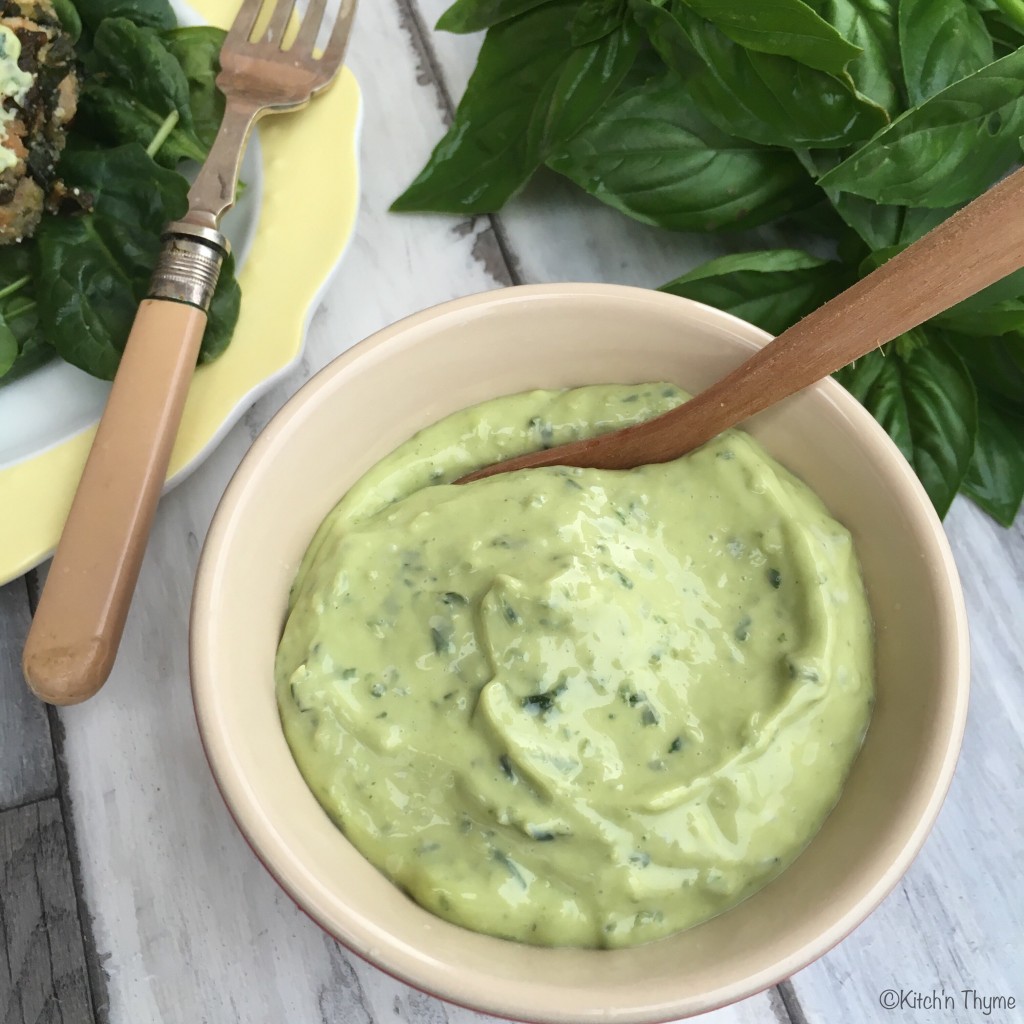
This basil mayo is such a simple but a goodie!

It goes with just about everything, from a burger to a green potato salad!

Have it ready to go in the fridge and serve with rissoles, as a dip, with crumbed chicken or fish, croquettes etc etc etc!

With loads of basil in season it’s the perfect thing to make!

It’s really so simple. Just blitz up fresh basil leaves and then continue like you ordinarily would to make fresh mayonnaise!

Enjoy!!


Basil Mayonnaise
Delicious fragrant basil mayo!
Write a review
Print
Prep Time
5 min
Total Time
5 min
Prep Time
5 min
Total Time
5 min
Ingredients
  1. 1 Garlic Clove
  2. 1/2 Bunch Basil, leaves only
  3. 2 Egg Yolks
  4. 2 tsp Dijon Mustard
  5. 2 tsp Lemon Juice
  6. 1/2 tsp Celtic Sea Salt
  7. 250g Avocado, Macadamia or Rice Bran Oil
Instructions
  1. Place garlic and basil into Thermomix mixing bowl and chop 3 Sec/Speed 7. Scrape down sides of bowl and repeat again if necessary.
  2. Place a jug on top of the Thermomix lid and weigh 250g oil and set aside.
  3. Insert Butterfly. Add the egg yolks, mustard, lemon, salt and pepper and mix 20 Sec/Speed 4.
  4. With the butterfly rotating on Speed 4 and MC in place, pour the oil onto the mixing bowl lid somewhat gradually. Add oil slowly to start with and then faster as the mayonnaise starts to emulsify.
  5. Place into a jar and keep in the refrigerator for up to 3 weeks.
Kitch'n Thyme https://kitchnthyme.com.au/

Chia & Almond Fruit Bread

Chia

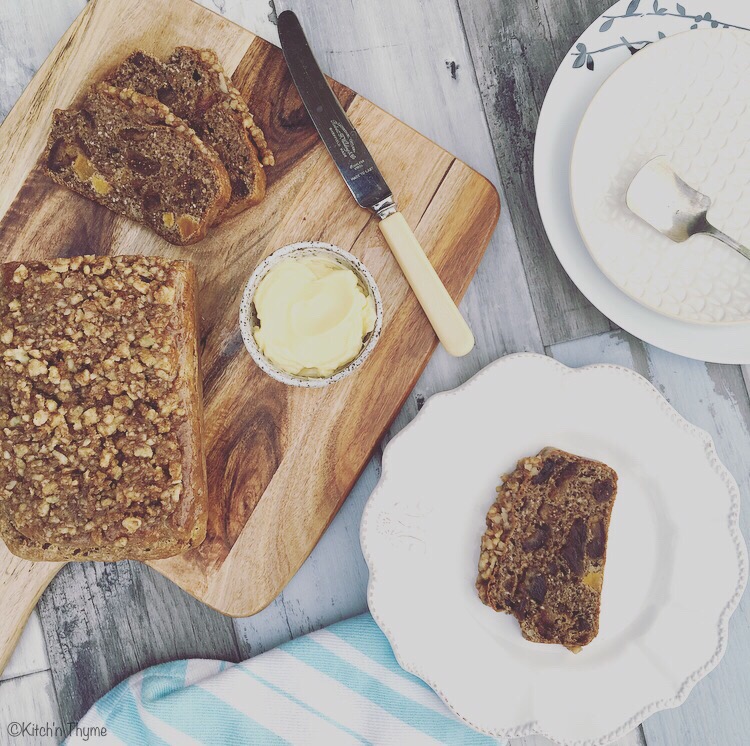
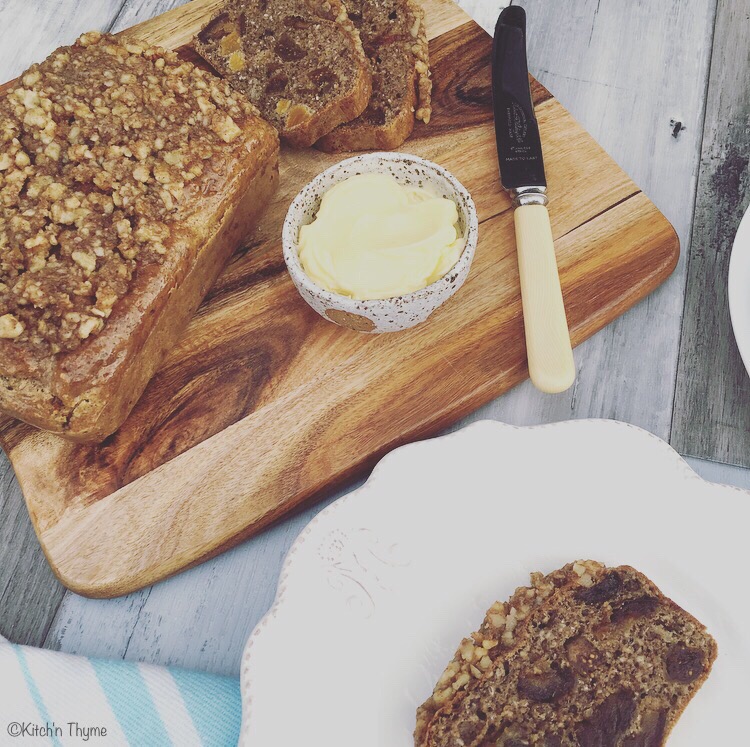
I started making the basic version of this bread from Tania Hubbard a while ago and absolutely love it! I’ve made it so many times and have often added sundried tomatoes, feta or cheddar, chives, basil and parsley to the mix for the perfect Mediterranean bread! It’s amazing!

Well recently I was in the kitchen with my good friend from Desperate Healthwives and we got cooking and came up with this one! How delicious is it!!! Well, I mean you probably aren’t too sure as you havent made it yet, but I highly suggest you just get straight off here and go and make it! It’s so quick and sooooo delicious!!

Chia & A Fruit Bread

Gluten free, paleo, vego, whatever diet you follow you are pretty sure to like this one!!

You can substitute some of the dried fruit for extra nuts in the bread. I actually love nuts in there and forgot to add them when I made this loaf, so that’s how the topping came along!

The topping is really delicious!! I really suggest making it! If you’re dairy free, just leave out the butter and sub with a tsp or 2 of coconut oil.

How gorgeous would the be as part of a Christmas breakfast or brunch or with a cheeseboard and berries! Yummo! xx

Chia & Almond Fruit Bread
This is a gorgeous take on a beautiful gluten free, grain free bread....and would be perfect for Christmas breakfast!
Write a review
Print
Prep Time
20 min
Cook Time
35 min
Total Time
55 min
Prep Time
20 min
Cook Time
35 min
Total Time
55 min
Ingredients
  1. 100g Almonds
  2. 80g Arrowroot
  3. 1 tsp Bicarb Soda
  4. 1 tsp Cinnamon
  5. 1/2 tsp Allspice
  6. pinch celtic salt
  7. 3 Organic Eggs
  8. 2 Tbsp Apple Cider Vinegar
  9. 2 Tbsp Chia soaked in 30ml Water
  10. 1/2 Lemon, zested
  11. 50g Dried Figs
  12. 50g Dried Apricots
  13. 50g Medjool Dates
  14. 50g Walnuts
  15. 20g Butter
  16. 20g Maple Syrup
  17. 1/8 tsp Cinnamon
Instructions
  1. Preheat the oven to 175°C. Grease and line a loaf tin with baking paper.
  2. Place the almonds into the Thermomix and mill 10 Sec/Speed 9.
  3. Add the arrowroot, spices, bicarb and salt and mix 10 Sec/Speed 5.
  4. Add the eggs, vinegar, chia & lemon zest and mix 10 Sec/Speed 5.
  5. Add the dried fruit and mix 5 Sec/Speed 3/Reverse.
  6. Pour into the prepared loaf tin and bake 30-35 Mins or until golden brown and cooked through.
  7. Place the walnuts, butter, maple syrup and cinnamon into the Thermomix and combine 5 Sec/Speed 2.5.
  8. Spread the mixture evenly onto the top of the bread and bake for a further 5 minutes.
  9. Cool completely on a wire rack before serving with butter!
Adapted from Tania Hubbards Chia & Almond Bread
Kitch'n Thyme https://kitchnthyme.com.au/

Roast Tomato Pasta Sauce

You won’t ever buy a jar of pasta sauce again!!! Delicious lick the spoon type scenario right here!
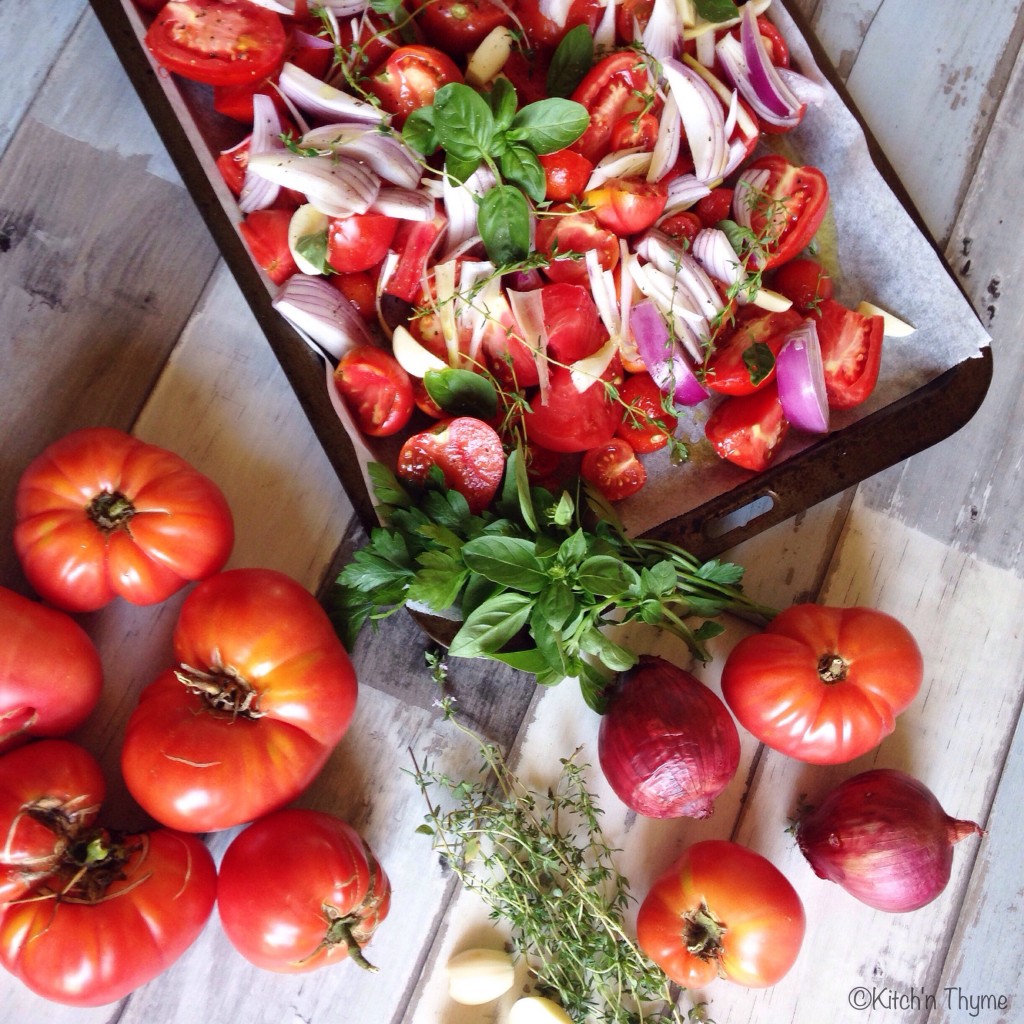
**January 2019 update!** This recipe was originally posted in November 2015. I really felt that the photos needed updating, so i’ve rephotographed the finished product. All the ingredients remain the same! The story below and one photo of before it’s cooked is as it was from 3 years ago (I coudn’t delete that pic as it has the heirloom tomatoes from my bumper garden crop that year🙈)!!**

Alrighty! For those of you who haven’t stopped buying jars of Dolmio or some Organic pasta sauce, then now’s the time to stop!!!

Look no further than THIS post! And make sure you continue scrolling to the bottom – save, pin, print the recipe….just make sure you have it ready for when you’re needing to make a batch of sauce!

I do this sauce partly in the oven and partly in the Thermomix. Roasting the tomatoes and aromatics first gives a much better end product. It gets the onions a little caramelised, sweeter, the tomatoes sweeter and the garlic roasts up and gets a beautiful depth of flavour to it!

Roast Tomato Pasta Sauce 2

If you don’t have a Thermomix, you can do the second step of cooking them down on the stove, and blending over so lightly at the end.

If you blend a tomato sauce on too high a speed it will turn the sauce orange. So to keep that beautiful rich red colour you mustn’t whiz it too much!

I add some Passata in this recipe. You will find that you will get a much better sauce if you use some Passata in addition to fresh tomatoes, rather than using more crushed or fresh cut tomatoes. Passata is made from tomatoes that have been picked at the best time of the year, when they are at their ripest and most full in flavour, it’s pureed and is then strained of skin and seeds and bottled to preserve for sauces throughout the year.

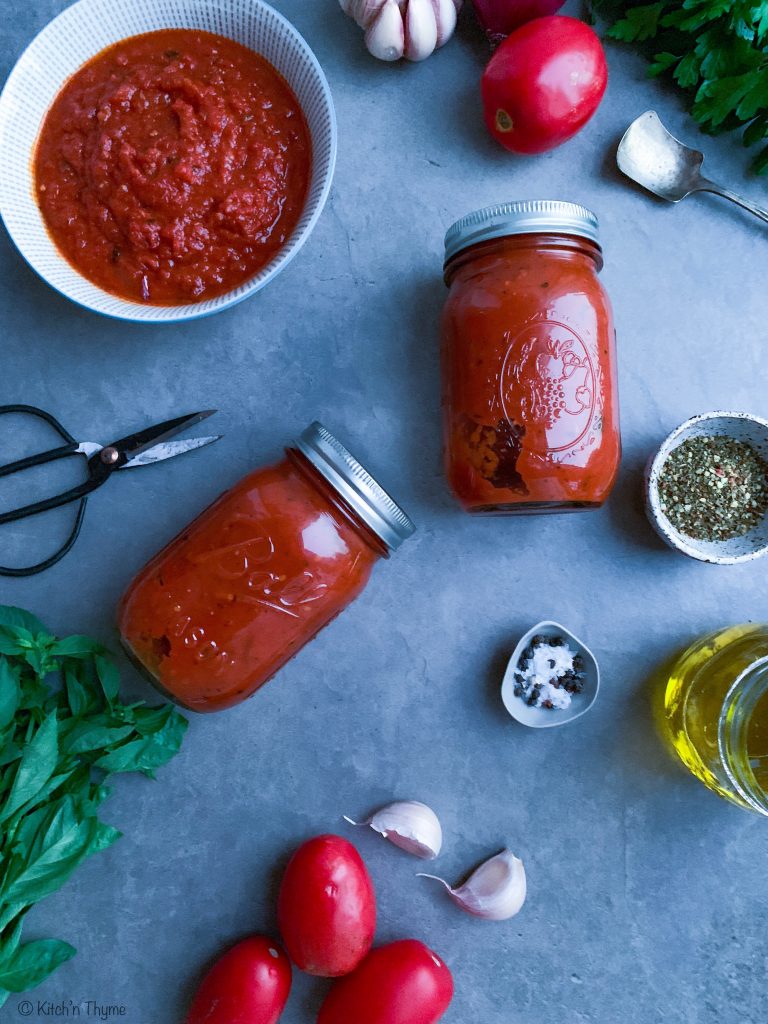
 This recipe makes 2 Litres. I make a batch and preserve it in 500ml portions in my Mason Ball jars and then store in the pantry like I would bought pasta sauce.

Print

Roast Tomato Pasta Sauce

Beautiful flavoursome pasta sauce to bottle up as pantry stock! Reader Kylie says: “Wow – such intense tomato flavour. This recipe will become a staple in our house. The roast tomatoes and veg make this amazing!”

  • Author: Kitch'n Thyme
  • Prep Time: 10
  • Cook Time: 120
  • Total Time: 130

Ingredients

  • 2kg Tomatoes
  • 2 Medium Red onions, sliced
  • 6 Cloves Garlic
  • 4 Sprigs each Thyme, Basil, & Italian Parsley
  • 4 Tbsp Olive Oil
  • Salt, pepper
  • 500ml Passata (You can add the whole 700ml bottle if it will fit in the Thermomix)
  • 100g Tomato Paste
  • 50g Honey
  • 20g Olive Oil
  • 2 tsp Celtic Salt
  • 2 tsp Lemon Juice
  • 2 tsp Italian Herbs
  • 1 tsp Garlic Powder
  • 1 tsp Onion Powder

Instructions

  1. Preheat the oven to 180°C and line 2 large baking trays with baking paper.
  2. Boil the kettle. Cut a small cross into the base of the tomatoes and place them into a large mixing bowl and cover with boiling water. Leave for 1-2 minutes to soak, before peeling the skins off and cutting into quarters.
  3. Place the tomatoes, onions, garlic, fresh herbs, olive oil, and a generous sprinkle of salt and pepper onto the prepared baking trays. Give a really good toss then spread out evenly on the baking trays and roast 60 minutes.
  4. Place the roasted mixture into the bowl of the Thermomix and add all the remaining ingredients. Cook for a further 60 Mins/100°/Speed 1.
  5. Then once cooked, blend 10 Sec/Speed 5. (Be careful not to go over with the speed or the sauce will go an orange colour.)
  6. Place into airtight jars (mason jars work fabulously as they seal really well) and cool. If you’ve preserved them by getting an adequate seal you can store them in the pantry for months, otherwise you can freeze the sauce in portions in the freezer.