Chia & Almond Fruit Bread

Chia

I started making the basic version of this bread from Tania Hubbard a while ago and absolutely love it! I’ve made it so many times and have often added sundried tomatoes, feta or cheddar, chives, basil and parsley to the mix for the perfect Mediterranean bread! It’s amazing!

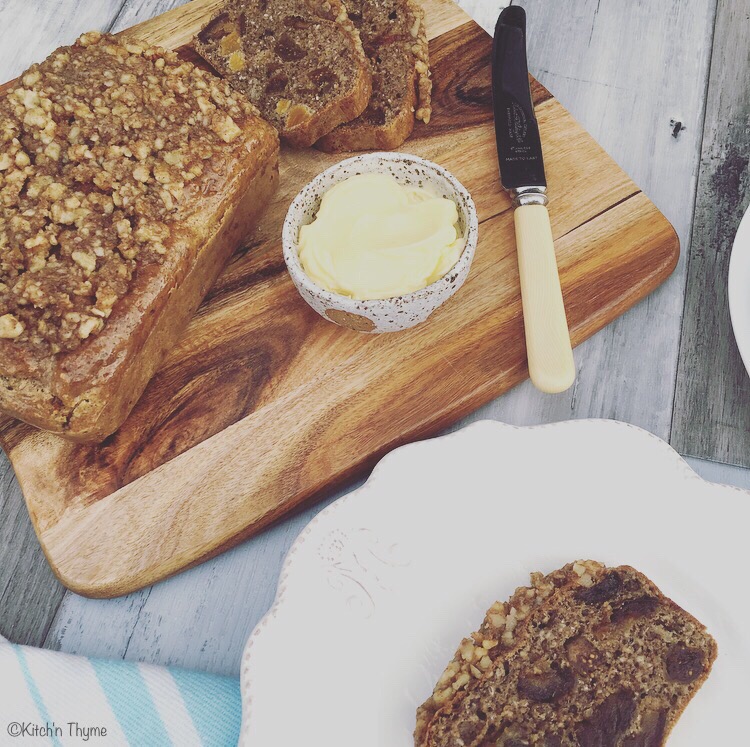
Well recently I was in the kitchen with my good friend from Desperate Healthwives and we got cooking and came up with this one! How delicious is it!!! Well, I mean you probably aren’t too sure as you havent made it yet, but I highly suggest you just get straight off here and go and make it! It’s so quick and sooooo delicious!!

Chia & A Fruit Bread

Gluten free, paleo, vego, whatever diet you follow you are pretty sure to like this one!!

You can substitute some of the dried fruit for extra nuts in the bread. I actually love nuts in there and forgot to add them when I made this loaf, so that’s how the topping came along!

The topping is really delicious!! I really suggest making it! If you’re dairy free, just leave out the butter and sub with a tsp or 2 of coconut oil.

How gorgeous would the be as part of a Christmas breakfast or brunch or with a cheeseboard and berries! Yummo! xx
Chia & Almond Fruit Bread
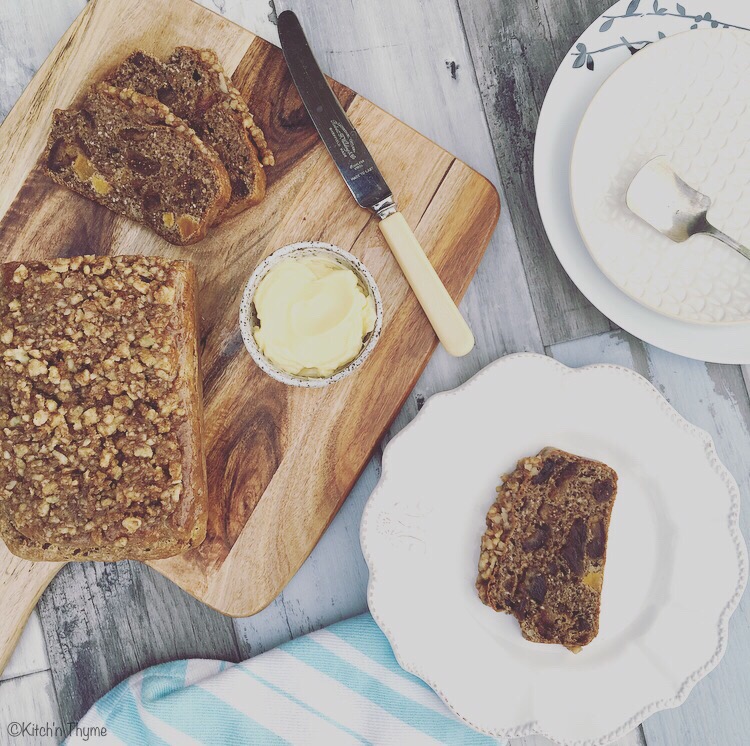
This is a gorgeous take on a beautiful gluten free, grain free bread....and would be perfect for Christmas breakfast!
Write a review
Print
Prep Time
20 min
Cook Time
35 min
Total Time
55 min
Prep Time
20 min
Cook Time
35 min
Total Time
55 min
Ingredients
  1. 100g Almonds
  2. 80g Arrowroot
  3. 1 tsp Bicarb Soda
  4. 1 tsp Cinnamon
  5. 1/2 tsp Allspice
  6. pinch celtic salt
  7. 3 Organic Eggs
  8. 2 Tbsp Apple Cider Vinegar
  9. 2 Tbsp Chia soaked in 30ml Water
  10. 1/2 Lemon, zested
  11. 50g Dried Figs
  12. 50g Dried Apricots
  13. 50g Medjool Dates
  14. 50g Walnuts
  15. 20g Butter
  16. 20g Maple Syrup
  17. 1/8 tsp Cinnamon
Instructions
  1. Preheat the oven to 175°C. Grease and line a loaf tin with baking paper.
  2. Place the almonds into the Thermomix and mill 10 Sec/Speed 9.
  3. Add the arrowroot, spices, bicarb and salt and mix 10 Sec/Speed 5.
  4. Add the eggs, vinegar, chia & lemon zest and mix 10 Sec/Speed 5.
  5. Add the dried fruit and mix 5 Sec/Speed 3/Reverse.
  6. Pour into the prepared loaf tin and bake 30-35 Mins or until golden brown and cooked through.
  7. Place the walnuts, butter, maple syrup and cinnamon into the Thermomix and combine 5 Sec/Speed 2.5.
  8. Spread the mixture evenly onto the top of the bread and bake for a further 5 minutes.
  9. Cool completely on a wire rack before serving with butter!
Adapted from Tania Hubbards Chia & Almond Bread
Kitch'n Thyme https://kitchnthyme.com.au/

Gluten Free Granola

Gluten Free Granola

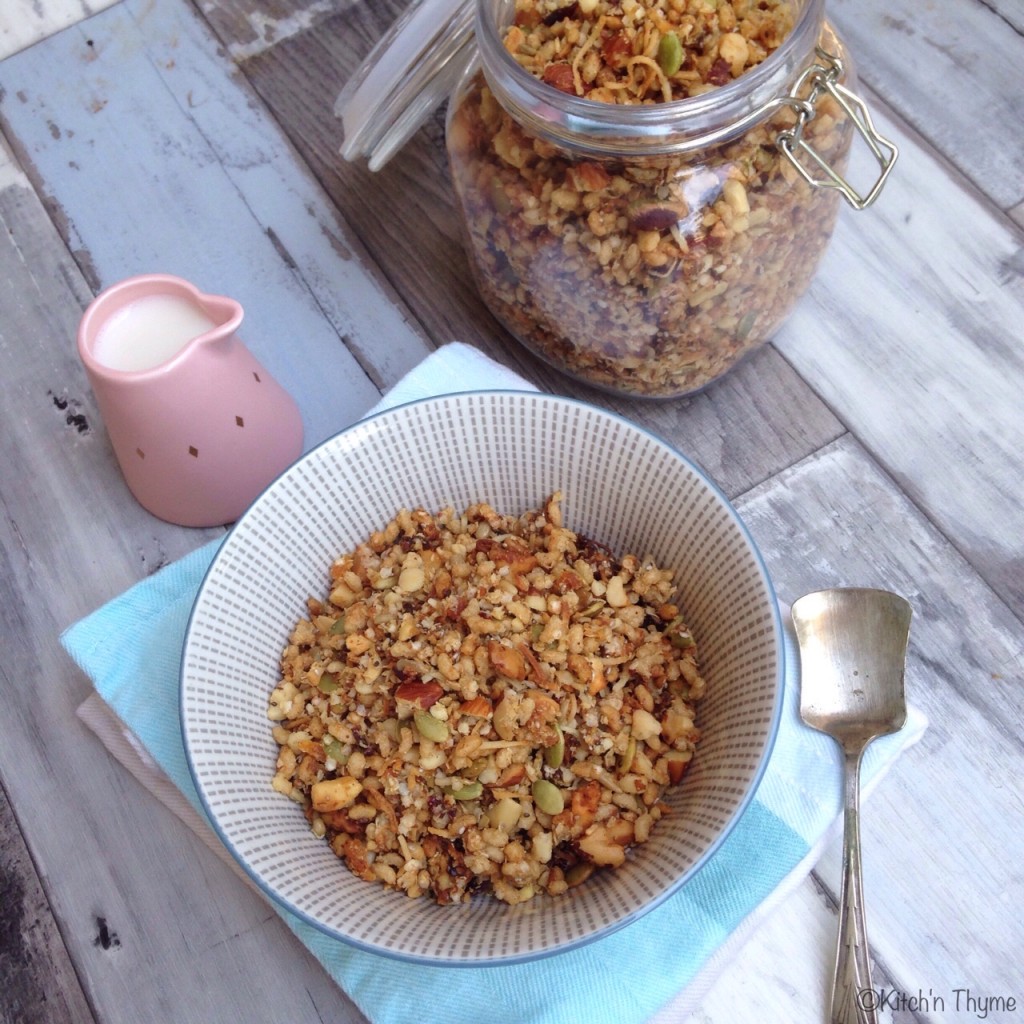
This yummy granola is so satisfying you will barely notice it’s any different to ‘normal’ granola!

Filled with nuts, dried fruit, coconut, quinoa & rice and mixed together with the lusciousness of butter and honey, its the perfect fast-food option for breakfast.

The quinoa flakes increase the protein content and create a really lovely flavour once baked.

Gluten Free Granola 2

You can leave some of the fruit out if you are watching the fructose sugars, but some in there is nice.

You can use coconut oil in place of the butter if you want it completely dairy free too.

I love having granola in the cupboard as a backup for when time is of the essence or eggs are getting a bit monotonous! It’s just delicious with my creamy homemade Almond Milk

Enjoy, Gabrielle xx.

Gluten Free Granola
Nutty, golden, crunchy goodness!
Write a review
Print
Prep Time
10 min
Cook Time
40 min
Total Time
40 min
Prep Time
10 min
Cook Time
40 min
Total Time
40 min
Ingredients
  1. 120g Almonds
  2. 120g Macadamias
  3. 150g Brazil Nuts
  4. 150g Quinoa Flakes
  5. 50g Sunflower Seeds
  6. 50g Pepitas
  7. 30g Chia Seeds
  8. 50g Shredded Coconut
  9. 100g Organic Puffed Brown Rice
  10. 1 tsp Cinnamon
  11. 1/2 tsp Allspice
  12. 50g Cranberries
  13. 50g Dried Dates
  14. 50g Apricots
  15. 150g Organic Butter
  16. 150g Honey
Instructions
  1. Preheat the oven to 180°C. Line 2 large baking trays with baking paper and set 1 aside.
  2. Spread the nuts out evenly over 1 tray and roast for 10-15 minutes.
  3. Place the quinoa, seeds, coconut, rice & spices in a large mixing bowl and stir well to combine.
  4. Place the roasted nuts into the Thermomix and chop 2 Sec/Speed 5. Add to the large mixing bowl.
  5. Place the dried fruit into the Thermomix and chop 3 Sec/Speed 7. Add to the large mixing bowl also.
  6. Place the butter and honey into the Thermomix and cook 2 Mins/50°/Speed 3.
  7. Pour over the dry ingredients and toss well to combine. Spread out evenly over the large baking trays and bake for 15 minutes. Stir well with a spoon and cook for a further 10-15 minutes or until golden brown.
  8. Cool on the trays completely before transferring to airtight containers or jars.
Notes
  1. Serve with your choice of milk, greek yoghurt, coconut yoghurt or atop fresh fruit salad for a nutty crunch!
Kitch'n Thyme https://kitchnthyme.com.au/

Salted Carob Bliss Balls

Carob Bliss Balls3These ones are a recent creation! And they are good!

I’ve used Carob instead of Cacao. Carob is naturally sweeter than cacao and is caffeine free. It’s a great alternative to cacao and has a beautiful sweet, mellow flavour.  You can use Cacao, but I much prefer the carob in these ones, it’s just a perfect flavour with the slight saltiness.

More and more I realise how much I’m going back to my childhood. Carob was the only thing we ate, chocolate was unheard of in our house!…I know deprived! But now I think oh yum carob for a change!

Carob Bliss Balls1

I’ve used part almonds, part sunflower seeds, and I roast both of them. The almonds are easy to do in the oven on about 180° for 15 minutes and the sunflowers are easiest to toast in a frypan over medium heat until golden. You don’t have to roast them if you want them to be completely raw, but I do love the flavour of roasted nuts and seeds!

There is no added sweetener other than the dates. I love this. You could eat a couple for breakfast they are that good!

The little bit of coconut cream adds to the texture and helps bind them too.

 I love having some ready make bliss balls in the fridge at all times so there’s a quick fix snack for lunchboxes or just when there’s a hankering for something sweet.

Salted Carob Bliss Balls
Yields 18
A bliss ball good enough to eat for breakfast!
Write a review
Print
Prep Time
2 min
Total Time
10 min
Prep Time
2 min
Total Time
10 min
Ingredients
  1. 100g Roasted Almonds
  2. 50g Toasted Sunflower Seeds
  3. 4 Medjool Dates, seeds removed
  4. 50g Coconut Oil
  5. 20g (2 Tbsp) Carob Powder
  6. 40g Coconut Cream
  7. 1 tsp Vanilla Essence or Paste
  8. 1/8 tsp Celtic Sea Salt
  9. Desiccated Coconut for rolling
Instructions
  1. Place all the ingredients into the Thermomix and process 10 Sec/Speed 6. Scrape down the sides of the bowl and process a further 10 Sec/Speed 7, or until a nice sticky crumb is achieved.
  2. Roll the mixture into balls and toss through the coconut to coat before placing into the fridge to set.
Notes
  1. If the mixture is a bit too oily to roll easily, place into the fridge to set for 30-60 mins before rolling.
Kitch'n Thyme https://kitchnthyme.com.au/

Apple & Mixed Berry Crumble

Apple & Berry Crumble 2

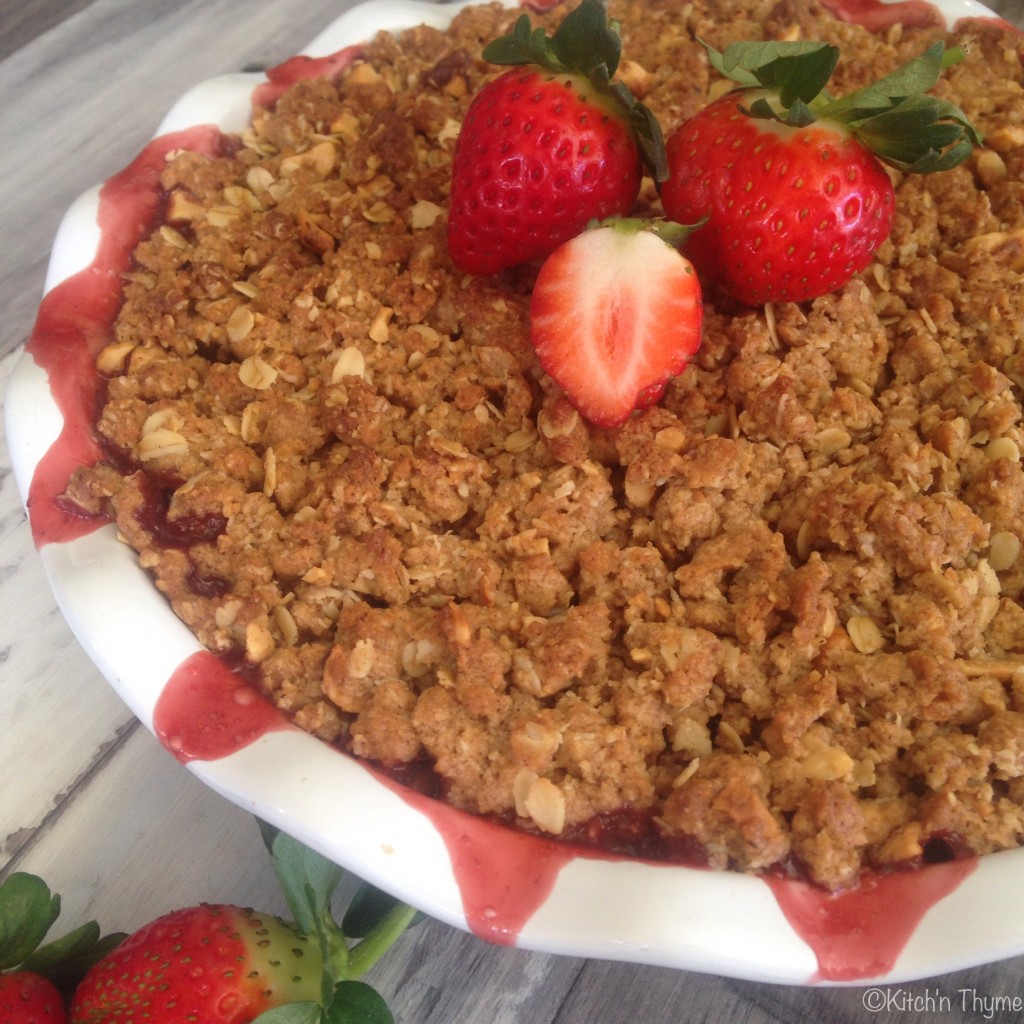
This is an absolute old family favourite! With similarities to the way mum used to make it growing up, I think this crumble is everything you want a crumble to be! Fruit that is perfectly cooked, not completely mushy, and a crumble topping that is biscuity and crunchy, with no sogginess!! Yum!

The Blueberry crumble tarts which were one of the first recipes I put up on the blog are pretty much an extension from this recipe! So if you enjoy/have enjoyed those tarts then I’m sure you will love this crumble.

I use a little coconut sugar in the filling (about 2 Tbsp) just to take the edge of the tartness of the apples. You could replace with a little honey if desired.

The hazelnuts are so delicious in the crumble topping. If you don’t have them, you can use almonds, which are just as delicious. Quite often I’ll do this crumble with pear and apple and the hazelnuts are such a good combination with the pear.

This crumble is best served with Frangelico Crème Anglaise! Naughty I know, but oh so yummy!! I’ll share the recipe for that at some stage. I don’t make it very often these days, as I’ve significantly reduced my dairy intake for a number of different reasons.

You can serve hot or cold with dairy or coconut yoghurt and fresh fruit for breakfast or as a sumptuous dessert with your choice of icecream….healthy homemade I mean!!! Enjoy!!!

Apple & Mixed Berry Crumble
Serves 6
A very old family favourite that makes the perfect breakfast treat or dinner dessert!
Write a review
Print
Prep Time
15 min
Cook Time
40 min
Total Time
55 min
Prep Time
15 min
Cook Time
40 min
Total Time
55 min
Filling
  1. 6-8 Large Granny Smith Apples, peeled & sliced thinly
  2. 300g Organic Frozen Mixed Berries
  3. 40g Coconut Sugar
  4. 1 Lime, juiced
  5. 1 tsp Vanilla Essence
  6. 100ml Water
  7. 2 Tbsp Cornflour (diluted in 2 Tbsp extra water)
Crumble Topping
  1. 40g Roasted Hazelnuts, roughly chopped
  2. 100g Wholemeal Spelt Flour
  3. 50g Rapadura Sugar
  4. 1/2 tsp Baking Powder (Aluminium Free)
  5. 100g Butter
  6. 60g Oats
  7. 40g Desiccated Coconut
  8. 1 tsp ground Cinnamon
Instructions
  1. Preheat oven to 180°C.
  2. Place all the filling ingredients, except the cornflour into a large pot. Place onto a medium heat, cover with a paper *cartouche and simmer for 10 minutes or until the fruit is tender, stirring a couple of times during cooking. (**You can do this step in the Thermomix too, however you may wish to dice the fruit if so as the slices won't remain completely in tact in the Thermomix.)
  3. Pour over the cornflour mixture and stir through quickly and gently with a silicon spatula. Pour into a large pie dish or baking dish.
  4. To make the crumble, place the hazelnuts into the Thermomix and chop 5-10 Sec/Speed 4. Set aside.
  5. Place the flour, sugar, baking powder and butter into the Thermomix and process 10 sec/speed 6 or until the mixture just resembles breadcrumbs. Add the remaining ingredients and the chopped nuts and process 10 sec/speed 4/Reverse or until it just comes together.
  6. Crumble over the apple & berry mixture evenly. Bake for 25-30 minutes or until golden brown.
Notes
  1. *A paper cartouche is just a little round piece of baking paper, used instead of a lid. It keeps the contents submerged and reduces evaporation. You can either use a pen to trace the size you need or fold a square of baking paper in half and half again, then into a triangle and cut at the desired length to get the right sized circle.
  2. ** To make the filling in the Thermomix, place quartered apples into the Thermomix bowl. Chop for 3-4 sec/speed 4. Add all remaining ingredients and cook for 5 min/80C/speed 1/Reverse. Add the cornflour and cook for a further 2 min/80C/speed 1/Reverse.
Kitch'n Thyme https://kitchnthyme.com.au/

Buckwheat Porridge with Figs & Roast Almonds

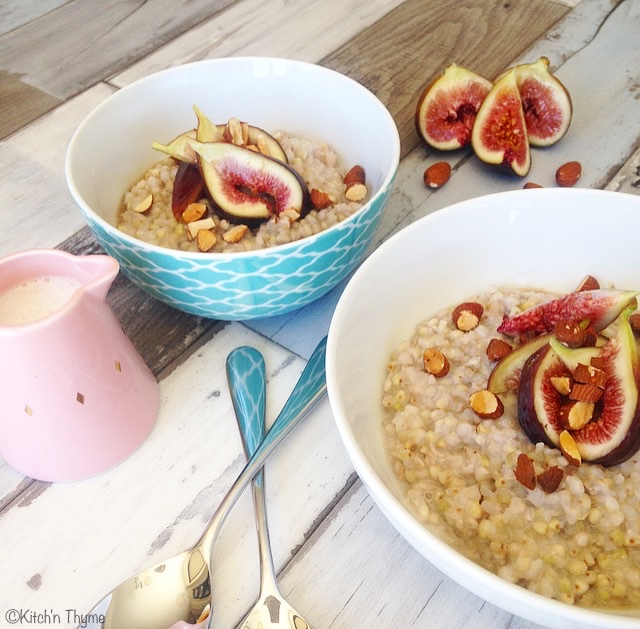
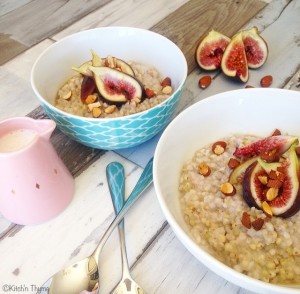
Buckwheat Porridge How gorgeous is this beautiful simple, super quick & easy breakfast! Figs are one of my favourites! I love them! And it’s fig season now and just the time to be using them in your kitchen! I got a beautiful big punnet really cheaply at my local farmers market last weekend…..I just love farmers markets.

There’s just something so wonderful buying produce straight from the farmer! It looks fresher, tastes fresher, stays fresher for longer and is mostly spray free or organic and cheaper! I love that the tops come on the beetroots (we keep them and add them into juices or cook with them!), the beets feel hard and crispy not old and wilted and soft! The silverbeet isn’t wrapped in plastic, it’s vibrant and crisp and ready to chomp on! And the herbs – they are a real size bunch of herbs! Not in teeny tiny plastic packets or a measly few sprigs in a plastic sleeve, these herbs are the real deal, about 3 or 4 times the size!

I could go on and on!!! But I digress…..back to breakfast!!!….But just go and hunt down a local farmers market when you can! Ok!

Buckwheat is a pseudo grain that I grew up on! We would probably eat this breakfast 1-2 a week. Recently it’s come into vogue and is considered a very healthy food. Related to rhubarb, buckwheat is actually the seed of a flowering plant! In some circles it isn’t considered part of a Paleo diet, but it is most definitely Gluten Free and suitable for baking and for the likes of this yummy porridge.

Being high in protein, a rich source of iron, zinc, manganese, copper, magnesium, & fiber, it has many wonderful health properties.

Instead of just typical oats for breakfast, I love to mix it up with using different grains for my family. Growing up, we used to have Millet & Polenta in much the same way. And it is thoroughly delicious also! I’ll post those recipes in another post!

So below I will give you 2 different methods. Growing up my mum didn’t have a Thermomix so I’m showing you the traditional method in the oven. I will say too that I want my children to know how to do things in the traditional methods of an oven or stove, so that they can then appreciate the Thermomix for how fast it truly is! You can also do this buckwheat on the stove, just on a gentle simmer, but you have to make sure you don’t forget it, you’ll need to stir it quite frequently!

Buckwheat - uncoookedBuckwheat cooked     


You will see above the buckwheat ready to go into the oven and then freshly cooked, straight out of the oven and ready to eat! Yum!

Buckwheat Porridge w Fresh Figs & Roasted Almonds
Serves 4
A wonderful Gluten Free alternative to Oat Porridge
Write a review
Print
Prep Time
2 min
Cook Time
20 min
Total Time
22 min
Prep Time
2 min
Cook Time
20 min
Total Time
22 min
Ingredients
  1. 200g Raw Buckwheat Kernels
  2. 550-600g Water
  3. pinch Celtic Sea Salt
  4. 40g Maple Syrup, Honey or Coconut Flower Nectar
  5. 250g Coconut Cream, plus extra for serving
  6. 2 tsp Vanilla Essence
  7. 4-6 Fresh Figs, quartered or cut into eighths
  8. 20g Roasted Almonds, roughly chopped
Thermomix Method
  1. Place the buckwheat, water and salt into the mixing bowl of the Thermomix and cook 20 Mins/100°/Reverse/Speed 2.
  2. Add the maple, coconut cream and vanilla and cook a further 2 Mins/100°/Reverse/Speed 2.
  3. Serve with chopped fresh figs, roasted almonds and extra coconut cream.
Oven Method
  1. Preheat the oven to 180°.
  2. Lightly spray a 1.5L stoneware baking dish with olive oil. Place the buckwheat, water and sea salt in the dish.
  3. Bake for 45-60 minutes or until all the water is absorbed. If you cover with a lid or aluminium foil it will only take 30-40 minutes to cook. I don't have a lid for mine, so I just bake it without.
  4. Remove from the oven. Add the maple, coconut cream and vanilla and stir to combine.
  5. Serve with chopped fresh figs, roasted almonds and extra coconut cream.
Notes
  1. Please note, you can change the consistency of this porridge by adding more or less water, depending on the desired consistency. You can also pre-chop the grains slightly before cooking if you would like it more porridge consistency. I quite like the texture of the individual grains so I like to leave them whole.
  2. You can sub the fresh figs for fresh pairs or bananas, strawberries or any other in season fruit.
Kitch'n Thyme https://kitchnthyme.com.au/

Chocolate & White Mulberry Granola

Choc Mulberry GranolaRather than muesli, this is delicious chunky, crispy, crunchy Granola! Sound good? Then this is for you! Homemade granola is wonderful to have in the house. My memory drifts to when I was a little girl and stood there stirring huge bowls of it! It can be a delicious healthy alternative to sugar laden cereals and great for mornings when you are on the go! The benefit to making it yourself is that you know exactly what has gone into it. Many of the store bought varieties are really high in sugars (especially granolas) and contain unhealthy oils/fats and unnecessary fillers, preservatives and numbers!

This granola is really easy and quick to make. Making it at home gives the you freedom to control what goes into it too. Every fortnight I try to have at least 1-2 food prepping days, which sets us up well with ready-to-eat foods.  These are the sorts of things I will cook on these days. This is a really big batch, it will make around 2.5kg. Depending on the size of your family it should last you a good number of weeks!

I sweeten it with apple sauce and honey. The apple sauce is just apples cooked and blitzed into sauce in 8 minutes with the Thermomix – no other things added! By using apple sauce over apple juice you are eating the fruit in its whole state, with all the fiber, and not just the sugar! The apple sauce also helps to create that chunky granola texture. I always use good quality organic raw honey. Whilst heat treated honey looks prettier and has a longer shelf life, many of the natural minerals, enzymes and antioxidants have been destroyed in the intensive processing. The pollen which is also filtered out has an array of health benefits too. So I always advocate local, raw honey.

Dried fruits contain concentrated amounts of sugars so I try to only put 1 to 2 varieties of dried fruits in. These are a couple of my favourite combinations below.

The addition of nuts and seeds enhances the protein content and delights the tastebuds! Even though the nuts are in the mixture I cook, I do pre-roast the almonds first, because I find you get a better roast on them, when roasted first on their own. You can roast them at 180° for 10-15 minutes.

I’m sharing a couple of my favourite combinations, but you can play around with the ingredients and make your own varieties using the flavours that you love. Enjoy!

Chocolate & White Mulberry Granola
Delicious chunky, crispy, crunchy Granola! Top with yoghurt and a drizzle of honey for a yummy breakfast!
Write a review
Print
Prep Time
15 min
Cook Time
30 min
Total Time
45 min
Prep Time
15 min
Cook Time
30 min
Total Time
45 min
Ingredients
  1. 1.2kg Organic Rolled Oats
  2. 100g Quinoa Flakes
  3. 100g Activated Buckwheat Kernels (optional)
  4. 100g Almond Milk Pulp (or Almond Meal)
  5. 50g Black Chia Seeds
  6. 100g Pepitas (or Pumpkin Seeds)
  7. 150g Sunflower Seeds
  8. 1 Tbsp Cinnamon
  9. 2 tsp Pimento
  10. 120g Macadamias
  11. 120g Roasted Almonds
  12. 500g Apple Sauce
  13. 300g Organic Butter
  14. 250g Honey
  15. 60g Raw Cacao Powder
  16. 1 tsp Vanilla Essence
  17. 50-100g White Mulberries
  18. 100g Coconut Chips
  19. 150g Dates (roughly chopped)
  20. 100g Chocolate Chips - Rapadura Sweetened (optional)
Instructions
  1. Preheat the oven to 180°. Line large baking trays with baking paper and set aside.
  2. Place the oats, flakes, buckwheat, almond meal, seeds, & spices into a very large mixing bowl. Stir to combine.
  3. Place the nuts into the Thermomix bowl and chop roughly 0.5 Second/Speed 6.
  4. Place the apple sauce, butter, honey & vanilla into the Thermomix and cook 2 Mins/50°/Speed 3. Pour this wet mixture over the dry ingredients and using your hands coat all the dry ingredients well.
  5. Place handfuls onto the baking trays, slightly clumping it in your hands as you go. Spread it out fairly thinly and evenly over your trays, and bake for 30-35 minutes, giving a quick stir halfway through.
  6. Remove from the oven and cool on the trays before placing back into the mixing bowl and tossing with the mulberries, coconut, dates and chocolate chips.
  7. Once completely cooled, place into airtight containers or jars and store in a cool, dry place for 2-3 weeks.
Kitch'n Thyme https://kitchnthyme.com.au/

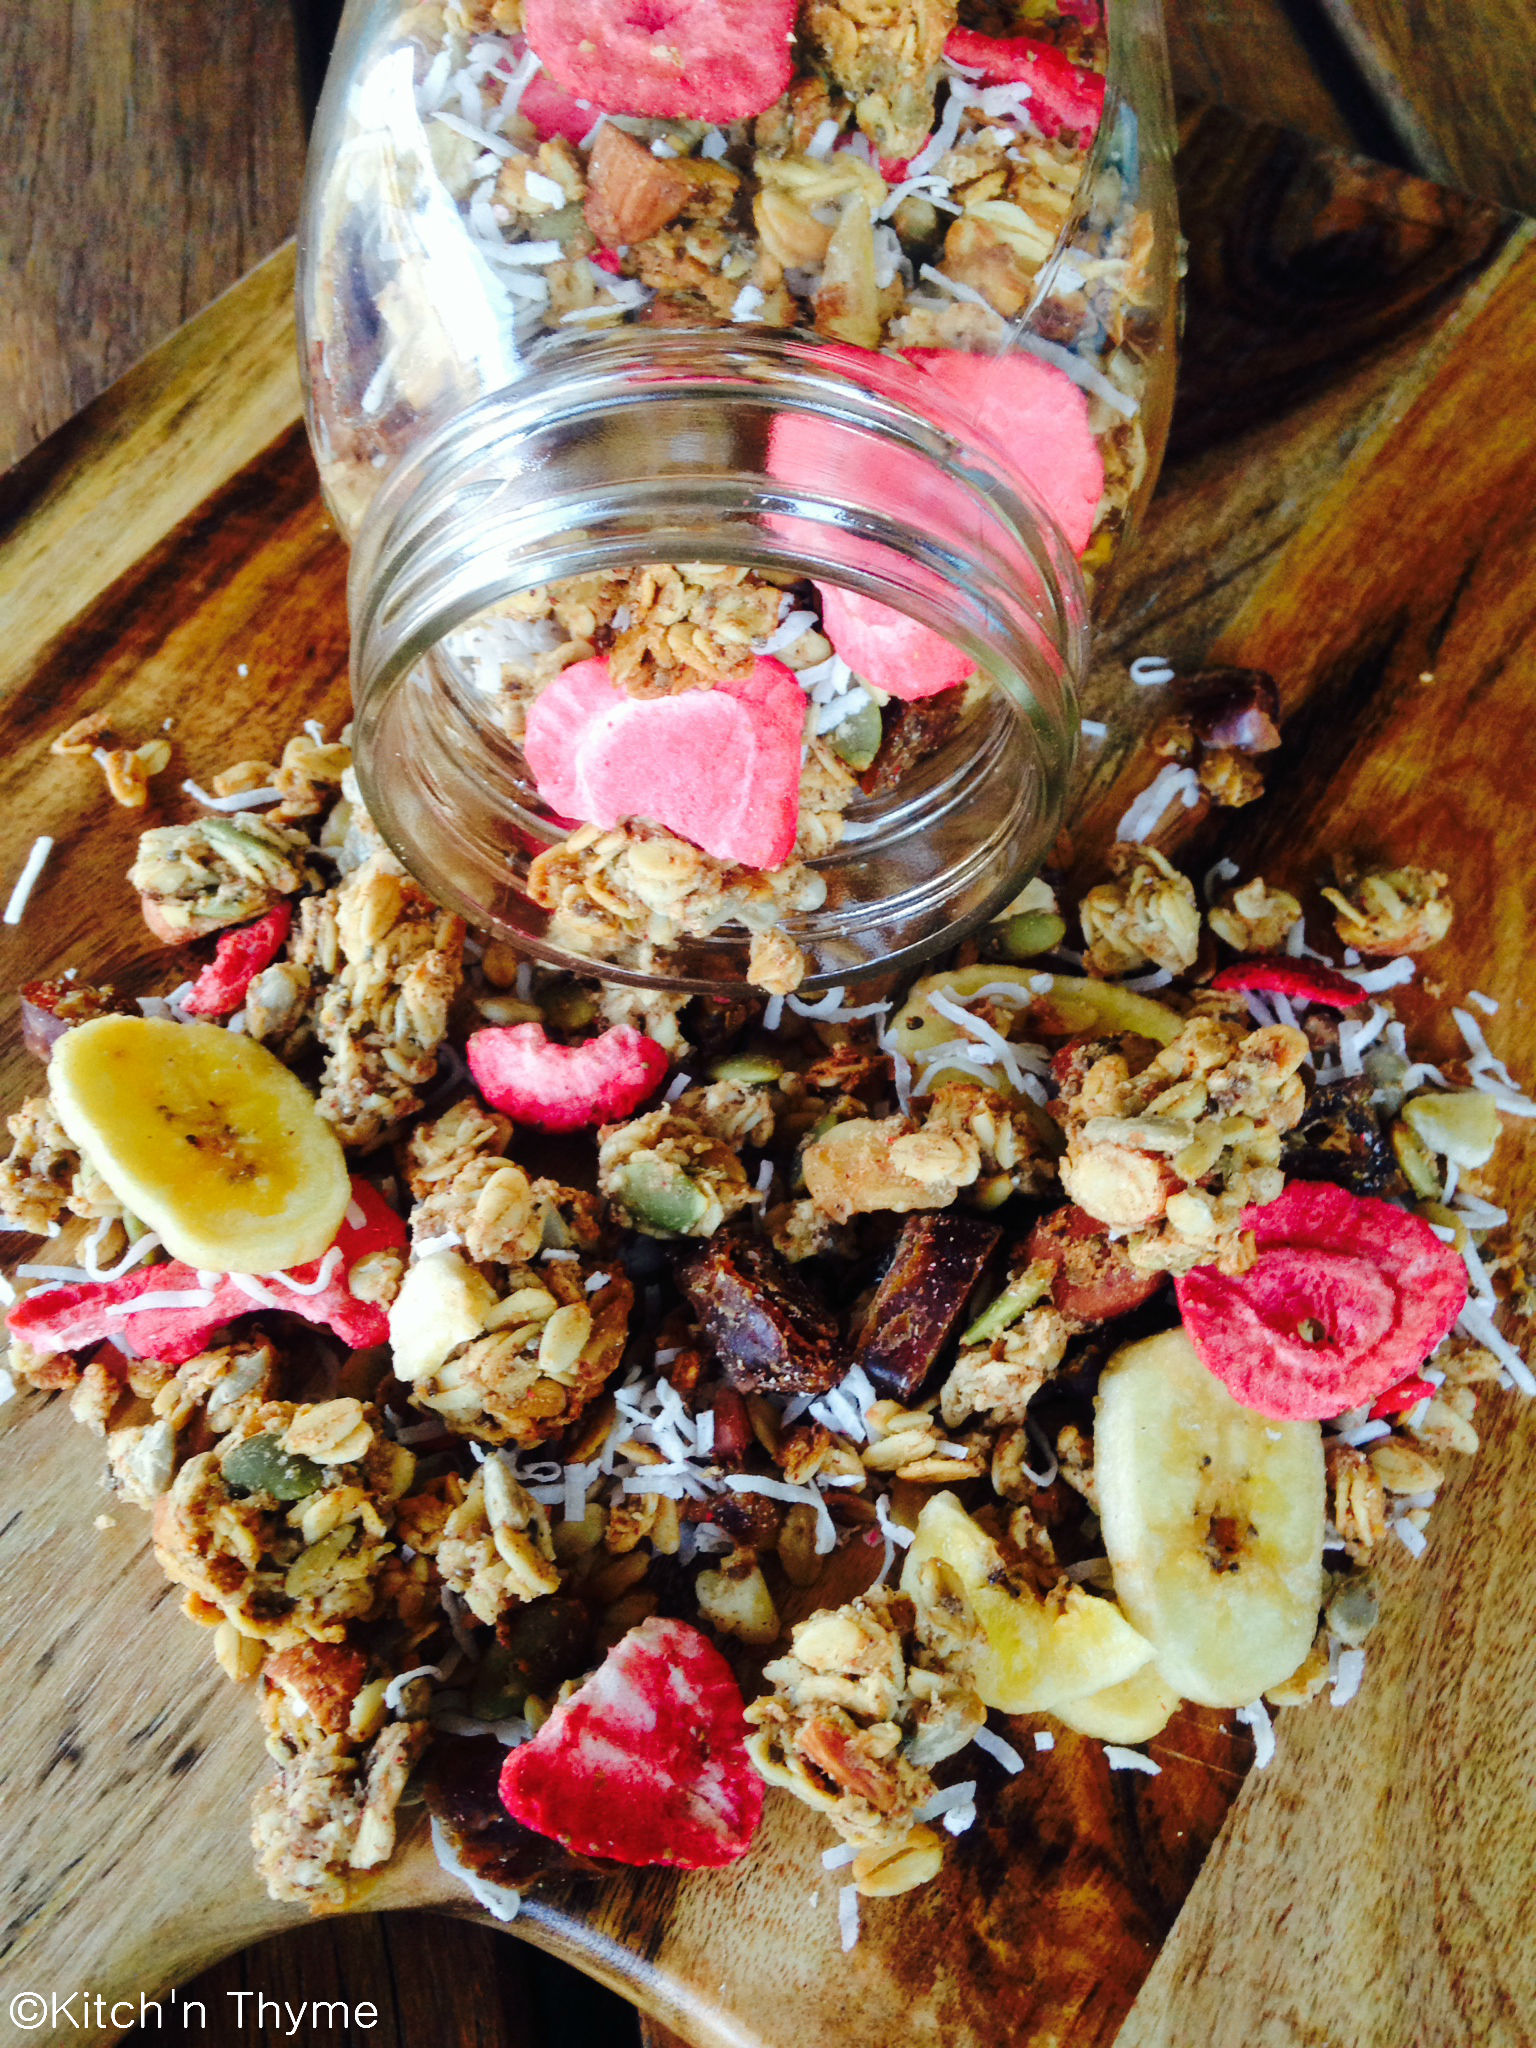
Coconut & Strawberry Granola


Coconut & Strawb GranolaRather than muesli, this is delicious chunky, crispy, crunchy Granola! Sound good? Then this is for you! Homemade granola is wonderful to have in the house. My memory drifts to when I was a little girl and stood there stirring huge bowls of it! It can be a delicious healthy alternative to sugar laden cereals and great for mornings when you are on the go! The benefit to making it yourself is that you know exactly what has gone into it. Many of the store bought varieties are really high in sugars (especially granolas) and contain unhealthy oils/fats and unnecessary fillers, preservatives and numbers!

This granola is really easy and quick to make. Making it at home gives the you freedom to control what goes into it too. Every fortnight I try to have at least 1-2 food prepping days, which sets us up well with ready-to-eat foods.  These are the sorts of things I will cook on these days. This is a really big batch, it will make around 2.5kg. Depending on the size of your family it should last you a good number of weeks!

I sweeten it with apple sauce and honey. The apple sauce is just apples cooked and blitzed into sauce in 8 minutes with the Thermomix – no other things added! By using apple sauce over apple juice you are eating the fruit in its whole state, with all the fiber, and not just the sugar! The apple sauce also helps to create that chunky granola texture. I always use good quality organic raw honey. Whilst heat treated honey looks prettier and has a longer shelf life, many of the natural minerals, enzymes and antioxidants have been destroyed in the intensive processing. The pollen which is also filtered out has an array of health benefits too. So I always advocate local, raw honey.

Dried fruits contain concentrated amounts of sugars so I try to only put 1 to 2 varieties of dried fruits in. These are a couple of my favourite combinations below. The addition of nuts and seeds enhances the protein content and delights the tastebuds! Even though the nuts are in the mixture I cook, I do pre-roast the almonds first, because I find you get a better roast on them, when roasted first on their own. You can roast them at 180° for 10-15 minutes.

Play around with the ingredients and make your own varieties using the flavours that you love. Enjoy!

Coconut & Strawberry Granola
Delicious chunky, crispy, crunchy Granola! Top with yoghurt and a drizzle of honey for a yummy breakfast!
Write a review
Print
Prep Time
15 min
Cook Time
30 min
Total Time
45 min
Prep Time
15 min
Cook Time
30 min
Total Time
45 min
Ingredients
  1. 1.2kg Organic Rolled Oats
  2. 100g Quinoa Flakes
  3. 100g Activated Buckwheat Kernels (optional)
  4. 100g Almond Milk Pulp (or Almond Meal)
  5. 50g Black Chia Seeds
  6. 100g Pepitas (or Pumpkin Seeds)
  7. 150g Sunflower Seeds
  8. 1 Tbsp Cinnamon
  9. 2 tsp Pimento
  10. 120g Macadamias
  11. 120g Roasted Almonds
  12. 400g Apple Sauce
  13. 300g Organic Butter
  14. 250g Honey
  15. 2 tsp Vanilla Essence
  16. 20g Freeze-dried Strawberries
  17. 100g Shredded Coconut or Coconut Chips
  18. 150g Dates (roughly chopped)
  19. 100g Banana Chips (naturally sweetened)
Instructions
  1. Preheat the oven to 180°. Line large baking trays with baking paper and set aside.
  2. Place the oats, flakes, buckwheat, almond meal, seeds, & spices into a very large mixing bowl. Stir to combine.
  3. Place the nuts into the Thermomix bowl and chop roughly 0.5 Second/Speed 6.
  4. Place the apple sauce, butter, honey & vanilla into the Thermomix and cook 2 Mins/50°/Speed 3. Pour this wet mixture over the dry ingredients and using your hands coat all the dry ingredients well.
  5. Place handfuls onto the baking trays, slightly clumping it in your hands as you go. Spread it out fairly thinly and evenly over your trays, and bake for 30-35 minutes, giving a quick stir halfway through.
  6. Remove from the oven and cool on the trays before placing back into the mixing bowl and tossing with the strawberries, coconut and dates.
  7. Once completely cooled, place into airtight containers or jars and store in a cool, dry place for 2-3 weeks.
Kitch'n Thyme https://kitchnthyme.com.au/

Breakfast Bombs

image
Looking for an alternative to the ‘ol bowl of cereal for breakfast?? Well these are a whole lot better than a bowl full of cereal! Think crispy, fudgey, and smooth!These little bombs are packed with loads of seeds, nuts, butter and coconut oil and are sure to go down a treat!

They have some organic crispy cereal in them and are loaded with all sorts of little superfood boosters. Filled with antioxidants found in the goji berries and the raw cacao, these foods help to stop free radicals damaging the cells.

The good fats from the coconut, butter and nuts are so important for growth development and cell function. They can also be used as a fantastic source of energy, especially for kids!

When my little ones aren’t feeling like eggs or other savoury options, these are fantastic alternative – he loves them!

You can press the mix into a tin and slice it up for something different too! They are best eaten straight from the fridge, as they will get softer as they sit out.

Breakfast Bombs
Yields 15
Write a review
Print
Prep Time
10 min
Cook Time
10 min
Total Time
20 min
Prep Time
10 min
Cook Time
10 min
Total Time
20 min
Ingredients
  1. 120g Cashews or Cashew Butter
  2. 50g Organic Butter
  3. 20g Coconut Oil
  4. 50g Maple Syrup
  5. 10g Raw Cacao Powder
  6. 50g Organic Brown Rice Crispies or Organic Brown Rice Chocolate Koala Crisp! (I use Natures Path brand from Iherb.
  7. 30g Organic Corn Flakes (Fruit Juice Sweetened) - I use Natures Path brand from Iherb
  8. 20g Almond Milk Pulp (or Almond Meal)
  9. 10g Shredded Coconut
  10. 10g Goji Berries
  11. 20g Black Chia Seeds
  12. 10g Sunflower Seeds
  13. 5g Pepitas
Instructions
  1. Roast the cashews for 10 minutes at 180°C or until golden brown.
  2. Place into the Thermomix and mill 10 Sec/Speed 9. Scrape down the edges of the bowl, then process 1 Min/Speed 4. Scrape down the edges of the bowl again and process a further 10 Sec/Speed 6 or until a nut butter consistency is achieved.
  3. Add the butter, oil, maple, and raw cacao to the nut butter and cook 3 Mins/50°/Speed 3.
  4. Add all the remaining ingredients and process 3-5 Sec/ Speed 5, or until it looks similar to a bliss ball consistency, but with some of the cereal still in tact and visible.
  5. Roll into decent sized balls and place into a container lined with baking paper. Refrigerate until set.
Kitch'n Thyme https://kitchnthyme.com.au/

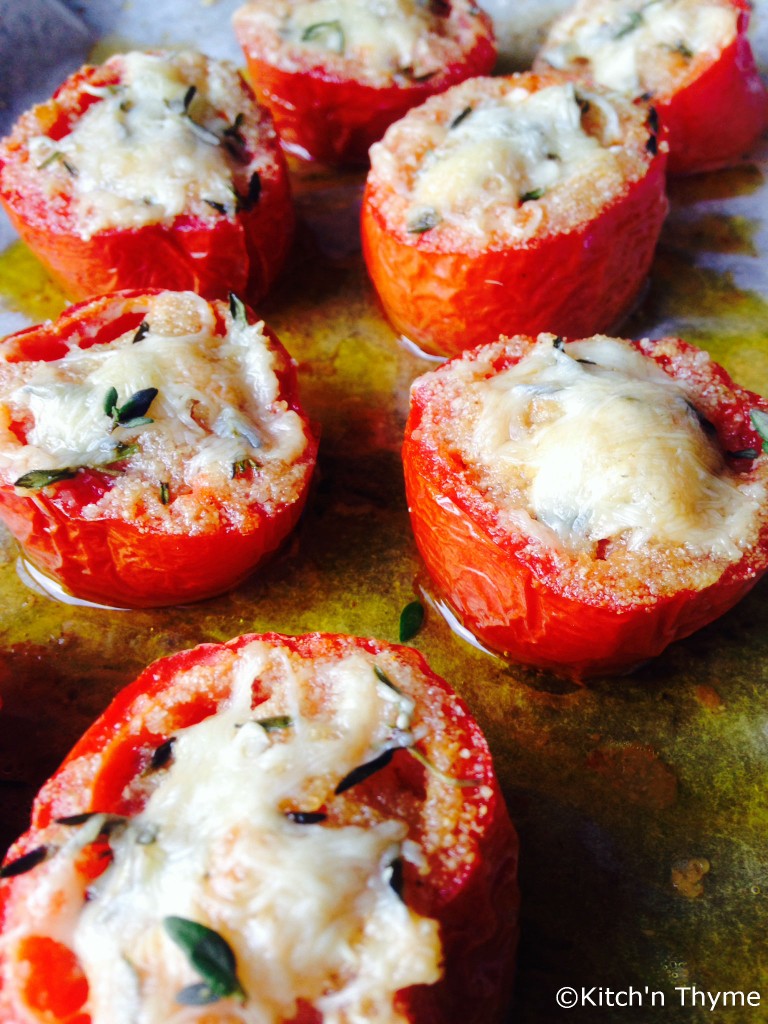
Saracino Roast Tomatoes

Roast Toms 2 ©These delightfully golden, winey, gummy, sticky, sweet & juicy tomatoes will be set to impress your whole family! They are the perfect compliment to any egg breakfast! I have a real obsession with tomatoes and these fulfil it!

I have for many years never liked going to a buffet where I’m served barely cooked, flavour-lacking roast tomatoes!! I need flavour!

You can go quite generously with all the flavourings! The oils that lie on the tray after baking are so delicious for drizzling over poached eggs, so don’t throw them away!

The sheep cheese is just delicious and often far less reactive for those that pose intolerances to regular cows dairy.

Enjoy!

Saracino Roast Tomatoes
Serves 4
These are so deliciously tasty! A little gummy, winey, sweet, intense and sticky! Yum!
Write a review
Print
Prep Time
5 min
Cook Time
25 min
Total Time
30 min
Prep Time
5 min
Cook Time
25 min
Total Time
30 min
Ingredients
  1. 4 Roma Tomatoes
  2. 1 tsp Garlic Powder
  3. 1 tsp Onion Powder
  4. sprinkle Celtic Sea Salt
  5. 2 sprigs Fresh Thyme
  6. 50g Saracino Sheep Cheese (grated)
  7. drizzle Extra Virgin Olive Oil
Instructions
  1. Preheat the oven to 180°C and line a baking tray with baking paper.
  2. Slice the top and the bottoms off the tomatoes. Try not to chop too much off the tomatoes, but rather just make a flat base on each, so they will sit flat on a tray. Cut the tomatoes in half horizontally and place cut side up on the tray.
  3. Sprinkle all the tomatoes with the garlic, onion, & salt. Pull the thyme leaves off the stems and sprinkle on the tomatoes. Generously drizzle with olive oil & top with the grated sheep cheese.
  4. Place into the oven and roast for 25 minutes. Serve hot with your favourite egg breakfast or in a beautiful fresh pasta dish for dinner!
Kitch'n Thyme https://kitchnthyme.com.au/

Almond Milk

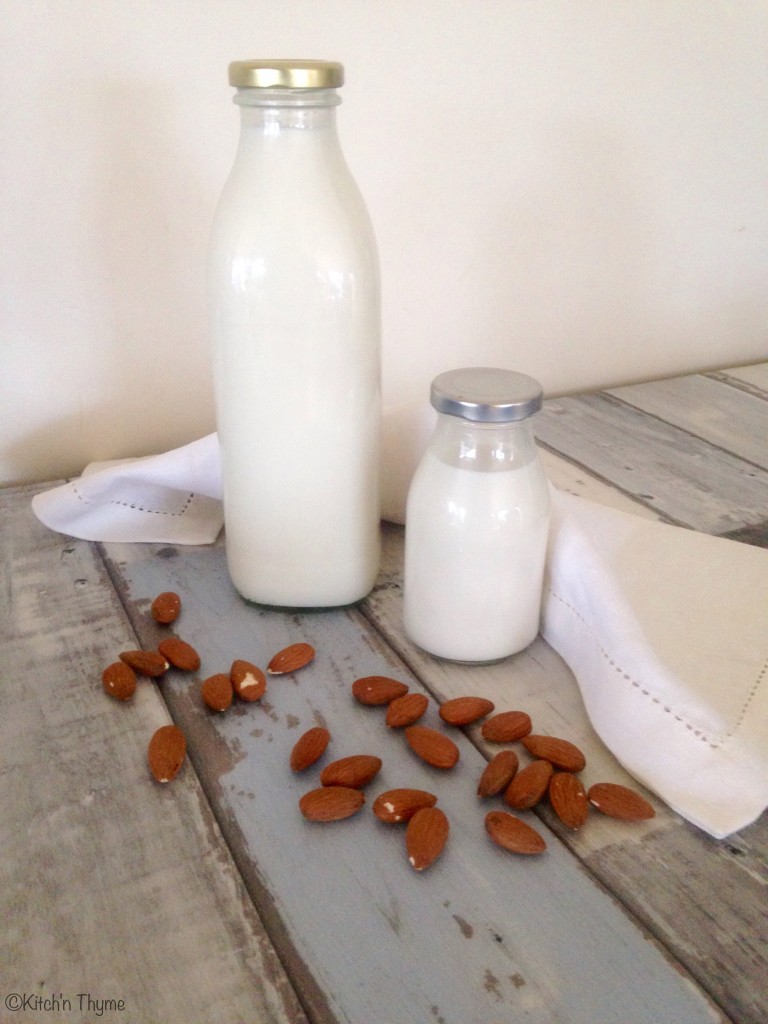
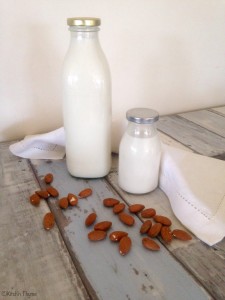
Almond MilkWhat a wonderful alternative to cow’s milk. This almond milk is really easy to make! It is completely raw, the almonds have been activated and with the addition of celtic sea salt which contains many vital trace minerals and the good fat of coconut oil, this is a winner for health benefits.

Activating the almonds is really important. It deactivates the enzyme inhibitors, helping us to be able to digest them much more easily and it brings the nuts to life!Soaking-Almonds-©-265x300

You will notice that I add a small amount of maple syrup. I do this whether I am making it for sweet or savoury use. It brings out the flavour of the almonds and doesn’t taste sweet as it’s such a small amount. You could use honey or rice malt syrup if you preferred. 

The addition of sunflower lecithin is optional. The milk will separate after a few hours in the fridge due to the fat from the nuts not emulsifying with the water. Lecithin is a fat emulsifier so it is the perfect solution. There is much question over soy lecithin, so when I learnt about sunflower lecithin you can imagine my delight. It will keep the milk homogenised and give it even more of a creamy texture!

Straining-Milk-225x300Above I’m straining the milk through a muslin cloth or nutmilk bag.

When I weaned my little boy off breastmilk I used this milk to replace his 1-2 daytime feeds. He just loved it. (As almond milk is not a complete meal replacement of breastmilk or formula for an infant or baby please be aware that my little boy was already eating a substantial well balanced diet by this stage. The almond milk was an addition to his diet.)

And perhaps you should go try my Chocolate Almond Milk too! Perfect for parties or as a yummy treat!

Almond Milk
Makes 1 Litre A wonderful super easy to make nut milk! Perfect as a Dairy Free option! You can then use for cakes, cookies, savouries etc! Or turn into Chocolate Milk or Choc Banana Milk or Raspberry or Strawberry Milk etc.
Write a review
Print
Ingredients
  1. 170g (1 Cup) Raw Almonds
  2. 1 Tbsp Coconut Oil
  3. 1 Tbsp Maple Syrup
  4. 1 tsp Vanilla Essence
  5. ½ tsp Celtic Sea Salt
  6. 1 tsp Sunflower Lecithin (optional)
  7. 1 L Filtered Water
Instructions
  1. Place the almonds into a bowl, cover with filtered water and leave to soak overnight (or for at least 12 hours).
  2. Drain the almonds and place into the bowl of the Thermomix and mill 7-10 Sec/Speed 9.
  3. Add all the remaining ingredients & blend 1 minute/Speed 9.
  4. Strain the milk through a nut milk bag or muslin cloth.
  5. Refrigerate and serve.
Notes
  1. You can decrease the amount of nuts used. The amount I use here makes for a really rich & creamy milk, however you can reduce this. I would tend to use a minimum of 100g raw nuts(approx. a heaped 1/2 cup) to 1 Litre of water. Remember also that once the raw nuts have been soaked they will weigh less than unsoaked raw nuts. So make sure you weigh your nuts before soaking!
  2. Nut milk will keep for approximately 3 days. It is suitable for the freezer too.
Kitch'n Thyme https://kitchnthyme.com.au/