Yoghurt – Thick Greek Style


I really love super thick Greek Style yoghurt! I much prefer really thick tangy yoghurt that doesn’t have any sweeteners added to it! I’ve been making yoghurt since I was a little kid with my mum (however lots of soy yoghurt back then) and I love it!
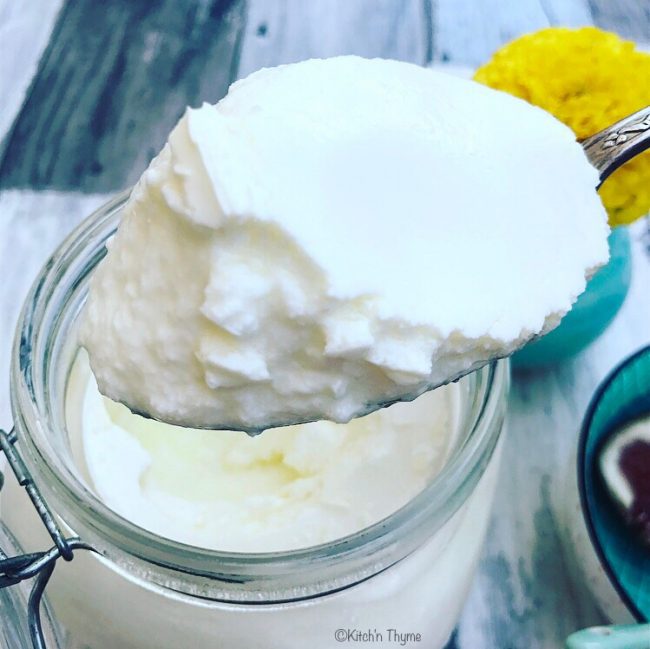
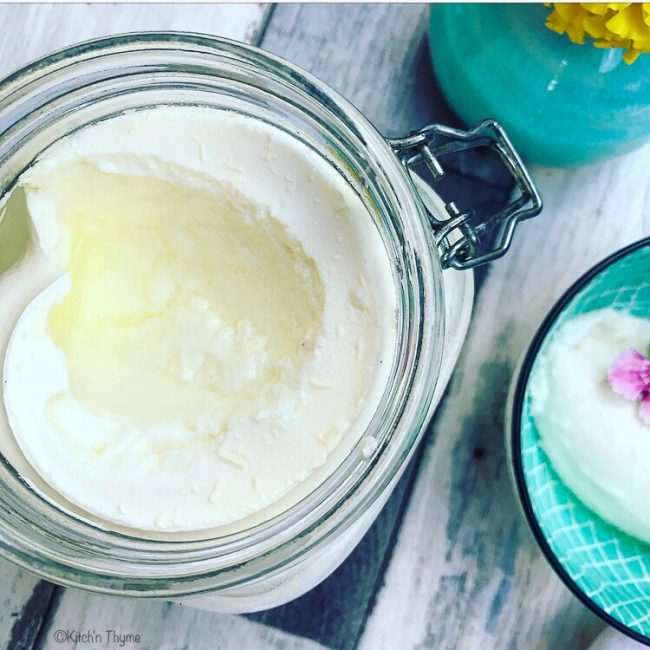

But last year I figured out how to get that super luscious thick yoghurt (almost Greek yoghurt type thickness but without straining off the whey) at home using a very simple method! My sister in law saw gourmet farmer using an esky for his yoghurt, and how well it worked! This is loosely based on his method, however tailored to using the Thermomix which gives the ability to get really accurate temperatures easily!

In the recipe when you’re heating up the milk I say to keep the milk at 90ºC for a longer time. The reason being, if you hold the milk at a stable temperature for longer it will make the yoghurt thicker by driving out the oxygen and helping in the fermentation process along with helping the proteins to hydrate well and bind as much water as possible. As this isn’t a strained Greek Yoghurt, there will still be some whey that gathers with the yoghurt remaining in the jar when you scoop your spoon of yoghurt into a bowl. You can either leave it in, (it will make the yoghurt a bit more watery) or you can just spoon it out to use in another recipe or dispose of it.
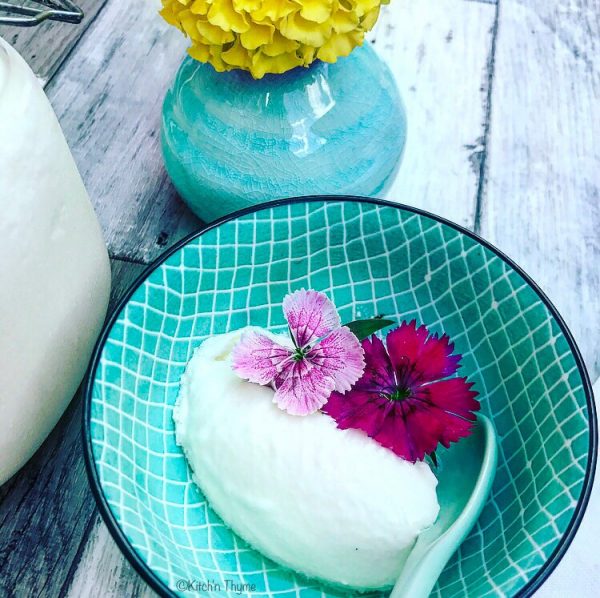

Once you have heated the milk it is important to cool the milk quickly. This helps to produce a thicker curd also. You can cool the milk quicker by filling a bowl with cold water, adding some ice cubes and setting the bowl of heated milk on top.

I’ve learnt that sometimes a less is more approach works best when it comes to the culture, which is why I only use 1-2 Tbsp of yoghurt as a starter. I like to use Jalna Greek Yoghurt for my starter, it always produces a really beautiful yoghurt.
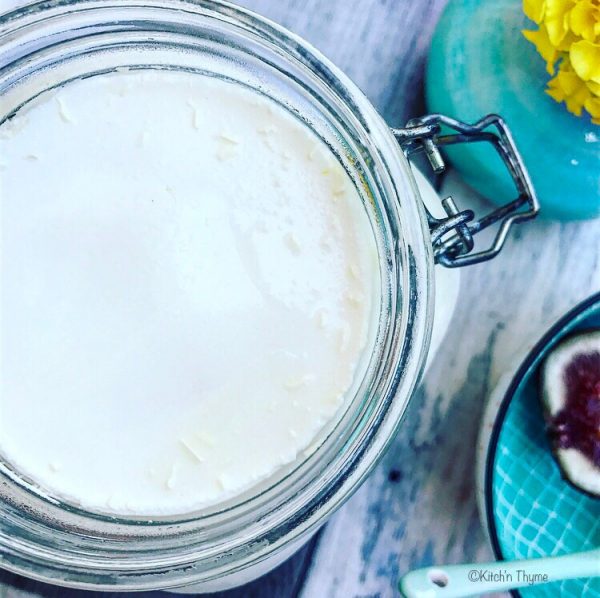
If your family uses a lot of yoghurt, you can double this recipe very easily. Just increase the time of heating the milk and make sure once the 2L of milk reaches 90ºC to hold it at that temperature for at lease another 10 minutes. (Should take around 30-40 mins) and use 2 x 1L glass jars. They should fit side by side in your 10L esky quite easily.

For different flavoured yoghurts you can add vanilla beans or bean paste or for fruit flavours rather than adding fresh fruit that will water down the yoghurt, add fruit compotes or homemade refined sugar free jams. 

It’s really quite easy to make beautiful yoghurt at home! I hope you enjoy!

Greek Style Yoghurt
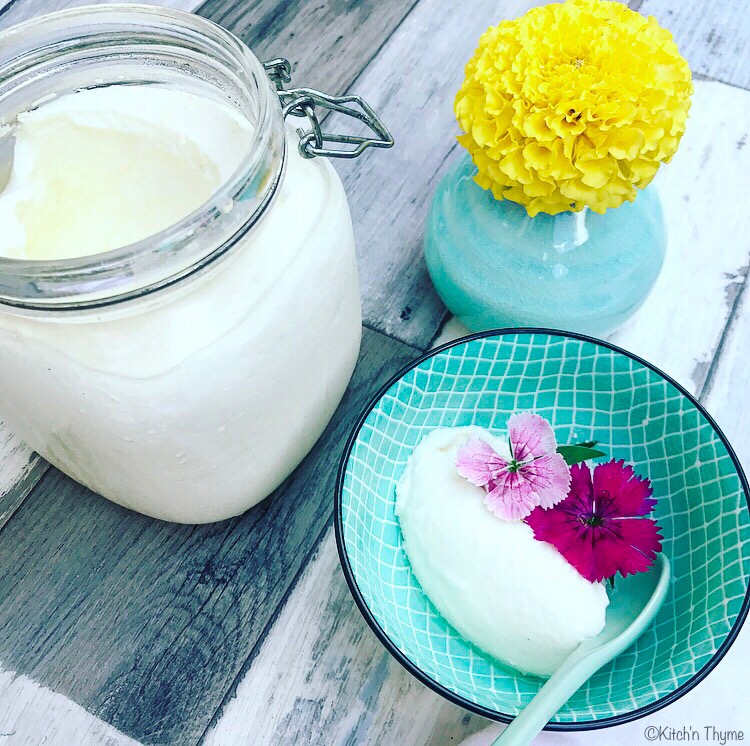
Beautiful thick, almost Greek Style yoghurt without the need to strain! Sugar and milk powder free!
Write a review
Print
Prep Time
5 min
Cook Time
40 min
Total Time
24 hr
Prep Time
5 min
Cook Time
40 min
Total Time
24 hr
Ingredients
  1. 1 Litre Non-homogenised Organic Milk
  2. 1-2 Tbsp Greek Style Yoghurt (with live cultures - I like Jalna)
Equipment
  1. 1 Thermomix or a Pot & Thermometer
  2. 2 Medium Stainless Steel Bowls
  3. 1 Thermometer
  4. 1L Glass Jar
Instructions
  1. Take the starter culture out of the fridge to bring to room temperature.
  2. Place the milk into the Thermomix and heat 20 Mins/90º/Speed 3. You will notice that the milk will reach 90º at around the 10 minute mark, but hold it at that temperature for the full 20 minutes. (Read why in the notes above the recipe)
  3. Fill a medium bowl with water and some ice cubes and place another bowl on top to make an ice bath. Pour the warmed milk into the bowl on top and let sit to cool to 38º - 40ºC. Check the temperature with a thermometer. Be careful that it doesn't drop below 35º. This should take about 20 minutes. It's important to reduce the heat quickly to produce a nice thick curd. (Alternatively, you can keep pouring the milk back into the Thermomix to check the temperature, but I find it easier to just use a Thermometer.)
  4. While the milk is cooling, place 2 Litres of water into the Thermomix and heat 3 Mins/45º/Speed 3. Pour the warmed water into a small 10L esky. Repeat this process. Depending on the height of the jars you use to set your yoghurt, you will need 3-4L of water.
  5. Remove a cup of the cooled milk into a cup or bowl, and stir or whisk in the starter so its smooth and there are no lumps.
  6. Pour this mixture back into the bowl of cooled milk and stir to combine briefly before pouring into a 1L glass jar. Secure the lid and place the jar into your esky filled with water. The water should be surrounding the jar but not covering the lid.
  7. Leave the jar in the water for 12-24 hours to incubate and ferment. Depending on how tart you like your yoghurt will determine how you long you leave the yoghurt to ferment. Around the 12-14 hours mark you will have a really lovely mildly tart yoghurt. Around this time is when I like to take mine out and place straight into the fridge to set firm.
  8. Once completely cooled, your yoghurt is ready to eat!
  9. And don't forget to save a couple of Tbsp for your next batch of yoghurt!
Notes
  1. Try not to disturb the yoghurt in the first 6 hours when the yoghurt is incubating as this can interfere with the yoghurt setting properly.
Kitch'n Thyme https://kitchnthyme.com.au/

Lemon & Blueberry Pancakes


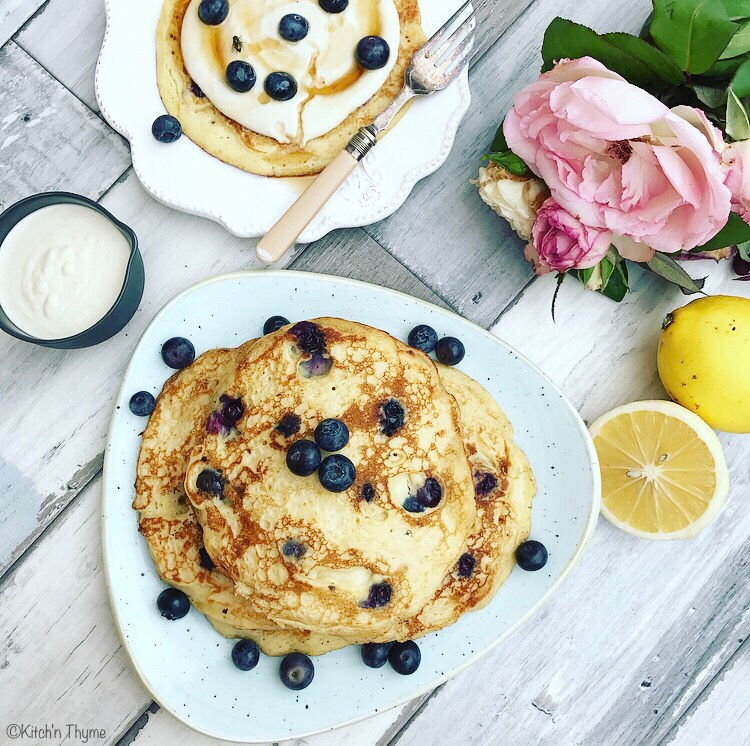
These Lemon & Blueberry Pancakes are SOOOOOOOOOOOOOO good!! 

Seriously they are SOOOO easy and SO delicious!!! I’ve been wanting to share this delicious recipe with you for quite sometime! Upon developing this recipe, I was absolutely stoked with how light and fluffy they are! I doubt you will be disappointed!

You can substitute the couple of Tbsp of raw sugar with honey or coconut sugar, it may just change the batter to be slightly off white in colour, but the taste it still just as delicious! 

Spelt flour can also be substituted for plain flour. As I’ve said in previous posts I use spelt flour in my kitchen as a straight swap for plain all purpose flour as it’s a more ancient form of wheat which has been less hybridised and is easier on the digestive system. In some cases those with wheat intolerances can tolerate spelt with it’s lower gluten content. It has a slightly nutty flavour and is a little more wholesome tasting!

You can basically use any berries like blueberries, raspberries, blackberries, strawberries etc.

Topped with my delicious Cashew Macadamia Cream and a drizzle of maple syrup there’s not much not to love! 

We make these probably once a fortnight and they are a real hit in our home! I hope you enjoy them too! 

Lemon & Blueberry Pancakes
Yields 6
Delectable fluffy, moist berry popping pancakes! Perfect for your weekend breakfast!
Write a review
Print
Prep Time
5 min
Cook Time
15 min
Total Time
20 min
Prep Time
5 min
Cook Time
15 min
Total Time
20 min
Ingredients
  1. 60g Organic Butter
  2. 200ml Almond Milk
  3. 1/2 tsp Vanilla Paste or Extract
  4. 1 Organic Egg
  5. 1/2 Lemon, zested
  6. 150g White Spelt Flour
  7. 40g Raw Sugar
  8. 2 tsp Baking Powder (Aluminimum Free)
  9. 125g Fresh or Frozen Blueberries
  10. 60g extra butter
Cashew Macadamia Cream
  1. 75g Cashews
  2. 75g Macadamias
  3. 1 tsp Vanilla Bean Paste or Extract
  4. 50g Maple Syrup
  5. 150g Almond Milk
Instructions
  1. Place the butter into the Thermomix and melt 2 Mins/50º/Speed 1.5.
  2. Add the almond milk, vanilla, egg & lemon and mix 10 Sec/Speed 3.
  3. Add the flour, sugar & baking powder and mix 5-10 Sec/Speed 5.
  4. Melt 10g butter in a non stick frying pan over low-medium heat. Pour slightly less than 1/2 cup batter in pan, and if necessary, using the back of a spoon, spread to a 12cm round.
  5. Cook for 2 minutes or until bubbles appear on surface. Scatter over approx 10 blueberries. Using a spatula or egg flip, flip and cook for a further 30 seconds or until golden underneath. Transfer to an oven tray and keep warm in the oven. Wipe pan clean. Repeat with remaining butter, batter and blueberries.
  6. Serve the pancakes with a dollop of cashew macadamia cream and a drizzle of maple syrup. Alternatively, top with your favourite fruits and yoghurt, figs in vanilla syrup or a simple squeeze of lemon juice and maple! Yum!
Cashew Macadamia Cream
  1. Place all the ingredients into the Thermomix and blend 1 Min/Speed 9. Can be served at room temperature or chilled.
Kitch'n Thyme https://kitchnthyme.com.au/

Gluten Free Crepes


These crepes are SOOOOOOOO easy!! You will love this recipe! I used to make these when I worked at the health retreat and I used them for lots of different applications! I’ve tweaked the recipe over time and I think they are perfect now!

You can make the batter the night before and quickly whip up fresh crepes in the morning and use whichever filling you desire! Of course there are so many sweet options but think about mushrooms, spinach and feta, or chicken mushroom and spinach for breakfast! An ideal way to send the family off for the day wiht a nutritious breakfast!

For a gluten free crepe, these are really good! You wouldn’t know they were gluten free. The flour blend I use does a good job of making a smooth, slightly elastic crepe (for want of a better word! Don’t worry though you won’t think you’re chewing on a rubber band!😆)

Just try them and enjoy!

Gluten Free Crepes
Yields 16
Perfect rendition of a traditional french crepe that will please the harshest gluten free critic!
Write a review
Print
Prep Time
5 min
Cook Time
20 min
Total Time
25 min
Prep Time
5 min
Cook Time
20 min
Total Time
25 min
Ingredients
  1. 40g Organic Butter
  2. 4 Organic Eggs
  3. 80g Tapioca Flour
  4. 50g Potato Starch
  5. 50g White Sorghum Flour
  6. 1 Tbsp Honey
  7. 450ml Almond Milk
  8. Extra butter for brushing
Instructions
  1. Place the butter into the Thermomix and melt 1-2 Mins/50º/Speed 3.
  2. Add all the remaining ingredients and mix 30 Sec/Speed 6.
  3. Pour the batter into a jug or bowl and leave to rest for 30 mins- overnight. (The resting time helps the gluten free flours to swell and the batter to become a little easier to work with, but if time doesn't permit you can rest for just 10 minutes and still get a great result.)
  4. Heat a shallow non stick pan or crepe pan over a medium heat. Brush the pan out with a small amount of melted butter or coconut oil just to coat the pan.
  5. Pour in enough batter to lightly cover the base of pan and swirl to cover thinly. (Using a cup measure helps you pour a similar amount into the pan each time...you'll be amazed how little batter you need!)
  6. Cook the crepe for about 1 minute each side or until lightly golden.
  7. Transfer to a plate, cover and keep warm.
  8. Continue cooking the crepes until the batter is finished, brushing with a little melted butter or coconut oil as needed.
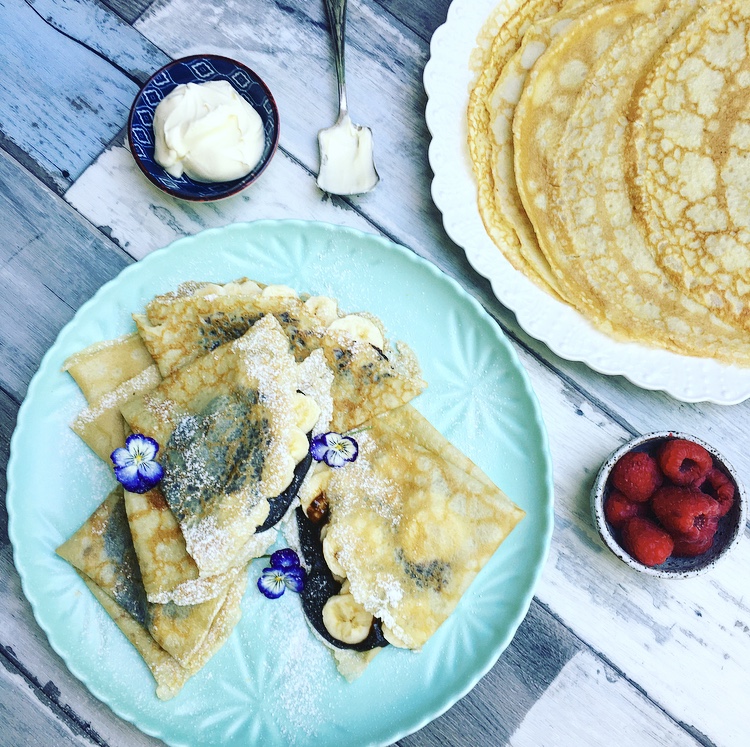
  9. Serve the crepes, with any topping you desire. In the picture I filled them with my homemade nutella and sliced banana, creme fraiche and raspberries!
Notes
  1. These can be used for savoury dishes too!! As an example you can make perfect breakfast savoury crepes or crepe stacks with these and they work brilliantly!
Kitch'n Thyme https://kitchnthyme.com.au/

Sweet Potato Rostis, Baby Chard, Poached Eggs, Coriander Pesto & Toasted Pepitas

fullsizerender-3Beautiful lazy weekend mornings call for soft poached eggs drizzling their goodness over warm rostis! Then topped with pesto and crunchy things what more could one need! 
I’ve been wanting to share my coriander pesto with you all for such a long time and it’s finally here! 

Coriander is such a wonderful herb! It’s one of my favourites! 

Coriander can help chelate heavy metals helping to detox them out of the body, so this one is definitely worth eating!

You could use it on pizza, as a spread on crusty sourdough, in a galette, the options are bountiful!

My kids really love dipping vege sticks into it so that is a massive win for me! I hope you enjoy it as much as we do! 

Sweet Potato Rostis, Baby Chard, Poached Eggs, Coriander Pesto & Toasted Pepitas
Serves 6
Delicious poached eggs atop potato rostis with simple coriander pesto
Write a review
Print
Prep Time
20 min
Prep Time
20 min
Coriander Pesto
  1. 100g Coriander Leaves (approx 2-3 large bunches)
  2. 2 Cloves Garlic, peeled
  3. 150g Roasted Macadamias (To Roast: 10-15 Mins 180ºC)
  4. 1/2 tsp Celtic Sea Salt
  5. 2 tsp Lemon Juice
  6. 2 tsp Savoury Yeast Flakes
  7. 100g Olive Oil
Sweet Potato Fritters
  1. 600g Sweet Potato, peeled & grated
  2. 2 Organic Eggs, lightly beaten
  3. Salt & Pepper to taste
  4. 2-4 Tbsp Olive Oil or Coconut Oil, for frying
Poached Eggs
  1. 1 Tbsp White Wine Vinegar
  2. 1 tsp Celtic Sea Salt
  3. 12 Organic Eggs
Instructions
  1. To make the coriander pesto, place all the ingredients into the bowl of the Thermomix and Chop 5-8 Sec/Speed 7. Set aside.
  2. Place the grated sweet potato into a medium bowl and add the lightly beaten egg. Season with salt and pepper and stir well to combine.
  3. Place a 1-2L pot filled with water on high heat. Place the vinegar and salt into the water and bring to the boil.
  4. To make the rostis, heat the oil in a large frypan over medium heat and place 2 Tbsp amounts into the pan. Flatten into a nice round shape and pan fry until golden on both sides. You should end up with about 12 rostis.
  5. To toast the pepitas, pan fry on a medium heat for 1-2 minutes, tossing until golden all over.
  6. Crack 8-12 eggs into a medium bowl, being careful not to seperate the yolk from the white. Once the water has boiled, briefly stir the water in a circular motion with a spoon, adding the eggs gently and as close to the water as possible, into the whirlpool. Continue to stir gently for about another 5-10 seconds once the eggs are in to stop them settling immediately on the base of the pot.
  7. Reduce the heat to medium and poach for approximately 3-4 minutes or until cooked to your liking. Take out and drain on absorbent paper towel.
  8. To serve, place 2 rostis on a plate, top with the baby swiss chard leaves or baby spinach and place 2 eggs on top. Rest a spoonful of the pesto on the eggs and sprinkle with the pepitas. Wahlah your breakfast is ready to devour!
Notes
  1. You can poach the eggs as per the Thermomix method, however I love my method for a perfect cafe style poached egg where the white fully encapsulates around the yolk!
  2. You can use Apple cider vinegar in the poaching water but it can turn the colour of the water slightly pink, as with Pink himalayan salt also.
Kitch'n Thyme https://kitchnthyme.com.au/

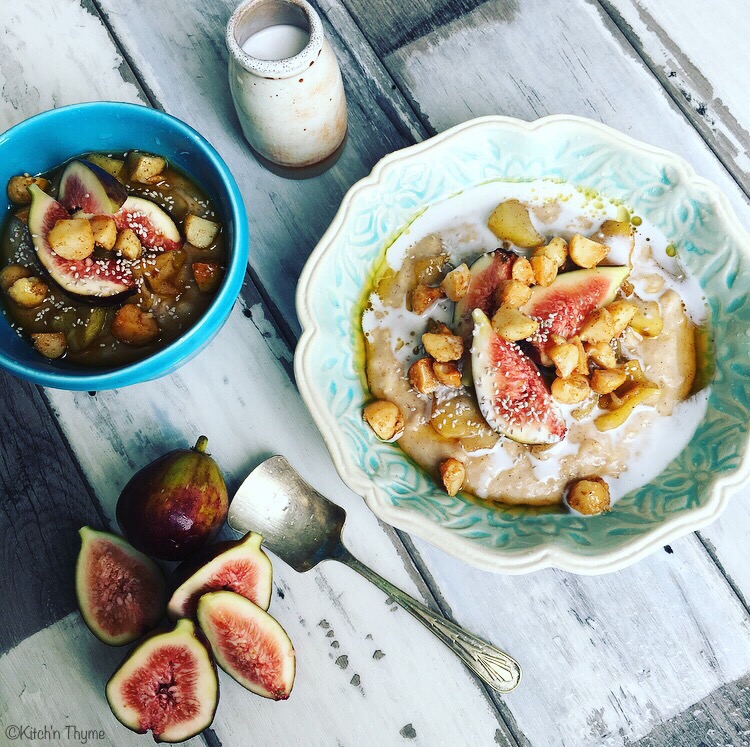
Almond Milk Oat Porridge, Cinnamon Apples, Crunchy Maple Macadamis & Fresh Figs

Almond Milk Oat Porridge, Cinnamon Apples, Maple Macadamia
As the long hot days of summer start to dwindle and the wet season rains of early Autumn begin to set in, there is nothing more warming and nourishing than a bowl of porridge to warm up your soul first thing in the morning.

This might look more complicated than it really is! I hope that some of you can look at my recipes and think ‘oh yum I can do that!’ Sometimes I do use a few ingredients but the steps are hopefully not too hard to follow!

With figs in season and everywhere at my favourite Noosa Farmers Markets I love making food to celebrate their deliciousness!! They are just so magically perfect without having to do anything much to them at all!

You could use walnuts instead of macadamias which would be scrumptious too!

Honestly, the ingredients are quite changeable here, whatever is in season and on your fruit platter – pear, raspberries, blueberries, strawberries, plums, peaches, just whatever mood you are in!

Go make it now! Or at least save it for later! xx

Almond Milk Oat Porridge, Cinnamon Apples, Crunchy Maple Macadamias & Fresh Figs
Serves 4
This deliciously warming, relatively super quick porridge will have your tastebuds singing all day!
Write a review
Print
Prep Time
5 min
Cook Time
15 min
Total Time
20 min
Prep Time
5 min
Cook Time
15 min
Total Time
20 min
Cinnamon Apples
  1. 2 Green Apples, peeled & sliced thinly or diced into 2-3cm cubes
  2. 1 Tbsp Maple Syrup
  3. 1/4 tsp Cinnamon
Maple Cinnamon Macadamias
  1. 100g Macadamias, quartered or roughly chopped
  2. 1 Tbsp Maple Syrup
  3. 1/4 tsp Cinnamon
Porridge
  1. 100g Organic Rolled Oats
  2. 500ml Almond Milk
  3. 100ml Water
  4. 40g Coconut Sugar (or sweetener of choice)
  5. 1 tsp Vanilla Powder
  6. 1/2 tsp Cinnamon
  7. 1/4 tsp Allspice
  8. 4 Fresh Figs, sliced thinly
  9. 2 Tbsp White Chia Seeds
  10. 200ml Organic Coconut Cream, for serving
Instructions
  1. Preheat the oven to 180°C and line a large baking tray with baking paper. Place the apples together with the maple & cinnamon into the Thermomix and mix to combine Speed 2-3 for 5-10 seconds. Spread evenly over the baking tray and without cleaning the bowl do the same with the macadamias and place onto the tray. Bake the nuts for 10-15 minutes or until golden brown. Remove them from the oven and set aside.
  2. Give the apples a quick toss and place back into the oven for a further 10-15 minutes or until golden brown and just starting to brown on the edges. Set aside.
  3. Whilst the apples and nuts are cooking, place the oats, milk, water, sugar, vanilla and spices ingredients into the Thermomix and cook 11 Mins/90°/Speed 2/Reverse.
  4. Portion evenly among bowls and top with the apples, fresh figs, macadamias, chia seeds & a generous drizzle of coconut cream.
Notes
  1. You can make my super easy Almond Milk here!
Kitch'n Thyme https://kitchnthyme.com.au/

Organic Italian Shakshuka w Coriander Pepper Black Salt

Shakshuka
Ever wondered what to do with that leftover bolognaise sauce? Turn it into these gorgeous baked eggs! I love baked eggs! It’s such a lovely way to eat eggs when you’re bored of fried, poached and scrambled! With all the other wonderful flavours combining with runny yoked eggs there’s not much not to love! and packed with veggies, herbs, olives and topped with feta etc they make the perfect start to any day! My kids even love this and that’s a winning start to the day being packed with great nutrition for growing minds!

I’ve made many versions of baked eggs over the years! When I worked at the health retreat fulltime I used to make a delicious creamy spinach baked eggs, or sometimes a beautiful Moroccan capsicum & lamb sausage shakshuka! I’m salivating right now thinking about the options!

I was dreaming this morning of serving this with a fresh zesty avocado, finger lime and green chilli salsa! Yum!…But then I realised I had left my bag of finger limes in the fridge at work and the avocados aren’t quite ripe enough! So there…a more simple yet delicious coriander, pepper & black salt had to suffice!

Obviously I did this with leftovers, however I’m going to give you the recipe for my Bolognaise Sauce. It’s totally delicious and well worth making whether for bolognaise sauce or baked eggs!

And no, I don’t cook it in the Thermomix. You see, I ain’t no Chef if I don’t have a pan in ma hand! I seriously love my Thermomix, but there are just some things that must be done on the stove! And for me this is one of them! My Thermomix is my apprentice here, so it does the chopping! I prefer getting a nice caramelisation on the onions and garlic with loads of olive oil for a bolognaise sauce. It’s really important to do this otherwise the onions will be bitter and not reduce their sweetness. I could do it in the Thermo but it will take longer than a frypan where there is more surface area! You can of course leave the Thermomix to cook for longer and eventually you will get a better caramelisation but there’s just something about stirring a pot that I love at times too! Its theraputic! And you know what??? That is AOK! If you like to roast a chook or beef in the oven, then do so, make your gorgeous gravy or a salad in the Thermomix and call it a night. You don’t have to use your Thermomix for everything! If it is helping you in some small way to find more time to do the things you love, save you money, keep you healthier, etc etc then my job is done!

Shakshuka 2

For making my organic lasagne, I don’t mind doing the meat sauce in the thermomix. I don’t mind if that is a bit runnier in consistency. It will continue to cook down and reduce in the oven to get the correct balance of sweetness and flavour.

Ok, so lets get on with it! I must go and remove my toddler from standing on my bench where he is walking softened butter everywhere!….Look he’s only trying to reach the sourdough bread dough! He loves to cook with me!…Yes all day long!….I’ll strive to embrace the chaos today, for oneday they will wake and move mountains! Enjoy!

Organic Italian Shakshuka
Serves 8
My beautiful Bolognaise Sauce leftovers turned into perfect Baked Eggs! Reader Kylie says: "We loved this recipe - the kids devoured it with toast for dipping. A delicious twist to the traditional Bolognese that the whole family will love. Can be made in one big pot for convenience and don't leave off the garnishes as they are essential." The 4 Blades Magazine, July 2016
Write a review
Print
Prep Time
15 min
Cook Time
20 min
Total Time
35 min
Prep Time
15 min
Cook Time
20 min
Total Time
35 min
Bolognaise Sauce
  1. 4 Tbsp Extra Virgin Organic Olive Oil
  2. 2 Brown Onions, halved
  3. 6 Cloves Garlic, peeled
  4. 1 Zucchini, chopped into 3-4cm pieces
  5. 2 Medium Carrots, chopped into 3-4cm pieces
  6. 2 tsp Dried Basil
  7. 2 tsp Dried Oregano
  8. 1 tsp Dried Italian Herbs
  9. 500g Organic Beef Mince
  10. 60ml Organic Red Wine (optional)
  11. 2 Tbsp Vegetable or Beef Stock Paste
  12. 2 Tbsp Tomato Paste
  13. 500ml Roast Tomato Pasta Sauce
  14. 10 Kalamata Olives, pitted and halved
  15. 8 Sundried Tomatoes, roughly cut with scissors
  16. 4 Large Tomatoes, halved
  17. 2 Sprigs Fresh Rosemary
  18. 2 Sprigs Fresh Thyme
  19. 4 Sprigs Fresh Basil or Italian Parsley
Shakshukas
  1. 16 Organic Eggs
  2. Extra Olive Oil for drizzling
  3. 100g Feta Cheese
  4. 1 Green Chilli, sliced on a diagonal
  5. 1/2 Bunch Coriander leaves, for serving
  6. Organic Crusty Sourdough, for serving
Coriander, Pepper Black Salt
  1. 1/2 Bunch Coriander Stalks, sliced very finely
  2. 1 tsp Freshly Ground Black Pepper
  3. 1 Tbsp Black Salt Flakes
Bolognaise Sauce
  1. In a large frypan, heat the olive oil over medium heat. Place the onions into the Thermomix bowl and chop 3 Sec/Speed 7. Add the onion to the pan, cooking for 4-6 minutes or until the onions are translucent and caramelised nicely. Add the garlic and cook for a further minute or two. Just be careful not to burn the garlic as it will become bitter.
  2. Place the zucchini and carrots into the Thermomix and chop 5 Sec/Speed 4-5 (or until fairly finely chopped). Add to the pan and sweat off until translucent.
  3. Add the dried herbs before adding the mince to the pan and stirring, cook for a further 2 minutes or until browned.
  4. Add the wine (if using) and sauté for another 2-3 minutes or until the liquid is reduced.
  5. Reduce the heat to low, add the stock paste, tomato paste, pasta sauce, olives and sundried toms.
  6. Place the fresh tomatoes into the Thermomix and chop 5 Sec/Speed 5 before adding to the frypan and reducing the sauce for 20 minutes.
  7. Towards the end, place the herbs into the Thermomix and chop 3 Sec/Speed 7 or finely chop with a knife. Stir through the sauce to finish.
Shakshuka
  1. Preheat the oven to 200°C and place an even amount of sauce into 8 mini cast iron frypans.
  2. Using a spoon, make indents in the mince, then crack 2 eggs into each mini frypan.
  3. Place into the hot oven and cook for 15-17 minutes or until the whites have just set.
  4. Remove from the oven, drizzle with oil, top with crumbled feta, chilli, fresh coriander and the black salt and serve with crusty bread.
Notes
  1. *This is my full bolognaise sauce recipe which is why it serves 8. I can usually make 3-4 shakshukas with our leftover bolognaise sauce.
  2. * Make my Roast Tomato Pasta Sauce here!
Kitch'n Thyme https://kitchnthyme.com.au/

Lime & Coconut Green Smoothie

Green SmoothieGreen Smoothies!!! Ok, I’ve been meaning to get this up on the blog for about a year!…almost 2!!! haha

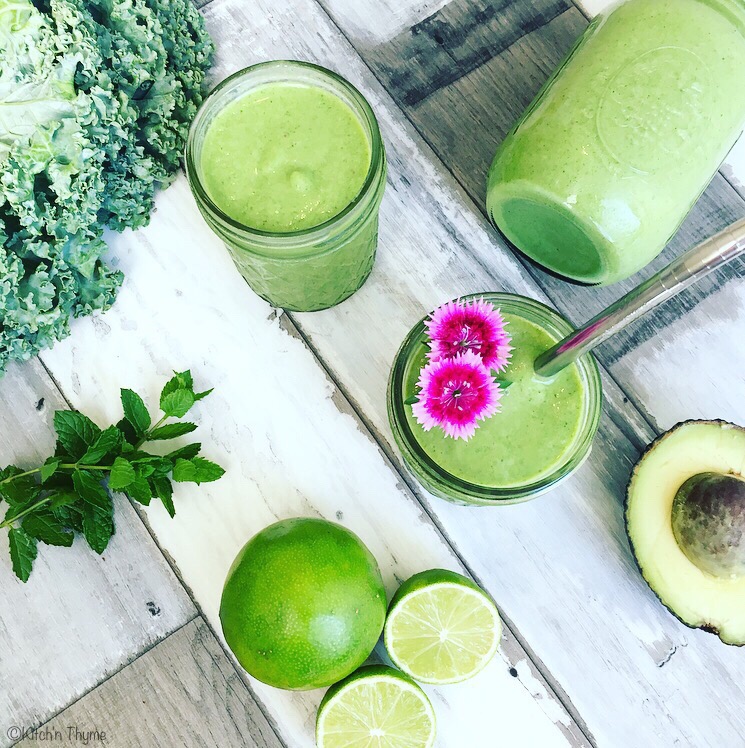
It should have been 1 of the first things I put up, but I wanted to do a really big post with a number of different flavours, but alas that might be another year away, so without further ado, I present you with one of the best green smoothies you will ever drink!!

We make them all the time in our house, my kids love them!! Well especially my little 17 month old! Mr 3 used to love them too, but he’s a little bit hit and miss these days! But alas that is fickle kids for you! Today he will drink a few sips and tomorrow he’ll drink a whole cup! The best thing I can do is to keep offering healthy food, it will pay off!

The key to a good or should I say great green smoothie is citrus, mint and parsley! These flavours disguise the strong flavour of spinach or kale and make it much more palatable. My favourite is lime, however orange, blood orange, lemon or grapefruit are also great!

Another essential ingredient in a green smoothie is avocado for creaminess! It is so much better with it!

Ice is also really important! The colder the smoothie the nicer it will be!

This is a bit strange but drinking through a straw also makes a green smoothie extra delicious! Try it and I’m sure you’ll know what I mean!

Here is a basic Green Smoothie guide:

Choose 400ml Base: Almond/Nut Milk, Coconut Cream/Milk, Coconut Water
Choose 100-200g Leafy Greens: Spinach, Asian greens, Cucumber, Zucchini, Celery
Choose 1 Citrus: Lime, Lemon, Grapefruit, Orange, Blood Orange
Choose 200-300g Fruits: Berries, Pineapple, Papaya, Mango, Peaches or Nectarines
Choose 1-2 Tbsp Thickeners: Chia or Hemp Seeds, Nut Butters
Choose a Power Up Booster: Mesquite, Lucuma, Maca Powder, Raw Cacao Powder, Medjool dates, Coconut oil, Acai, Cinnamon, Vanilla, Green Powders, or Protein Powders.

There are lots of others but this gives you a guide to go and create your own delightful flavours!

If you haven’t tried a green smoothie before, then give this one a go! It’s such a fabulous way of getting greens into the diet and is such a wonderful way to start the day! Adding some protein powder also makes it a perfect change to eggs for breakfast if you’re heading out the door and in a hurry!

Lime & Coconut Green Smoothie
Yields 1
Fresh, zesty, delicious green smoothie to start your day!
Write a review
Print
Prep Time
3 min
Total Time
5 min
Prep Time
3 min
Total Time
5 min
Ingredients
  1. 150g Frozen Bananas
  2. 1 Green Apple, cored & quartered, or Kiwi Fruit or Pear
  3. 1/2 Avocado
  4. 1 Lime, half skin removed
  5. 100g Ice
  6. 250ml Coconut Water
  7. 150ml Coconut Cream or Milk
  8. 4 Sprigs Fresh Mint, leaves only
  9. 4 Sprigs Fresh Italian Parsely, leaves only
  10. 1/2-3/4 Bunch Kale, de-veined
  11. 1 Tbsp Maple Syrup (optional)
Instructions
  1. Place all the ingredients into the Thermomix bowl and blend 1 Min/Speed 9.
  2. Pour into glasses and serve immediately.
Notes
  1. You can use water in place of the coconut water, but I do suggest adding the coconut cream/milk as it will make it nice and creamy.
Kitch'n Thyme https://kitchnthyme.com.au/

Choc Hazelnut Spread

Luciously creamy indulgent chocolate hazelnut spread! 

🍫🌰Choc Hazelnut Spread🌰🍫 Think drizzled on pancakes, as a crepe filling, drizzled over a cake, over fruit skewers, sandwiched between cookies (yup that recipes coming!!), stuffed into medjool dates, or simply spread on some crusty sourdough bread! Yum!! 😍

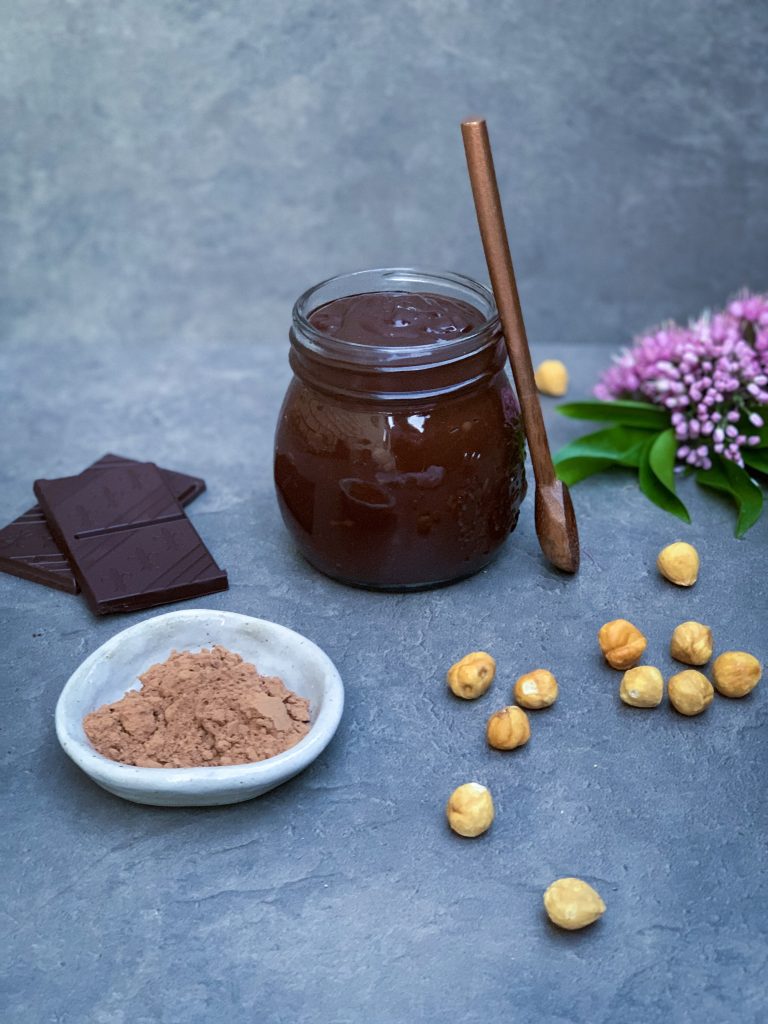
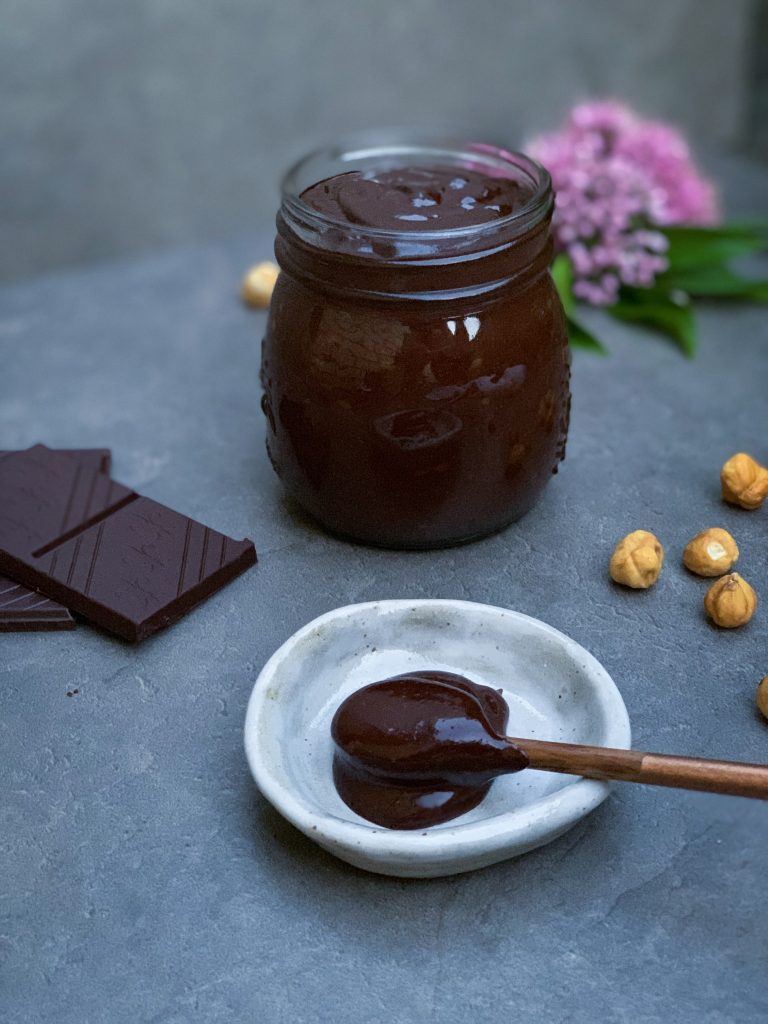
(You can see in the image above how molten and lusciously creamy it is straight after being made!)

It is SO easy to make your own Choc Hazelnut Spread or ‘Nutella’ in the Thermomix! .

Using natural healthier ingredients and making it from scratch there is a lot to love about a spoonful of this decadent creamy goodness! .

Have you ever read the ingredients list on a bought Nutella or choc hazel spread? Next time you go to the shops, make sure you do so! 🙃

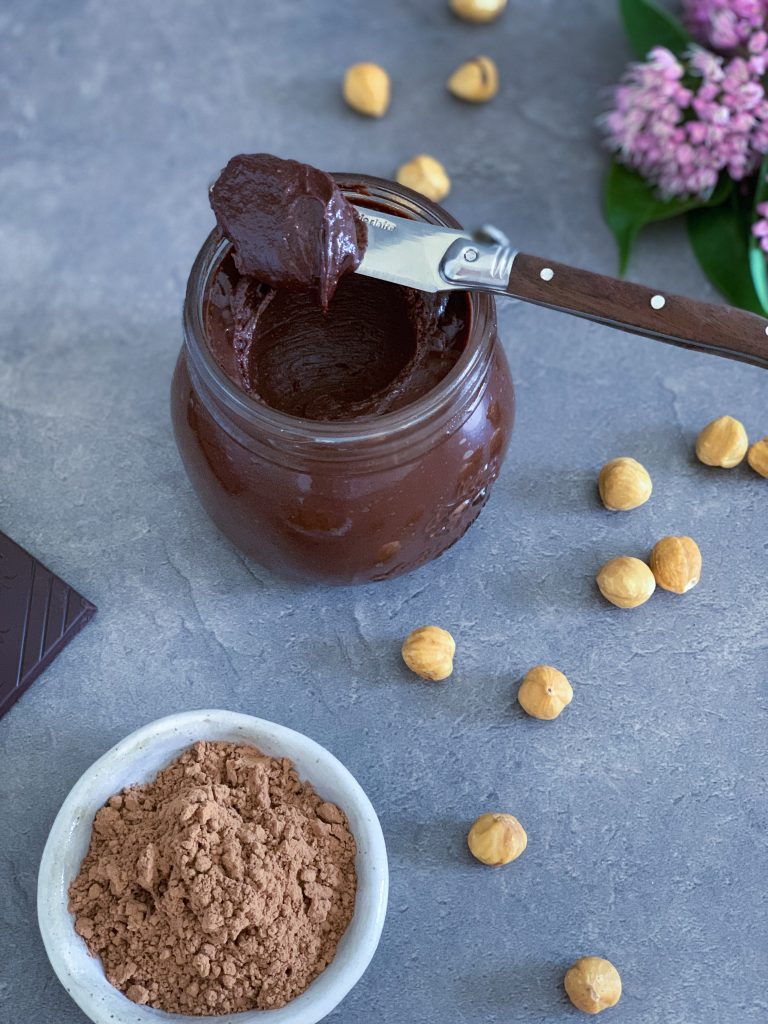
Now look at the image below of how the ‘Nutella’ sets after being in the fridge overnight! It sets up so nicely and is the perfect spreadable consistency after sitting out of the fridge for just 5 minutes!

I made this ‘Nutella’ a few years ago and now use it on my sister in laws Paleo Nutella Cake on my website, so give it a go if you haven’t already! 

Gabrielle xx

Print

Choc Hazelnut Spread

Luciously creamy indulgent chocolate hazelnut spread! 

  • Author: Gabrielle
  • Prep Time: 2 Minutes
  • Cook Time: 6 Minutes
  • Total Time: 8 minutes

Ingredients

60g Roasted Hazelnuts

75g Coconut Palm Sugar

100g Organic 70% Dark Chocolate (Use Dairy Free for complete Paleo)

100g Almond Milk

70g Butter or Coconut Oil

30g Raw Cacao Powder

1 tsp Vanilla Essence

Instructions

  1. Place the sugar into the mixing bowl and mill 10 Sec/Speed 9.
  2. Add the hazelnuts and mill 8 Sec/Speed 9.
  3. Add the dark chocolate and mill 10 Sec/speed 9.
  4. Add all the remaining ingredients and cook 6 Mins/60°/Speed 3.
  5. Place into jars and store in the fridge or set aside in a large bowl for use in the cake.

Notes

Make sure you make the delicious Paleo Nutella Cake with this delicious spread! 

5 Minute Coconut, Date & Blueberry Polenta

5 Minute Coconut Date & Blueberry Polenta

Creamy breakfast polenta is something I’ve been making since I was just a little kid! Of course not in the Thermomix as we didn’t have one back then but over the stove it’s almost just as simple! It’s super quick and easy and perfect when you’re on the go and need breakfast on the table fast!

This makes a really great breakfast for babies. Both my kids loved/love it! With babies under 1 I don’t add the honey, and reduce the dates and then its perfect.

I use coconut cream and water, however you can use any dairy free milk or even dairy milk if you like. I love the creaminess and taste of the coconut cream though, it’s just delicious.

The dates add a lot to this polenta. As I don’t add much sweetener, the dates add nice little pops of sweet with each mouthful. You can increase or decrease according to your tastebuds!

And it’s really as simple as that! Top with extra coconut cream and fresh blueberries, or any beautiful fresh berries and away you go!

5 Minute Coconut, Date & Blueberry Polenta
Serves 4
Creamy coconut polenta that makes for a delicious breakfast!
Write a review
Print
Prep Time
2 min
Cook Time
5 min
Total Time
7 min
Prep Time
2 min
Cook Time
5 min
Total Time
7 min
Ingredients
  1. 100g Polenta
  2. 200g Coconut Cream or Almond Milk
  3. 200g Water
  4. 20g Honey
  5. 1 tsp Vanilla Essence
  6. pinch celtic sea salt
  7. 50g Dates, chopped roughly
  8. 125g Fresh Blueberries
Instructions
  1. Place the polenta, coconut cream, water, honey, vanilla, and salt into the Thermomix and cook 5 Mins/100°/Speed 2.
  2. Add the dates and cook a further 1 Min/100°/Speed 1/Reverse.
  3. Spoon into serving bowls and top with extra coconut cream and fresh blueberries. Yummo!
Kitch'n Thyme https://kitchnthyme.com.au/