Basil Pesto

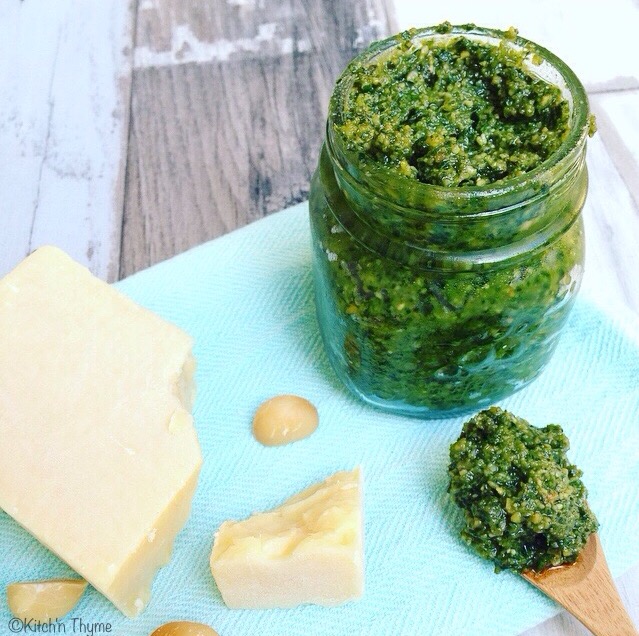
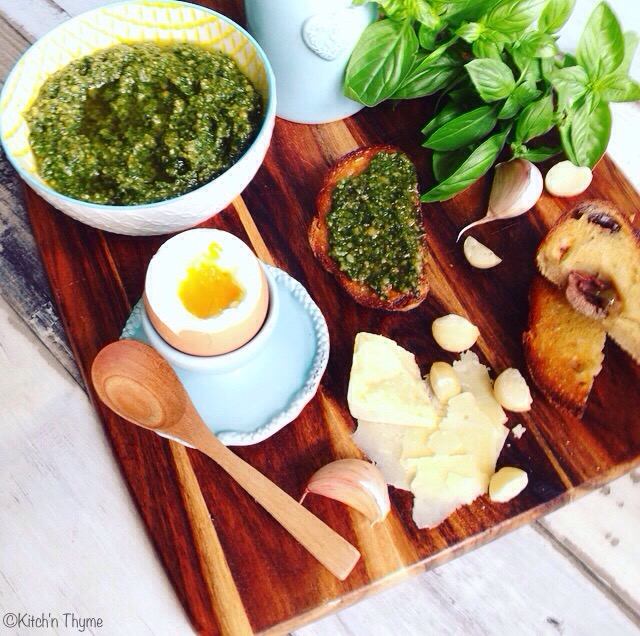
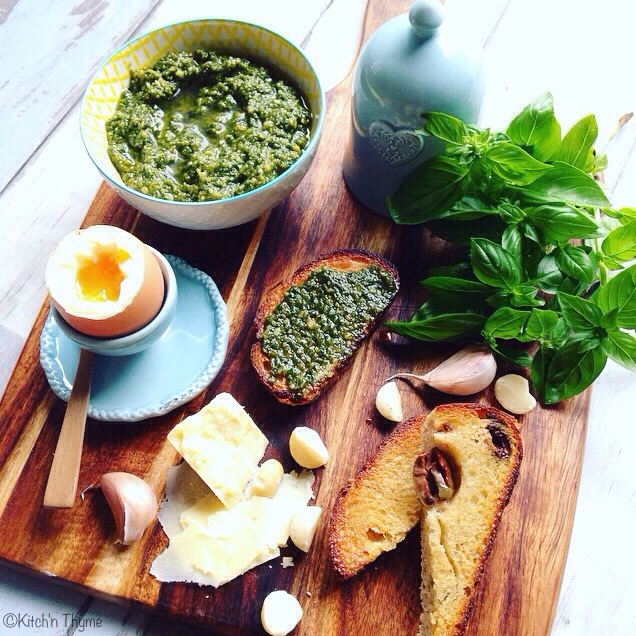
Basil PestoThis Basil Pesto is delicious!!!!! I developed this one back when I was studying as a chef.

I’ve always added Italian Parsley to my pesto as it oxides quite a lot slower than basil and keeps for a really brilliant vibrant green pesto. And plus I really love the flavour dimension that the parsley adds.

Basil Pesto 3

Basil & Parsley are really high in Vitamin K along with many other vitamins. Through their unique anti-oxidants, essential-oils, vitamins, phyto-sterols and other nutrient substances, they help equip our body to fight against germs, toxins and help to boost immunity level.

So what better way than to pack them into a super dense nutrient spread/sauce!

I choose macadamias and pine nuts! They mix gives a really delicious flavour. You could use brazil or cashew nuts too.

bAsil Pesto 2

To make it dairy free and completely paleo just omit the parmesan. You will still have a beautiful pesto.

Basil Pesto
Yields 500
Delicious moreish pesto that has endless uses in my kitchen!
Write a review
Print
Prep Time
5 min
Total Time
7 min
Prep Time
5 min
Total Time
7 min
Ingredients
  1. 60g Parmesan Cheese
  2. 1 Clove Garlic
  3. 2 Large Bunches (100g) Basil
  4. 1 Bunch (20g) Italian Parsley
  5. 150g Pine Nuts
  6. 50g Macadamias
  7. 1 1/2 tsp Celtic Salt
  8. 100g Olive Oil
Instructions
  1. Preheat the oven to 180°C. Line a large baking tray with baking paper and roast the pine nuts and macadamias for approximately 10 minutes or until golden brown. Set aside to cool slightly.
  2. Place the parmesan into the Thermomix and mill 5 Sec/Speed 7.
  3. Add all the remaining ingredients and blend 8 Sec/Speed 7.
  4. Serve.
Notes
  1. This pesto will keep nicely in the fridge for up to a week. Just make sure you cover the top with extra olive oil.
  2. You can freeze this pesto too. I often make a batch and freeze the leftover into ice cube trays ready to pull out for different meals.
Kitch'n Thyme https://kitchnthyme.com.au/

Cranberry & Almond Muesli Bars

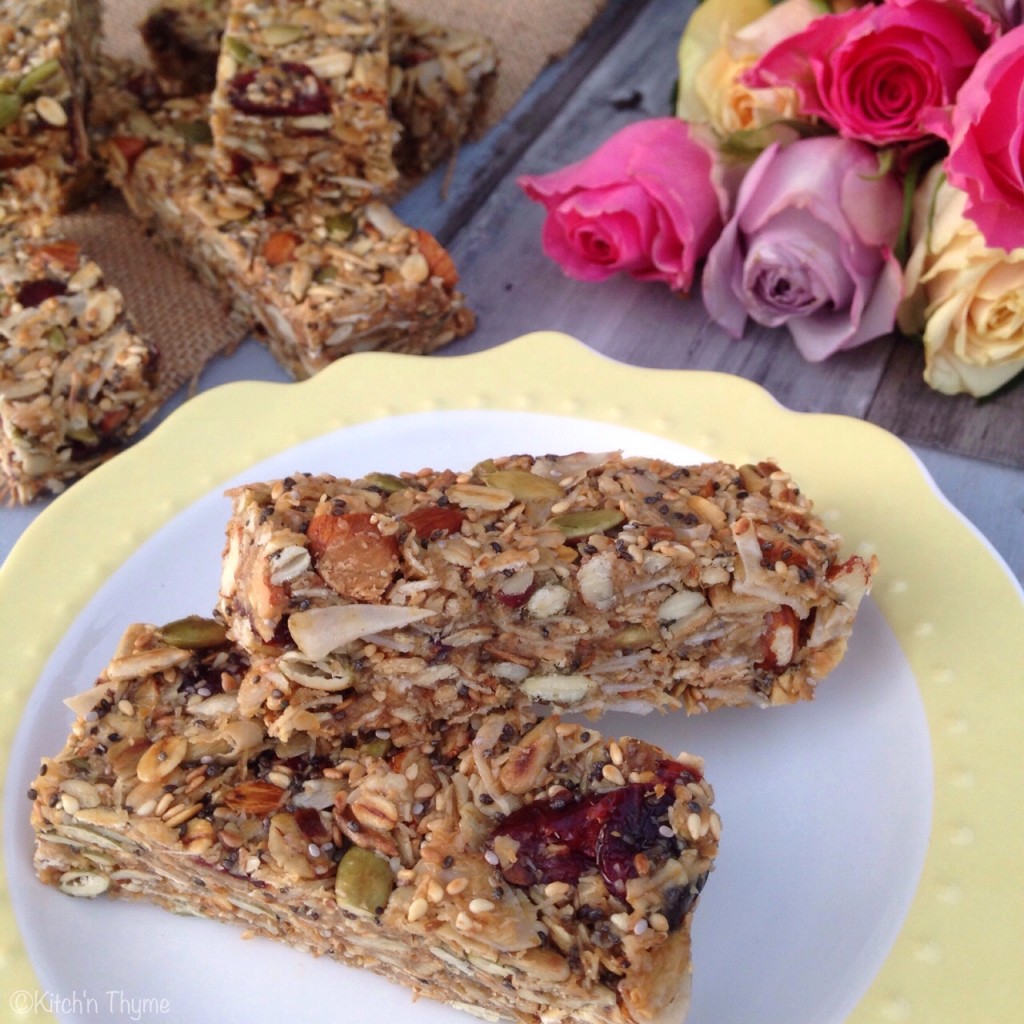
Muesli Bars 1

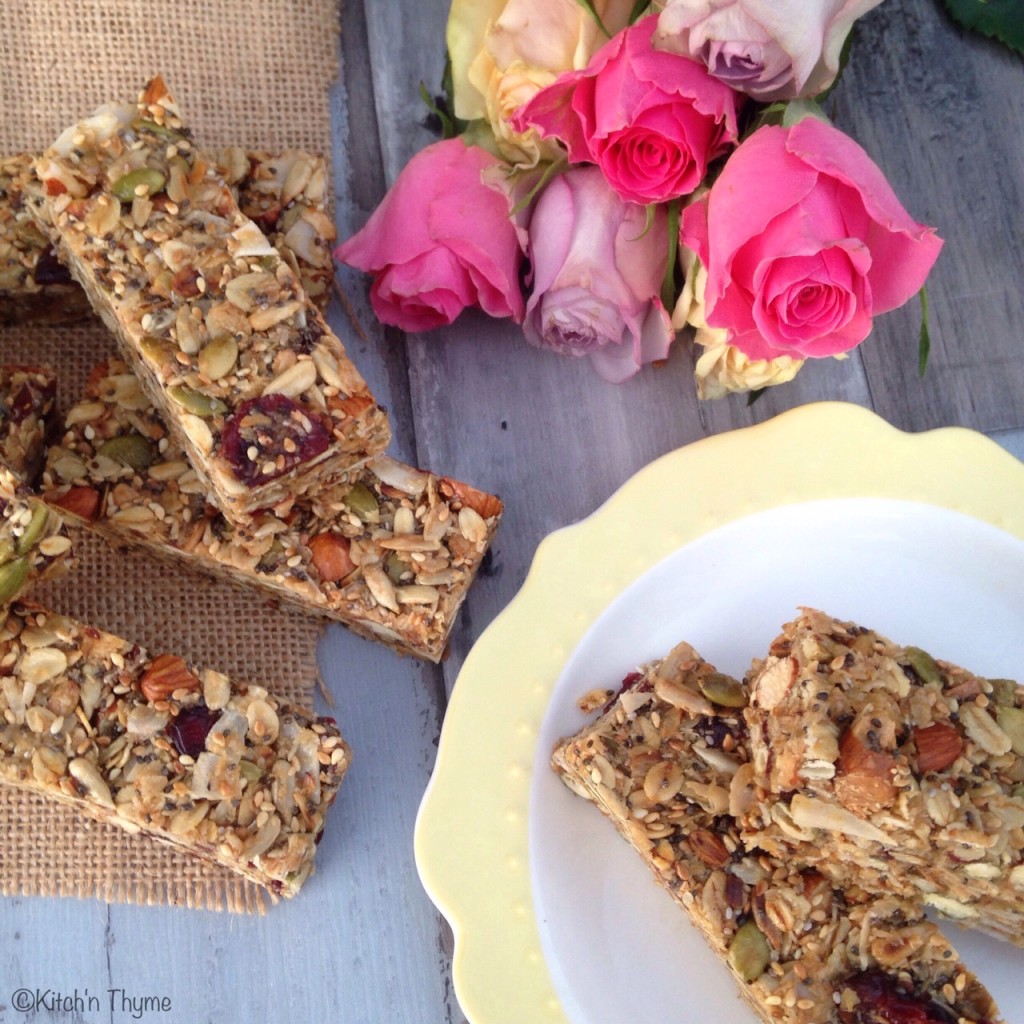
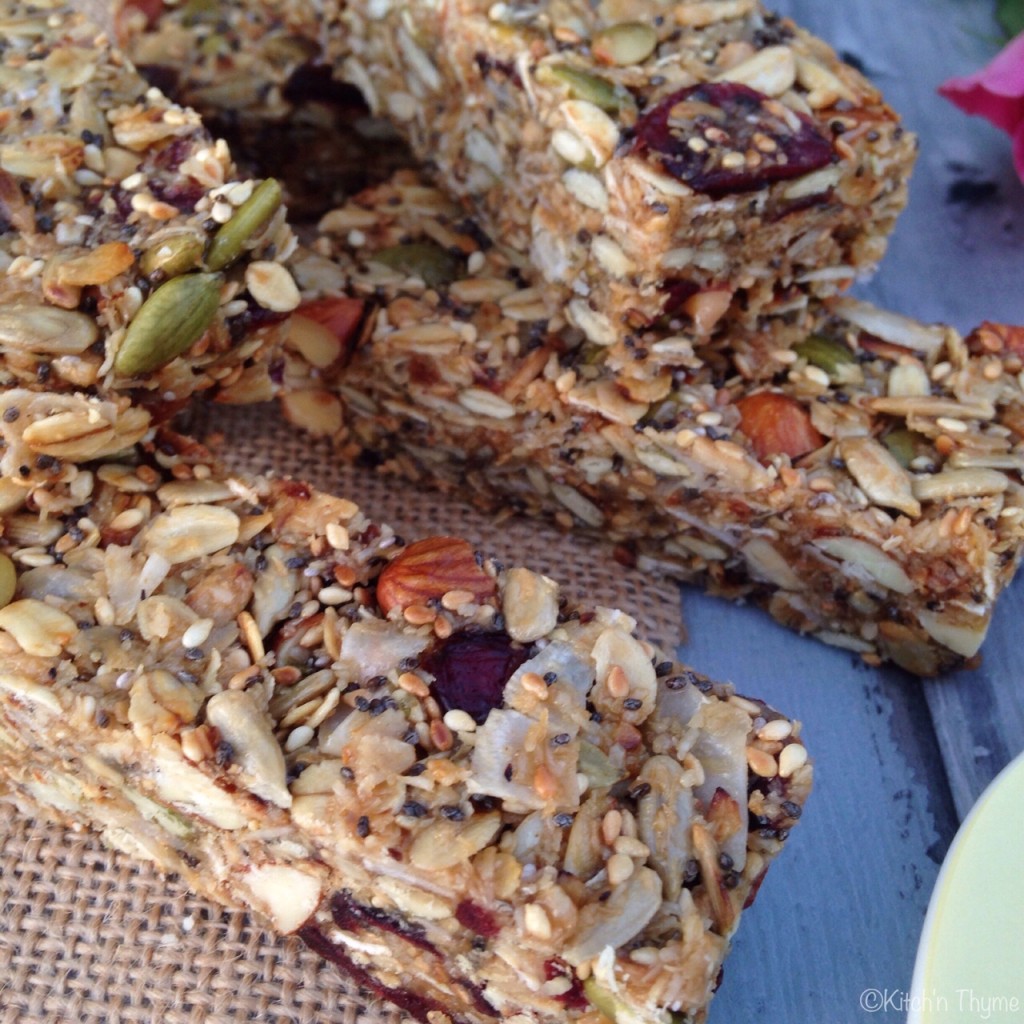
I’m finally sharing these with you all! I’ve had a number of friends ask me for my muesli bars recipe recently…and some not so recently!! With school going back it’s a must share right now! They are so quick easy and really take no time to make as they require no baking! They are full of nutritious seeds and nuts, with much lower sugar content than shop bought packaged ones that cost the earth!

They do have oats in them, so they aren’t gluten free. However, they can easily be made gluten free. To do so, omit the oats and replace with 100g of either organic puffed rice, cornflakes, quinoa flakes, extra nuts, seeds or coconut flakes or a mixture of all of them!Muesli Bars 4

You can also make them completely nut free by omitting the almonds if your school is nut free. Just replace with extra seeds or dried fruit. Otherwise you can make my Paleo Lunchbox Squares as another option.

Muesli Bars 2

These bars are sweetened with Honey and Coconut Sugar. You can use just honey if you prefer. I like the flavour of Coconut Palm Sugar with its Caramel tones. Either way, the sweetener in them is still a sugar, so they are definitely a treat, and something to eat in conjunction with a well balanced diet.

This is just one flavour combo that works really well. I also love Macadamia and Peach, or Chocolate Chip & Macadamia! So many options really! Just go to town on your favourite nuts or dried fruits!

Cranberry & Almond Muesli Bars
Yields 16
Nutty, seedy, fruity no bake muesli bars!
Write a review
Print
Prep Time
20 min
Prep Time
20 min
Ingredients
  1. 100g Organic Rolled Oats
  2. 80g Sunflower Seeds
  3. 80g Pumpkin Seeds
  4. 50g Sesame Seeds
  5. 80g Desiccated Coconut
  6. 80g Roasted Almonds, halved
  7. 50g Unsweetened Cranberries
  8. 50g Coconut Chips
  9. 30g Chia Seeds
  10. 130g Honey
  11. 50g Coconut Palm Sugar
  12. 130g Organic Butter
  13. 1 tsp Vanilla Extract
Instructions
  1. Line a 27cm x 18cm slice tray with baking paper. Set aside.
  2. Heat a large non stick frying pan over medium heat. Toast the oats until golden brown and then transfer to a large mixing bowl.
  3. Add the sunflower, pumpkin, sesame seeds and desiccated coconut and toast until golden brown, about 2-3 minutes. Transfer to the large mixing bowl.
  4. Add the almonds, cranberries, coconut chips & chia seeds and toss well to combine.
  5. Place the honey, sugar, butter and vanilla into the Thermomix and cook 8 Mins/115°/Speed 2. ( Use Varoma heat on the TM31.)
  6. Pour the hot mix over the dry ingredients and mix thoroughly with a spatula. Pour the mix into the prepared tray and press down firmly and smooth with your hands. Refrigerate until set firm, about 1-2 hours. Once set, cut into bars and place into an airtight container. Store in the fridge.
Kitch'n Thyme https://kitchnthyme.com.au/

Crunchy Asian Salad w. Chilli Macadamia Dressing

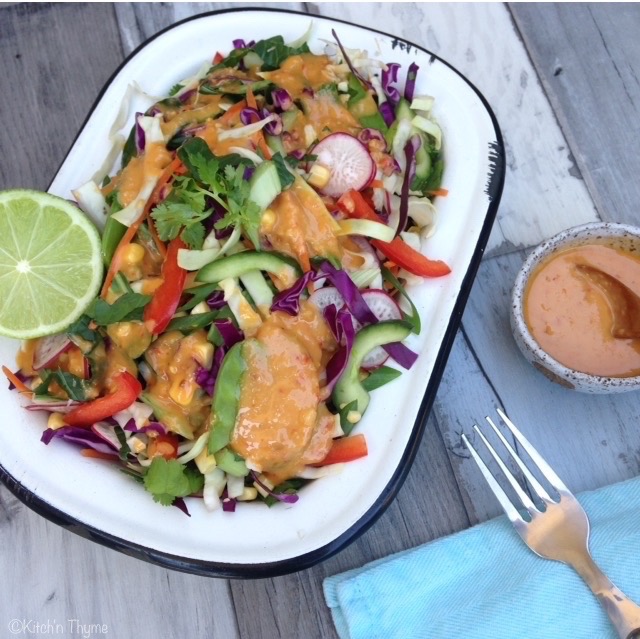
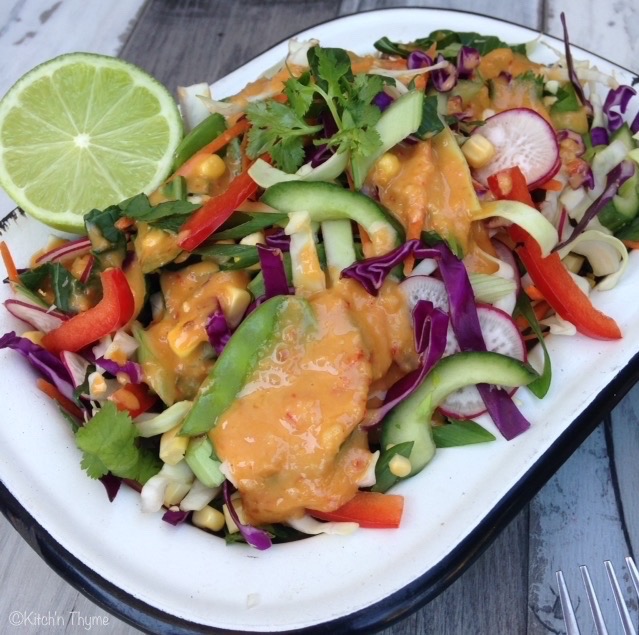
Asian Crunch Salad 2

This is absolutely perfect coming into summer! Fresh, crispy, crunchy, colourful, quick and yummy! You can’t really beat that! Well you can until this dressing is drizzled over the top! Packed with flavour, it’s one of the quickest, yummiest, creamiest dressings to make!

Asian Crunch Salad 3

We love salads in our house! Salads all year around! I pack my husband up with salad everyday for work, its the perfect meal of the day to eat salad! My toddler also loves salad too, and I love that!

Salads are such a great way of getting fresh raw nutrition into you! However, salads on their own are pretty boring without dressing! So a good dressing is key! Whether you go creamy or a classic style vinaigrette, you will be amazed at how much more appealing that bowl of rabbit food can become!
I have lots of salads and dressings to put up on the blog, and I’m realising I must have a real love for creamy dressings, because so many of them are creamy! Of course too I love a beautiful classic olive oil, lemon and salt, which just about goes with any salad!….That’s always there as the backup plan!

You could increase the chilli content (or just keep the membrane and seeds in) of this dressing if you want that real kick, however I make it quite mild to suit the little people palettes in my house!

Asian Crunch Salad

Crunchy Asian Salad w Chilli Macadamia Dressing
Serves 6
A super crispy crunchy Asian Salad with the yummiest dressing! Perfect topped with grilled meats, tofu or just some boiled eggs!
Write a review
Print
Prep Time
20 min
Total Time
20 min
Prep Time
20 min
Total Time
20 min
Chilli Macadamia Dressing
  1. 80g Macadamias, roasted
  2. 100ml Olive Oil
  3. 1 Red Cayenne Chilli, seeds removed
  4. 2cm Knob Ginger
  5. 1-2 Cloves Garlic
  6. 2 tsp Honey
  7. 2 tsp Apple Cider Vinegar
  8. 2 tsp Tamari
  9. 1/2 Lime, juiced
  10. 1 tsp Celtic Salt
Salad
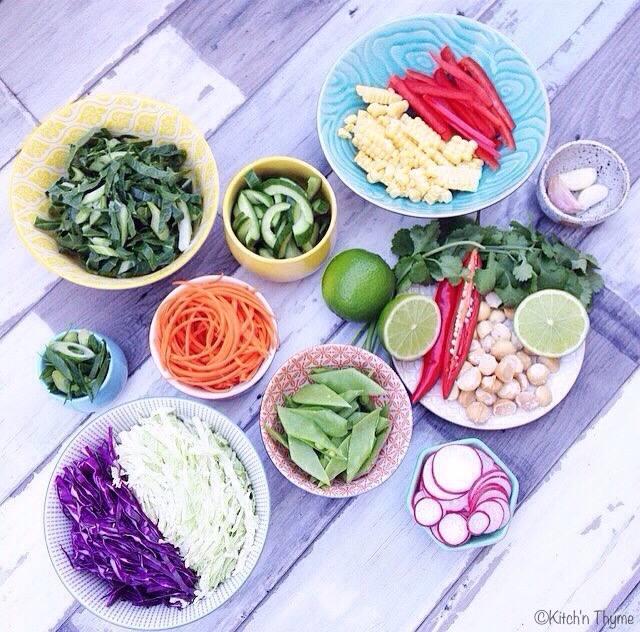
  1. 300g White or Wombok Cabbage, shredded
  2. 200g Red Cabbage, shredded
  3. 1 Bunch Choy Sum, shredded
  4. 2 Lebanese Cucumbers, seeds removed & sliced diagonally
  5. 1 Carrot, shredded
  6. 1/2 Red Capsicum, sliced thinly
  7. 4 Shallots, sliced thinly
  8. 125g Snow Peas, cut into 3rds diagonally
  9. 1 Fresh Corn Cob, kernels removed
  10. 6 Red Radishes, thinly sliced
  11. 1/2 Bunch Fresh Coriander Leaves
Instructions
  1. Preheat the oven to 180°C. Place the macadamias onto a baking tray lined with baking paper and roast until golden brown.
  2. Place a small jug onto the Thermomix lid and weigh 100ml oil into the jug. Set aside.
  3. Place the nuts, chilli, ginger & garlic into the Thermomix and chop 3 Sec/Speed 7.
  4. Add the honey, vinegar, tamari, lime juice and salt and process 1 Min/Speed 3. Whilst the Thermomix is running, slowly pour the reserved olive oil onto the lid, letting it drizzle into mixing bowl to emulsify. Set aside.
  5. Place all the salad ingredients into a large bowl and toss well to combine. Pour the dressing over the salad just before serving, to avoid making the salad soggy.
Notes
  1. You can use a variety of whichever crispy salad vegetables you have in your fridge, so don't be too particular about getting exactly what my recipe says.
Kitch'n Thyme https://kitchnthyme.com.au/

Butter Chicken

Butter Chicken 3

BUTTER CHICKEN!!!!!!! A nut free version.

Yes it’s finally here!!! My Butter Chicken recipe has made it up onto the blog! I’ve been wanting to share this one with you for a loooooonnnng time! But do you think I could get around to it!!! Let’s just say that I’ve been taking my time perfecting the recipe to which I now think is pretty pretty amazing!!

I don’t use cashews in my butter chicken. Some recipes and restaurants do and many don’t. Rumour has it that nuts started being introduced to Butter Chicken in the 1970’s in New Delhi for one reason or another, but it wasn’t like the traditional curry. I prefer not to because I think it changes the sauce in a number of ways. It makes the sauce thicker, and changes the flavour. It gives it a very thick mouth feel. I myself prefer a more authentic smooth tomato cream sauce….albeit with absolutely no change to the flavour!! I like to leave the nuts for a beautiful Korma curry!

It’s important in a butter chicken and in any curry for that matter, to cook off the aromatics well. So that’s the onion and garlic etc. If not cooked off enough, they will leave a bitter aftertaste and also won’t release all their intended sweetness.

Butter Chicken 1

The spices also need to be thoroughly cooked off too! If not, you can end up with quite a powdery mouth feel, not nice! So whether you’re making a curry in a Thermomix or in a saucepan, make sure you cook off the onions and spices well…please! I try to keep the spices fairly straight forward in this recipe without compromising flavour…so that you don’t have to buy a trillion different packets! You can add more cayenne if you like your curry a little hotter.

I also cook the tomatoes off for a few minutes too. This will help the tomatoes to release their sweetness and cook of any tart element.

You won’t get a butter chicken quite the colour of the one you eat at the Indian restaurant unless you use tandoori food colouring. They also marinate the chicken in the colour before grilling in the Tandor (you can grill the chicken first if you like before adding in to the sauce to finish cooking). I prefer not to use colours in my cooking, so we just have it a little more orange in colour!

I choose to use chicken thigh. I prefer it for its superior flavour and tenderness. You can use breast if you would prefer, just reduce the final cooking stage to about 10-12 minutes.

You can very easily make it completely dairy free by replacing the butter with coconut oil and the cream with coconut cream.

You can serve the curry with my Cauliflower Rice (which I keep plain with no coriander and capsicum etc for this recipe) or Basmati Rice and of course a good dollop of Cucumber Raita. (I’ll definitely put up my recipe for that soon too!)

This recipe feeds 6-8, so more than what my young family needs for 1 meal, so we eat half and freeze the other half for a rainy day or for a friend in need! I love having meals in the freezer for when you get in the door late or have a crazy day at home etc, it makes such a difference in helping the home to run smoothly!

I really hope you love my family favourite curry as much as we do!

Butter Chicken
Serves 6
Beautiful tender chicken cooked in a spicy tomato cream sauce.
Write a review
Print
Cook Time
35 min
Cook Time
35 min
Ingredients
  1. 800g-1kg Organic Chicken Thigh, diced into 4-5cm pieces
  2. 1 tsp Cumin
  3. 1 tsp Coriander
  4. 1 tsp Smoked Paprika
  5. 15g Olive Oil
  6. 20g Lemon Juice
Sauce
  1. 1 Medium Brown Onion, halved
  2. 3 Cloves Garlic, peeled
  3. 15g (3cm knob) Ginger
  4. 100g Organic Butter
  5. 30g Olive Oil
  6. 2 tsp Garam Masala
  7. 1 tsp Cumin
  8. 1 tsp Smoked Paprika
  9. 1 tsp Turmeric
  10. 1 tsp Fennel Seeds
  11. 1/2 tsp Coriander
  12. 1/8-1/4 tsp Cinnamon
  13. 5 Cardamon Pods
  14. pinch chilli powder or cayenne pepper
  15. 200g Crushed Tomatoes
  16. 30g Tomato Paste
  17. 300g Organic Cream
  18. 2 tsp Celtic Salt
  19. 1 tsp Honey
Instructions
  1. Place the chicken, spices, olive oil & lemon into a medium bowl and mix well to combine. Place in the fridge to marinate for 3 hours or overnight.
  2. Place the onion, garlic & ginger into the Thermomix bowl and chop 3 Sec/Speed 7.
  3. Add the butter & olive oil and cook 7 Mins/120°/Speed 1/MC Off.
  4. Add the spices* and cook a further 3 Mins/100°/Speed 1/MC Off.
  5. Add the crushed tomatoes and tomato paste and cook 5 Mins/100°/Speed 1, then blend 1 Min/Speed 8.
  6. Scrape down the sides of the bowl and the lid. Add the pre-marinated chicken, cream, salt & honey and cook 17 Mins/100°/Speed 1/Reverse.
  7. Pour into a Thermoserver and garnish with fresh Coriander. Serve with steamed basmati rice or cauliflower rice and cucumber raita.
Notes
  1. *Once you've cooked the spices off and cooked the tomatoes, you can choose to take out the cardamom pods before blending, or leave them in for an extra punchy spice flavour.
  2. If you're using canned tomatoes, you can use the whole 400g tin, but it will just encourage a little more of a tomato flavour. I choose to freeze the other half for another meal of butter chicken.
  3. This recipe feeds 6-8, so more than what my young family needs for 1 meal, so we eat half and freeze the other half for a rainy day or for a friend in need! I love having meals in the freezer for when you get in the door late or have a crazy day at home etc, it makes such a difference in helping the home to run smoothly!
Kitch'n Thyme https://kitchnthyme.com.au/
Spicy Tomato Relish


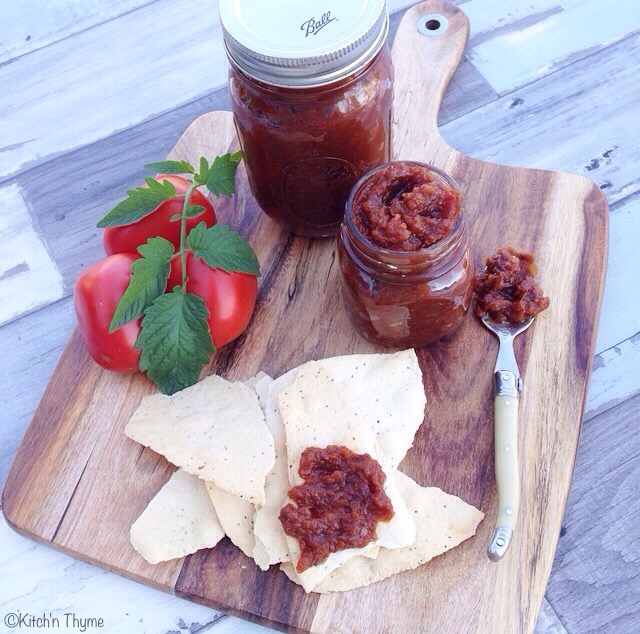
Tomato Relish 4

I don’t really remember when I started making this gorgeous sauce. All I know is that it’s stuck with me and been a real hit in my house, and is one of my secret recipes! So I’m sharing it with you all here….so I guess it’s not a secret anymore! Shhhh, don’t tell anyone!

Back when I was studying, I made it for one of our big functions and it was a real hit! Back then, before I had a Thermomix it used to cook down on the stove for about 3-4 hours! In the Thermomix it takes 2 hours, which is a real time saver for me! Plus I don’t have to watch it as much with the timer set!
Tomato Relish 3

There is some chilli in it, however you can increase this to your tastebuds! The spices are subtle and add a really beautiful depth of flavour to the relish.

I’ve significantly reduced the sugar content from my original recipe, as that has become really important to me as the children are eating more of these foods, (and I don’t want to train their tastebuds for food that’s too sweet), but it still has sweetener, so keep it in moderation for the little ones…and the adults too of course! You can make it completely Paleo if you use Coconut Palm Sugar.

Tomato Relish 1

I do de-skin the tomatoes, however I have made it before without and its ok, but the texture is that much nicer without the skins, and it really is a very quick step!

You can serve it with turkey ham on wraps, with tacos, arancini balls, on eggs for breakfast, with crackers and cheese! So many options, the list goes on and on!

Pure spicy love, Gabrielle xx

Spicy Tomato Relish
Yields 1
Delectable spicy relish to serve with meats, rissoles, sandwiches, cheese platters and more!
Write a review
Print
Prep Time
5 min
Cook Time
2 hr
Total Time
2 hr 5 min
Prep Time
5 min
Cook Time
2 hr
Total Time
2 hr 5 min
Ingredients
  1. 1.5 kg Mixed Tomatoes, peeled & quartered
  2. 250g Red onions, peeled & halved
  3. 2 Cloves Garlic, peeled
  4. 2cm knob Ginger, peeled
  5. 1-2 Red Cayenne Chillies, deseeded
  6. 125ml Red wine vinegar
  7. 180g Rapadura Sugar
  8. 1 1/2 tsp Celtic Sea Salt
  9. 1/4 tsp Pimentos (Allspice), ground
  10. 1/4 tsp Cloves, ground
  11. Few grinds of Black Pepper
  12. Pinch Cayenne Pepper
Instructions
  1. Boil the kettle. Cut a small cross into the base of the tomatoes and place them into a large mixing bowl and cover with boiling water. Leave for 1-2 minutes to soak, before peeling the skins off.
  2. Place the onions, garlic, ginger & chilli into the Thermomix & chop 3 Sec/Speed 7.
  3. Add the peeled tomatoes and chop for another 3 Sec/Speed 5.
  4. Add the red wine vinegar, rapadura, salt, spices, pepper & cayenne and cook 90 Mins/100°/Speed 1.5-2 with the simmering basket on top. Cook for a further 30-60 Mins/100°/Speed 1.5-2. (The timer on the Thermomix goes to 99 mins on the TM5, so you could set it to that and then for set it for a further 50 mins or so.)
Kitch'n Thyme https://kitchnthyme.com.au/

Lemon Tart (Gluten Free & Refined Sugar Free, Primal)

Lemon Tart

Who doesn’t love a good citrus tart?

Such a beautiful French dessert that is the perfect way to end any meal or on any afternoon tea menu!

This beautiful creation of mine is one of my husbands favourite! He is an absolute lover of lemon!

I’ve always made it with my Sweet Spelt Shortcrust, however I’m somewhat trying to lower any gluten content for a few reasons at the moment. So I’ve made a delicious Paleo crust that is a really lovely compromise!
Lemon Tart 2
The filling is delectably smooth! It used to take me a long time over the stove to whisk it so constantly and I love that the Thermomix makes it so much quicker and I don’t have to watch it! If you like a lemon tart with a lot of lemon curd then double the curd to make it thicker.

It’s important to use a mild flavoured honey in this as a strong honey can easily over power that beautiful lemon flavour that we want to hero! 😉

Because I use butter in the curd it isn’t completely Paleo, but you just can’t have a lemon tart without butter!!! I absolutely love good fats, and I can’t bare to cook without them! They have amazing health benefits! More on that in another post though!

I hope you enjoy this is as much as we do!

Lemon Tart
Yields 8
The most perfectly smooth, naturally sweetened, tangy and delectable Lemon Tart ever!
Write a review
Print
Prep Time
1 hr
Cook Time
20 min
Total Time
1 hr 20 min
Prep Time
1 hr
Cook Time
20 min
Total Time
1 hr 20 min
Sweet Shortcrust Pastry
  1. 50g Coconut Palm Sugar
  2. 150g Almond Meal
  3. 50g Coconut Flour
  4. 30g Arrowroot
  5. 100g Organic Butter
  6. 1/2 Lemon, zested
  7. 1 Organic Egg, lightly beaten
Filling
  1. 200g Lemon Juice, strained
  2. 200g Organic Butter
  3. 150g Organic Honey
  4. 1 1/2 Lemons, zested
  5. 1 Tbsp Cornflour
  6. 5 Organic Eggs
Pastry
  1. Place the sugar into the Thermomix bowl and mill 10 Sec/Speed 9.
  2. Add the almond meal, coconut flour, arrowroot, butter and lemon zest to the bowl and blend 10 Sec/Speed 6.
  3. Add the egg and Knead 15 Sec.
  4. Wrap in plastic wrap, flatten, and place in the refrigerator for 30 minutes to chill.
  5. Preheat the oven to 160°C and spray a 26cm tart case with oil spray.
  6. Once the dough is chilled, roll out to 5mm thickness between 2 sheets of baking paper.
  7. Peel off the top sheet of baking paper, and transfer pastry to prepared tart case and peel the bottom sheet of baking paper off, pushing the pastry down gently to fit the case evenly. If there are any tares, just use a little of the excess dough to carefully patch it, being careful to maintain an even thickness.
  8. Place back into the fridge to chill for 15 minutes before baking for 15 minutes.
  9. Remove from the oven and cool.
Filling
  1. Place the juice, butter, honey and zest into the bowl of the Thermomix and heat 3 Mins/60°/Speed 2.
  2. Mix 50 Sec/Speed 3, adding the cornflour first, then the eggs 1 at a time through the hole in the mixing bowl lid. Once the eggs are completely incorporated, cook for 8 Mins/80°/Speed 3.
  3. Pour into the cooled tart case and gently agitate it the case to even the filling mixture out. Set aside to cool and then place into the fridge to set completely.
  4. Once set, approx. 1 hr, cut into slices and serve with fresh cream or yoghurt.
Notes
  1. Make sure to use a mild flavour honey so that it doesn't over power the flavour!
Kitch'n Thyme https://kitchnthyme.com.au/

Salted Carob Bliss Balls

Carob Bliss Balls3These ones are a recent creation! And they are good!

I’ve used Carob instead of Cacao. Carob is naturally sweeter than cacao and is caffeine free. It’s a great alternative to cacao and has a beautiful sweet, mellow flavour.  You can use Cacao, but I much prefer the carob in these ones, it’s just a perfect flavour with the slight saltiness.

More and more I realise how much I’m going back to my childhood. Carob was the only thing we ate, chocolate was unheard of in our house!…I know deprived! But now I think oh yum carob for a change!

Carob Bliss Balls1

I’ve used part almonds, part sunflower seeds, and I roast both of them. The almonds are easy to do in the oven on about 180° for 15 minutes and the sunflowers are easiest to toast in a frypan over medium heat until golden. You don’t have to roast them if you want them to be completely raw, but I do love the flavour of roasted nuts and seeds!

There is no added sweetener other than the dates. I love this. You could eat a couple for breakfast they are that good!

The little bit of coconut cream adds to the texture and helps bind them too.

 I love having some ready make bliss balls in the fridge at all times so there’s a quick fix snack for lunchboxes or just when there’s a hankering for something sweet.

Salted Carob Bliss Balls
Yields 18
A bliss ball good enough to eat for breakfast!
Write a review
Print
Prep Time
2 min
Total Time
10 min
Prep Time
2 min
Total Time
10 min
Ingredients
  1. 100g Roasted Almonds
  2. 50g Toasted Sunflower Seeds
  3. 4 Medjool Dates, seeds removed
  4. 50g Coconut Oil
  5. 20g (2 Tbsp) Carob Powder
  6. 40g Coconut Cream
  7. 1 tsp Vanilla Essence or Paste
  8. 1/8 tsp Celtic Sea Salt
  9. Desiccated Coconut for rolling
Instructions
  1. Place all the ingredients into the Thermomix and process 10 Sec/Speed 6. Scrape down the sides of the bowl and process a further 10 Sec/Speed 7, or until a nice sticky crumb is achieved.
  2. Roll the mixture into balls and toss through the coconut to coat before placing into the fridge to set.
Notes
  1. If the mixture is a bit too oily to roll easily, place into the fridge to set for 30-60 mins before rolling.
Kitch'n Thyme https://kitchnthyme.com.au/

Thai Chicken Salad with Creamy Coconut Dressing

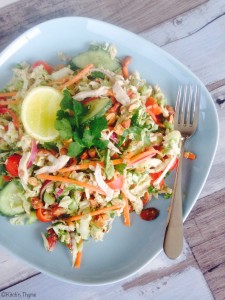
Thai Chicken SaladI’ve been wanting to get this salad up on the blog for many months! Now before I go any further I just need to enlighten you on the reality of running a blog with 2 small children!  Of course the day I do decide to try and photograph the salad is the day one of my babies won’t sleep in her bed – only on mum! So she’s on my back in the Ergo carrier so she won’t attack the photo set and she promptly goes to sleep! I line everything up, ready to snap away! I go to take the photo and my storage is full! Ok, so I spend 5 minutes making some storage space on my iPhone….yes I do take all of my photos on an iPhone!…So now we are all ready to go again!

Then I hear little footsteps walking down the hallway! Oh yes that would be my 2.5 year old!…At this point, I wonder whether there is point in battling through!! He comes over “What’s this Mum?” I tell him its a yummy salad! “Mmmm it looks good Mum”. He proceeds to sit down and start feeding himself forkful after forkful along with the occasional forkful to mum “Open wide Mum!”. By this time I think it’s safe to say I’m no longer in photo taking mode, but deciding to relish this wonderful moment with my precious little human! We had a great little picnic! Let’s just say that there was about a teaspoon of salad left on the plate after his visit! And alas, I think that must be a very good sign! If a 2 year old will eat it I’m happy….my job is done! haha 😉

My saving grace was the rest of the salad in the kitchen! I could replate and have another go! So by the end of the day I finally had a photo!

Some days it’s easy to lose focus on what this is all about! My aim is to share the things I’m doing to nourish my family…and that was today! 

This is another recipe from a number of years ago. I used to serve this somewhat regularly at the health retreat as a perfect lunch option. And it makes the perfect option for me and obviously my 2 year old at home too! Good protein, good carbs and good fats from the dressing too!

Over time, I’ve done a couple of different dressings. I couldn’t work out which one to share, so I’ve gone with the Creamy Coconut Dressing. I’m happy to share the other one which is a more traditional tamari sesame dressing! Both delicious!

I often make this salad and serve it with my yummy Sticky Sesame Chicken for a delicious dinner!

Thai Chicken Salad w. Creamy Coconut Dressing
Serves 4
A perfect one bowl meal for a light lunch or dinner.
Write a review
Print
Prep Time
10 min
Cook Time
20 min
Total Time
30 min
Prep Time
10 min
Cook Time
20 min
Total Time
30 min
Ingredients
  1. 1.25L Water
  2. *250ml Coconut Cream
  3. 2 Organic Chicken Breasts
  4. 1 Red Chilli, deseeded
  5. 1 Stem Lemongrass
  6. 2 Coriander roots & stems
  7. 4 Kaffir Lime Leaves
  8. 1 tsp Celtic Salt
SALAD
  1. 1/4-1/2 Wombok Cabbage, finely sliced
  2. 1 Bunch Choy Sum or Bok Choy, finely sliced
  3. 1/2 Red Capsicum, thinly sliced
  4. 1 Continental Cucumber, cut diagonally
  5. 1 Carrot, julienned
  6. 4 Spring Onions or 1 Red Onion, sliced thinly
  7. 1/4 Bunch Coriander Leaves, roughly chopped
  8. 1/4 Bunch Thai Basil Leaves, roughly chopped
  9. 100g Roasted Almonds or Cashews
CREAMY COCONUT DRESSING
  1. 1/4 Bunch Coriander, inclu roots & stems
  2. 2cm knob of Ginger
  3. 2 Kaffir Lime Leaves, de-stemmed
  4. 1 Tbsp Lime Juice
  5. 1 tsp Celtic Sea Salt
  6. 1 Tbsp Tamari
  7. 2 tsp Sesame Oil
  8. 250ml Coconut Cream
Instructions
  1. Place the water and coconut cream into the Thermomix bowl and insert the simmering basket. Place the chicken, chilli, lemongrass, coriander, lime leaves and salt into the basket.
  2. Cook the chicken 20 Mins/100°/Speed 3. Remove the basket with the spatula and set the chicken aside for 5 mins to cool slightly. Discard the aromatics in the basket and the cooking water. Tear the chicken into a few chunks and place back into the Thermomix bowl. Shred the chicken 5 Sec/Reverse/Speed 4. Place into a large mixing bowl.
  3. Place all the salad veges and the nuts into the large mixing bowl with the chicken and toss to combine.
  4. For the dressing, place all the ingredients into the Thermomix bowl and blend 30 Sec/Speed 8.
  5. Drizzle over the salad and toss to combine if serving straight away or serve on the side so the salad doesn't get soggy.
Notes
  1. *You can cook the chicken in all water to save on coconut cream if desired.
Kitch'n Thyme https://kitchnthyme.com.au/

Feta & Walnut Meatballs

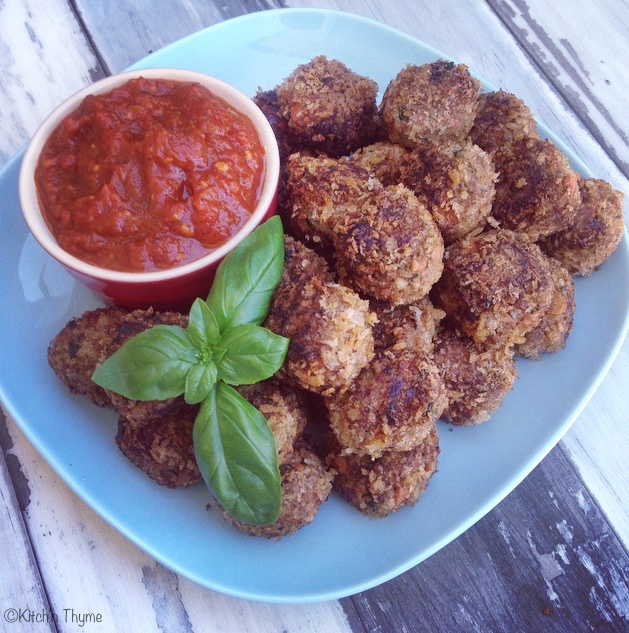
IMG_9465MeatballsI’m pretty positive you will LOVE these meatballs!!! They make the perfect weeknight meal, or part of an elaborate Italian feast, or more simply the perfect protein hit for a quick lunch or lunchbox!

I made a bit batch of these for my friend when she had her baby earlier this year! They went down a real treat and her husband wanted the recipe…SO you’re all super lucky, because otherwise I might not have shared this favourite recipe of mine!

The walnuts just add such a lovely texture to the meatball and compliment beef in flavour so well! You could substitute other nuts with what is in your pantry though!

I do use Panko breadcrumbs sometimes for rolling….I know – Japanese & Italian! Say again?!! Yes, just this once, I’m mixing up the cuisines! These breadcrumbs are a real treat in my home! But they really do make them so yummy and crunchy on the outside! I’ve used ordinary breadcrumbs, gluten free breadcrumbs, or some crushed nuts (for Paleo) and they all work fine too! If using Panko crumbs, you may need to gently press the crumbs into the meatballs to help them stick sufficiently.

When cooking the meatballs, be really gentle when turning them over in the pan. Just gently turn them, as they may have the potential to crumble, depending on how wet your mix is. If you have cooked off the onions and veggies sufficiently, they shouldn’t fall apart though, but just be mindful of it!

You can absolutely leave the feta cheese out of them if you are dairy free or Paleo. They are still delightfully delicious without!

The sauce here, is a really quick pasta sauce. Sometime I’ll share with you my yummy-licious Roast Tomato, Garlic & Thyme Pasta Sauce! But this one is perfect for meals on the table fast! Just use whatever herbs are in your garden or what you have in the fridge! When I cook I don’t get too hung up on being exact with these things. If a recipe says 1/2 and onion, I’d chuck the whole one in! If you think some rosemary or oregano would be nice then stick it in! I’ve used both before and they are yum! Just whatever flavour hits you in the moment will work perfectly!

Enjoy!

Feta & Walnut Meatballs
Serves 4
My delicious meatballs make for the perfect dinner or for a fantastic ready-to-eat snack from the fridge! Get cooking!
Write a review
Print
Meatballs
  1. 1 Large Red Onion
  2. 1 Clove Garlic, peeled
  3. 4 Sprigs Italian Parsley, chopped finely
  4. 2 Zucchini, cut into 3-4cm pieces
  5. 2 Carrot, cut into 3-4cm pieces
  6. 4 Tbsp Olive Oil
  7. 100g Walnuts
  8. 500g Organic Beef Mince
  9. 100g Feta, crumbled into rough pieces
  10. 1 Tbsp Italian Herbs
  11. 2 tsp Balsamic Vinegar
  12. 2 tsp Dijon Mustard
  13. 2 Tbsp Tomato Paste
  14. 2 tsp Celtic Sea Salt
  15. 100g Panko Breadcrumbs or preferred breadcrumbs
  16. Ghee or Coconut Oil for shallow frying
Quick Pasta Sauce
  1. 1 Brown Onion, halved
  2. 2 Cloves Garlic, peeled
  3. 2 Sprigs Fresh Basil
  4. 4 Sprigs Fresh Italian Parsley
  5. 2 Sprigs Fresh Thyme
  6. 50g Olive Oil
  7. 800g Organic Tinned Diced Tomatoes
  8. 1 tsp Honey
  9. 1 tsp Celtic Salt
  10. 1/2 Lemon, zested
Meatballs
  1. Place the onion, garlic, parsley and olive oil into Thermomix mixing bowl and chop 5-7 Sec/Speed 5.
  2. Heat a non-stick fry-pan over medium heat. Place 1/2 the olive oil in the pan to heat a little.(Being careful not to overheat it.)
  3. Scrape the onion mix into the pan and sauté until it starts to go golden brown and the moisture from the onions has cooked off.
  4. Place into a large mixing bowl and set aside. Leave the pan on the heat and add the remaining oil to heat.
  5. Place the zucchini and carrot into the mixing bowl and chop 10-15 Sec/Speed 4.
  6. Scrape into the pan and sauté until all the moisture has cooked off from the veggies. Add to the large mixing bowl with the onion mixture.
  7. Place the walnuts into the mixing bowl and chop 10 Sec/Speed 4, or until roughly chopped and add to the large mixing bowl.
  8. Add all the remaining ingredients and mix well to combine.
  9. Roll the mixture into tablespoon sized balls before rolling in the breadcrumbs. You may need to gently press the panko crumbs into the meatballs so they stick sufficiently.
  10. Heat a large non-stick frypan over medium heat with the ghee or oil, and cook in batches, turning frequently, for about 4 minutes, or until golden brown all over. Please take when turning the meatballs, they need to be handled with care.
  11. Remove from the heat and serve with tomato pasta sauce, fresh zucchini or parsnip pasta or traditional spaghetti.
Quick Pasta Sauce
  1. Place onion, garlic, herbs and olive oil into the mixing bowl and chop 5 Sec/Speed 5. Scrape down the sides of mixing bowl and sauté 7 Mins/120°/Speed 1.
  2. Add the tomatoes, honey, salt and lemon zest and cook 20 Mins/100°/Speed 2.
  3. Serve hot over the meatballs.
Kitch'n Thyme https://kitchnthyme.com.au/

Chilli Con Carne

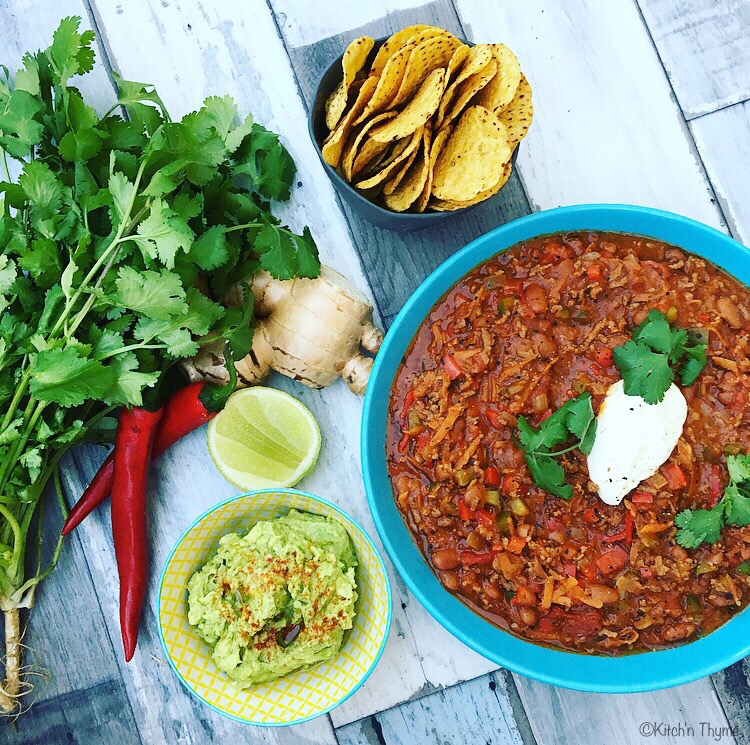
Chilli Con Carne upgradedThis dish brings back many memoires for me! Growing up, my mum used to make a delicious vegetarian version. It was such a staple in our house and one that I remember fondly!

I’ve added in a few things and made it more traditional with the organic beef, but essentially it still has all those same hearty flavours that remind you of home! 

Some people put cinnamon in chilli con carne. I personally don’t, but you are more than welcome to add some in if you like. I absolutely love cinnamon, but am not a huge fan of too much in savoury dishes like this!

There are all different consistencies to the perfect chilli, mine isn’t runny, but it’s not super thick either.

I use Mexe-beans (Pinto beans) rather than Red Kidney Beans and I don’t drain them. The liquid is just water, spices and salt, (no sugar or nasty flavourings), so I add it in for that perfect consistency and extra flavour. You can use Red kidney beans if you like, but I find them a bit more floury than Pinto beans. 

I also love the basil and oregano that I put in mine! It adds a beautiful flavour! I tend to not make it too hot with the chilli. 1-2 is enough for me as this suits my little boys taste buds too! But feel free to increase the chilli if you like your food hotter! 

Chilli Con Carne upgraded 2

It’s starting to get cooler now, and this beauty is the perfect winter warmer! 

So what are you waiting for?!!  Go cook it! Go right now!! 

Chilli Con Carne
Serves 4
My take on this classically perfect winter warmer!
Write a review
Print
Prep Time
5 min
Cook Time
30 min
Total Time
35 min
Prep Time
5 min
Cook Time
30 min
Total Time
35 min
Ingredients
  1. 2 tsp Cumin Seeds
  2. 2 tsp Coriander Seeds
  3. 1/4 tsp Black Peppercorns
  4. 1 Large Carrot, cut into 3-4cm lengths
  5. 1 Green Capsicum, quartered & deseeded
  6. 1 Red Capsicum, quartered & deseeded
  7. Few sprigs Fresh Coriander, inclu stems and roots
  8. 2 Medium Brown Onions, halved
  9. 3cm Knob Ginger
  10. 2 Cloves Garlic
  11. 1-2 Long Red Cayenne Chillies, adjust to taste
  12. 1/8-1/4 tsp Cayenne Pepper
  13. 2 Tbsp Extra Virgin Olive Oil
  14. 500g Organic Beef, partially frozen, cut into pieces
  15. 1 Tbsp Dried Basil
  16. 1 Tbsp Dried Oregano
  17. 400g Can Mexe Beans, Red Kidney Beans or Black Beans
  18. 2 x 400g Can Organic Chopped Tomatoes
  19. 4 Tbsp Organic Tomato Paste
  20. 2 tsp Celtic Sea Salt
Instructions
  1. Place the spices into the mixing bowl and dry roast 2 Mins/120°/Speed 1. Allow to cool slightly then insert measuring cup and mill 1 Min/Speed 9. Transfer into a bowl and set aside.
  2. Without cleaning the bowl, place half of the beef into mixing bowl and chop Turbo/0.5Sec/3 Times to mince. Transfer to the bowl with the spices and repeat the same mincing process with the remaining beef before adding to the bowl with the beef and spices.
  3. Without rinsing the bowl, place the carrot, capsicums and coriander into mixing bowl and chop 5 Sec/Speed 4. Transfer into the bowl with the spices and set aside.
  4. Place brown onion, ginger, garlic, red chillies, cayenne pepper and olive oil into mixing bowl and chop 3 Sec/Speed 7. Scrape down sides of mixing bowl with spatula and sauté 6 Mins/120°/Speed 1, placing simmering basket instead of measuring cup onto mixing bowl lid.
  5. Insert the butterfly. Add the beef mince, spice and carrot/capsicum mix, basil & oregano and cook 10 Mins/100°/Reverse/Speed 1.
  6. Add the mexe beans (or kidney beans), chopped tomatoes, tomato paste, and salt. Cook 10 Mins/90°/Reverse/Speed 1, placing simmering basket instead of measuring cup on to mixing bowl lid.
  7. Serve with corn chips, guacamole, sour cream or your favourite sides!
Notes
  1. *You can use Organic Beef Mince however it does tend to really mince it further. If time permits, I suggest making your own mince!
  2. *If you prefer a slightly thicker consistency only add 1 x 400g Can Organic Tin Tomatoes.
  3. *For Paleo & Ketogenic, omit the beans and serve with cauliflower chips or rice or other suitable option.
Kitch'n Thyme https://kitchnthyme.com.au/