Thai Chicken Rissoles

Thai Chicken Rissoles best 3These are an absolute staple in our house! I make these for my husbands lunches. With a great big salad, these are the perfect meal. They are very easy to make, are a great source of protein, and are also packed with veges.

My little boy also loves them, and I love that they are full of hidden vegetables! Onions, garlic and ginger for immune building and nuts for added texture and good fats.

I leave the chillies in, even for my little boy. He has been used to eating spicy foods since he was little, as I want him to enjoy a wide variety from a young age. The long red cayenne chillies aren’t that hot, but you can leave them out if your child is sensitive to spicy foods!

You will notice that I have diced the onions and garlic and capsicum and panfried them first. This probably comes down to my OCD, as I like some things to be precise! You can chop them in the Thermomix if you couldn’t be bothered to dice yourself. I cook them off in a fry pan before adding to the mix as I don’t want them to make the mix watery. You also get nice caramelisation in a pan which adds loads of flavour!

These are great also as a dinner option served with roasted/steamed vegetables.  

Thai Chicken Rissoles best 2

Thai Chicken Rissoles
Yields 35
Perfect for lunchboxes! Packed with veges, chicken and aromatics, these are a perfect source of good carbs, protein & good fats! Reader Channy says: This is such a flavour-filled recipe, and so simple to make! This would be amazing served cold with a fresh salad on a warm summer night. I see this becoming a household fave!" - The 4 Blades Magazine July 2016
Write a review
Print
Prep Time
20 min
Cook Time
15 min
Total Time
35 min
Prep Time
20 min
Cook Time
15 min
Total Time
35 min
CURRY PASTE
  1. 6 Kaffir Lime Leaves (stalk removed)
  2. 2 stalks Lemon Grass (white part only)
  3. 1/4 bunch Coriander (inclu roots & stalks)
  4. 5cm knobs Ginger
  5. 1/2 Lime, zested
  6. 2 Red Cayenne Chillies, de-seeded
RISSOLES
  1. 4 tablespoons Olive Oil, plus extra for pan frying
  2. 2 Large Red Onions, finely diced
  3. 2 cloves Garlic, finely chopped
  4. 1 Red Capsicum, finely chopped
  5. 1kg Organic Chicken Breasts, roughly chopped into 3-4cm pieces
  6. 2 Zucchinis
  7. 2 Carrots
  8. 100g Cashews
  9. 100g Macadamias
  10. 4 Spring Onions, thinly sliced
  11. 2 Organic Egg, lightly beaten
  12. 1 Tbsp Celtic Sea Salt
  13. 1 Tbsp Fish Sauce
  14. Gluten Free Breadcrumbs or Almond Meal (for crumbing)
CURRY PASTE
  1. Roughly chop all the ingredients into 1-2 cm pieces. Then add to the Thermomix bowl and process 5-10 Sec/Speed 7. Transfer to a large mixing bowl.
RISSOLES
  1. Bring a large fry pan to medium heat. Add 2 Tbsp of the olive oil, the finely diced onion & garlic and sauté till golden brown. Add to the large mixing bowl with the curry paste. Repeat the process with the remaining olive oil and capsicum and add to the large mixing bowl.
  2. Add the chicken, 500g at a time, to the Thermomix and process 5 Sec/Speed 5. Transfer to the large mixing bowl also.
  3. Roughly chop the carrot and zucchini into 3-4cm pieces and add to the Thermomix bowl. Chop 10 Sec/Speed 4. Add to the mixing bowl.
  4. Add the nuts to the Thermomix bowl and chop 12 Sec/Speed 4. Add to the mixing bowl.
  5. Add the spring onions and give the mix a good stir at this point before adding all the remaining ingredients.
  6. Heat a large fry pan over medium heat. Add some olive oil (Be careful not to smoke the oil). Roll the mix into rissole shapes & coat with breadcrumbs or almond meal. It is quite a loose mix, so handle them with care. Add to the pan and cook for 2-4 mins each side or until golden brown and cooked through. Transfer onto a paper towel lined cooling rack. Serve warm with a fresh salad or vegetables & garlic mayo or thai tomato relish.
Notes
  1. Refrigerate for 3 days or freeze for future use.
Kitch'n Thyme https://kitchnthyme.com.au/

Coconut Butter


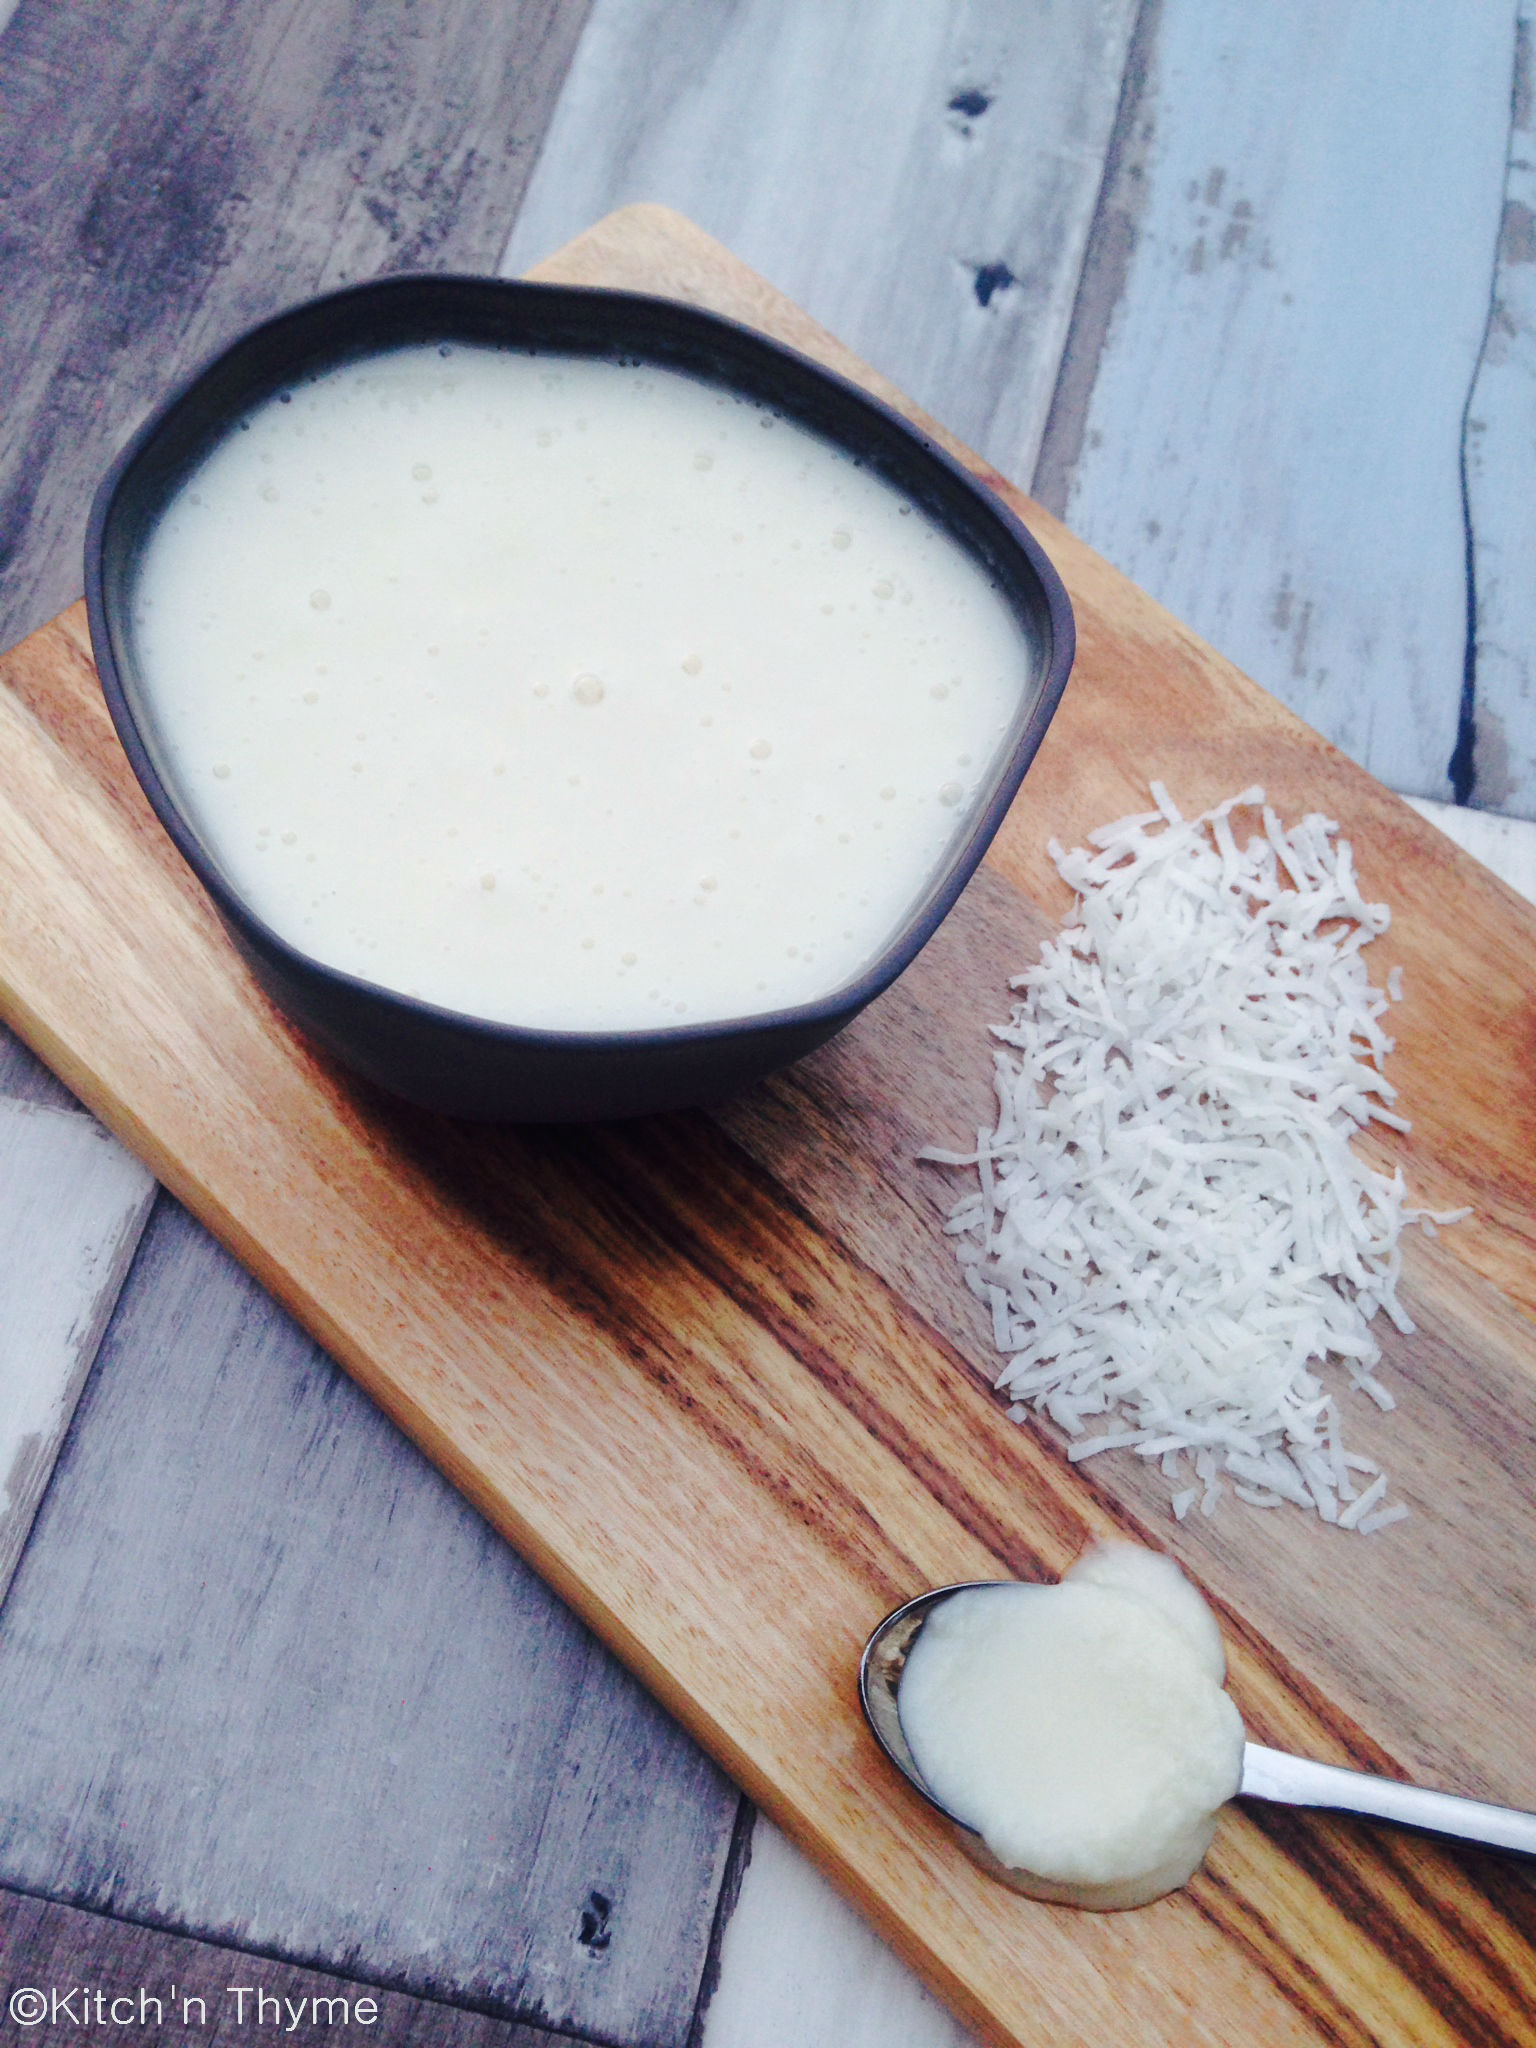
Coconut ButterCoconut Butter – What a brilliant alternative for those avoiding dairy! It is uniquely different to coconut oil in that it is made from the dried flesh of coconuts. Sometimes it is marketed as coconut oil, however they are two different things. Coconut butter contains the oil as well as the coconut flesh. It’s uses are endless. Much much cheaper to make than to buy and takes all of 4 minutes in the Thermomix.

Coconut Butter was one of the 1st things I made in my Thermomix as my sister-in-law had been trying to make coconut butter in her food processor (as had I in a commercial food processor at work!) and it was taking us about 10-20 minutes! I just chucked a bag of shredded coconut in and wanted to see what would happen – well how fast it was!! I rang my sister-in-law straight away! She was not completely convinced on the machine, until of course I went to visit and she saw it make such light work of this butter!

The heat during the cooking process is important as it will help to get the oils working in the coconut a little quicker. Even if you don’t set the Thermomix to 37°, it will reach this temperature being on for 3 minutes anyway, but will be a little quicker if you select it from the start. This method will give you a great puree consistency, but don’t expect a completely smooth result like dairy butter.

I use shredded coconut, but coconut chips work really well too. I find the more oily your coconut, the better the result, thus I find either shredded or chips better than desiccated.

You will need this coconut butter recipe to make my Choc Peppermint Creams.

Coconut Butter
A wonderful alternative for those who can't have butter! Makes 500ml (2 cups).
Write a review
Print
Prep Time
4 min
Prep Time
4 min
Ingredients
  1. 500g Shredded Coconut
Instructions
  1. Place the coconut into the bowl of the Thermomix and mill 1 minute/Speed 8.
  2. Scrape down the sides of the bowl. Continue processing for a further 2 minutes/37°/Speed 6.
  3. Scrape down the sides of the bowl and blend a further 1 minute/Speed 7.
  4. Store in an airtight container out of the fridge. If refrigerated it will set quite hard.
Kitch'n Thyme https://kitchnthyme.com.au/

Cauliflower Rice – Coriander & Capsicum

Cauliflower Rice C

Cauliflower Rice is becoming really popular at the moment – actually everything ‘cauliflower’ is taking off! And why not? Gone are the days of just using this underestimated vegetable for gratin! It’s such a versatile vege as well as cheap, low carb and yummy!!

I’ve tried a fair few ways of making ‘cauli’ rice, and this is my favourite. Frying it gives it such a lovely nutty texture and it doesn’t go soft or mushy. It really does resemble rice so well. You can use coconut oil or ghee to fry, however in this case I really love the flavour of the olive oil.

This is such a winner with children! It’s easy to disguise the vegetable and is super yummy! When I’ve made this at my work, I’ve had guests comment that they thought it was real rice! So a winner with all ages!

You can play around with all different flavours for cauli rice, but this is one of my favourites! I will share some of my other favourites too.

Cauliflower Rice – Coriander & Capsicum

Ingredients

  • 1 Medium Cauliflower
  • 2 tablespoons Olive Oil
  • 1 Medium Red Onion (sliced into thin wedges)
  • 1 Large Red Capsicum (julienned)
  • 1 teaspoon Celtic Sea Salt
  • 1/2 bunch Fresh Coriander

Directions

1. Roughly chop the cauliflower into 5-6 cm chunks. Place into the bowl of the Thermomix and chop 3 Seconds/Speed 5. You want it to look the texture of rice. Be careful to not chop it too fine!
2. Heat the oil in a large frypan. Be careful not to over heat the oil however, as you don't want it to reach smoking point, but you want it hot enough to sear the cauliflower nicely.
3. Add the onion and capsicum and fry off until nicely caramelised.
4. Add the cauliflower and salt and brown off. Keep tossing the cauliflower to brown it all off nicely, but not mushy. It should have a nice nutty, rice type texture.
5. Once cooked, take off the heat. Quickly toss through the coriander, transfer to a serving bowl and serve.

Choc Cranberry Crunch Slice

Choc Cranberry Crunch Slice

Gluten Free! Dairy Free! Refined Sugar Free & ‘almost’ Raw!!! This is such a winner and is just yummo!

This delicious slice is perfect for any morning or afternoon tea. It is almost raw, except for the roasted almonds. You can keep the almonds raw for the filling if desired, however the roasted flavour adds amazing dimension to this slice
A classic style raw but THIN almond date base, a delicious coconut caramel almond cranberry filling and a raw chocolate topping! Delicious! And you get that chocolate fix without the guilt!

One of the tricks I find to raw desserts is to keep the ‘biscuit’ base nice and  THIN or it overpowers the flavour of the whole slice and texture isn’t quite right. It all needs to balance nicely.

The coconut caramel filling is just SO creamy and yum! With roasted almonds and cranberries added it’s just perfect!

The chocolate layer is technically still raw as it isn’t heated over 40 degrees. And it is pure raw chocolate goodness with raw cacao butter and raw cacao powder! My favourite raw cacao butter is Absolute Organics brand. Health food stores or some IGA’s stock it. It’s beautifully creamy and mellow in flavour.

The chocolate layer is free of any nasty additives and sweeteners, and full of loads of antioxidants and good fats! This is a fabulous one for kids. My kids devour it!!

Print

Choc Cranberry Crunch Slice

A delicious crunchy, nutty chocolate fix without the guilt!

  • Author: Gabrielle Tobin - Kitch'n Thyme

Ingredients

Base

  • 230g Raw Almonds
  • 150g Dates
  • 10g Shredded Coconut
  • 60g Maple Syrup
  • 35g Coconut Oil

Coconut Caramel Nut Filling

  • 240g Coconut Butter
  • 40g Coconut Oil
  • 160g Maple Syrup
  • 150g Roasted Almonds, halved
  • 40g Dried Cranberries
  • 1 tsp Vanilla Essence
  • pinch celtic salt

Chocolate Layer

  • 225g Raw Cacao Butter
  • 50g Raw Cacao Powder
  • 50g Maple syrup
  • 2 tsp vanilla Essence
  • pinch celtic salt

Cacao Nibs, for topping (optional)

Dried Cornflowers, for topping (optional)

Instructions

Base Layer

  1. Spray and line a 9×13″ rectangle slice tray with baking paper, allowing for an overhang on the sides to easily remove the slice after setting time. (Try to make the baking paper as neat as possible on the sides, creasing the paper where necessary to make it sit flat. The straighter the baking paper sides, the neater the edges of your slice will be.) Set aside.
  2. Place all the base ingredients into the bowl of the Thermomix and process for 10-15 Seconds/ Speed 7. 
  3. Press the mixture evenly into the lined slice tray and refrigerate for 30 minutes to set (or freeze for 15 minutes).

Coconut Caramel Nut Layer

  1. Place the coconut butter, coconut oil, maple syrup and vanilla into the bowl of the Thermomix and melt 1-2 Mins/50°/Speed 3.
  2. Add the chopped almonds, cranberries & salt and mix together 5 Seconds/Speed 3/Reverse.
  3. Once combined, pour the mixture evenly over the set base. Return to the fridge for a further 30 minutes to set (or the freezer for 15 minutes.)

Chocolate Layer

  1. Place the cacao butter into the bowl of the Thermomix and mill 10-15 Seconds/Speed 9.
  2. Melt the cacao butter for 10 minutes/37°/Speed 2 scraping down the sides of the bowl and around the blades closer to the finish time.
  3. Add the cacao powder, maple syrup, vanilla & salt and continue cooking for a further 5 minutes/37°/Speed 2.
  4. Pour over the slice as the final layer. Refrigerate for 10 minutes, then sprinkle with cacao nibs and dried flower petals just as the chocolate is beginning to set (make sure the topping is beginning to set – if you top with the decorations too early, they will all sink into the chocolate filling) then refrigerate a further 20 minutes or until set. Chop into small squares and serve.