Paleo Pumpkin & Walnut Chocolate Chip Cookies

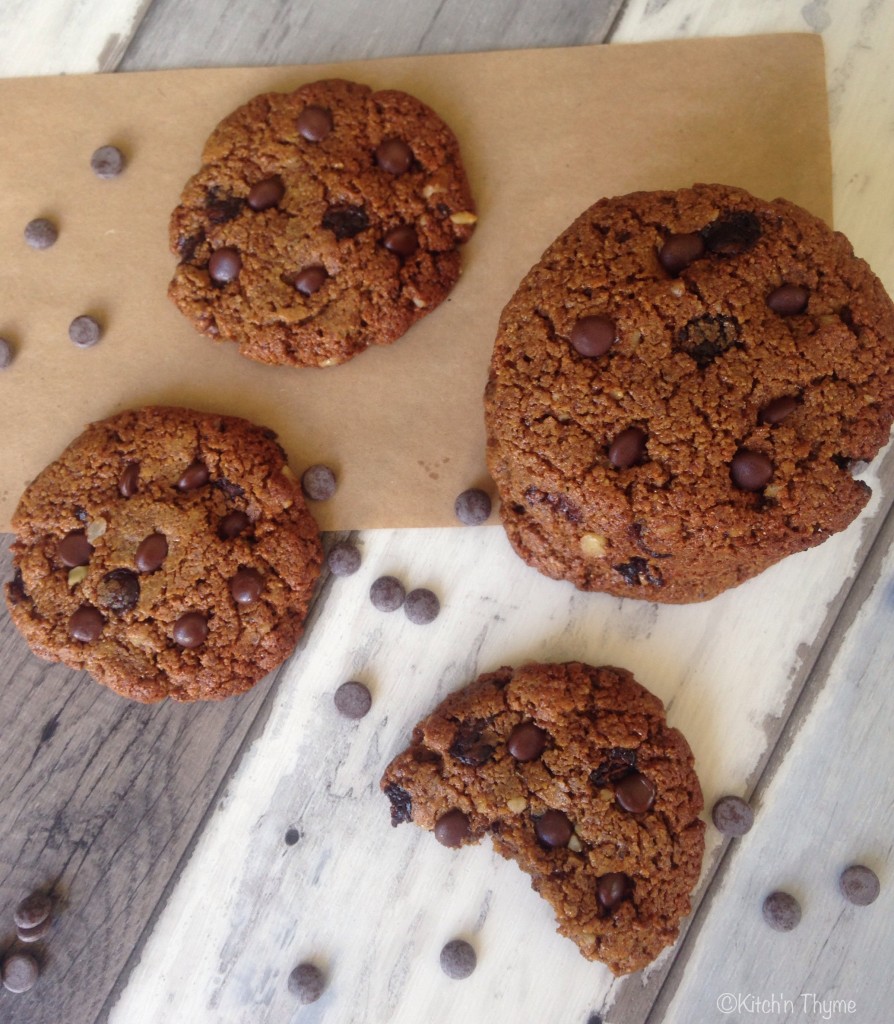
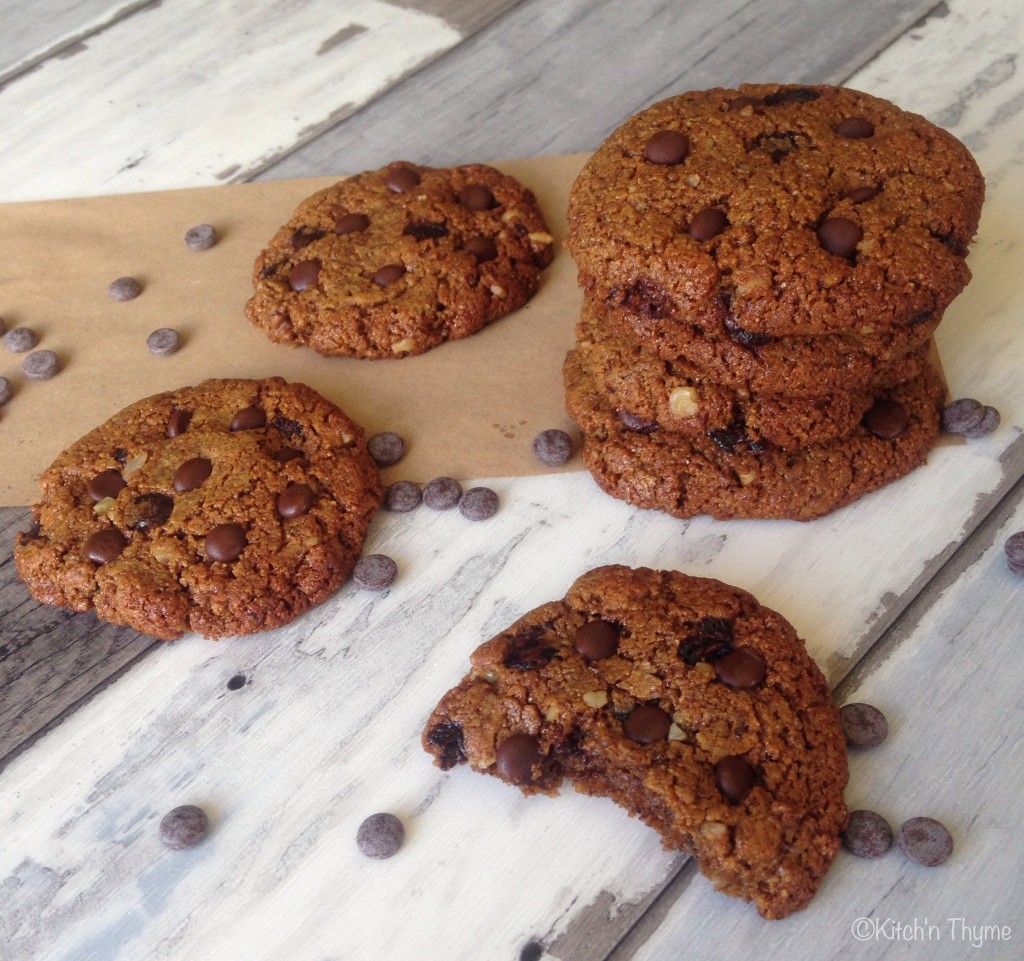
photoI’m soooooo excited!!! After countless experiments I finally present to you my humble Paleo Pumpkin & Walnut Chocolate Chip Cookies!

I have tried so many different things! A multitude of flours, sweeteners & fats! At one stage I had what my nieces and nephews termed a “Moofie”! A cross between a cookie and a muffin! I almost ran with that as they were delicious, but not 100% what I was looking for! I was looking for a crispy, golden, crunchy PALEO cookie! What I will say is that they will go softer once they are stored, but they are still deliciously beautiful! Just eat them fresh on the day of baking if you want that beautiful crispy texture!

I tried many different prototypes with almond meal but it wasn’t until I had an epic light bulb moment and decided to try them with almond butter. It came about because I was thinking of adding walnut butter to the mix for flavour! I suddenly realised nut butter might be the secret! Roasted almond butter. And oh, you can’t imagine the joy when I pulled out perfectly ‘normal’ looking cookies out of the oven! They were golden, and looked crispy! I just about dove in right there to try them! Once they had cooled sufficiently so I wouldn’t get burnt,  I snatched one right then and there!….Wow! Something magical had happened! The almond butter had done it! I was so elated! After all my attempts with many complex ratios and multiple ingredients, I ended up with a delightful cookie from the simplest of ingredients! There is really not much to these cookies at all! I am ridiculously excited to share this beautiful recipe with you! I’ve added no extra oils to the cookies. It rely’s completely on that from the almond butter. Because the almonds are roasted, this also helps to release even more of those beautiful oils from the nuts, which is why no other oil is needed.

To make you own almond butter, just place about 450-500g roasted almonds in the Thermomix and mill 10 Sec/Speed 9. Scrape down the sides and process for about 1 minute/Speed 8 or until a beautiful butter consistency is achieved!

As I love to do, I wanted vegetables in them, in particular pumpkin, firstly because I think its a perfect match (chocolate & pumpkin), and to increase the nutritional benefit! I mean, if I’m going to give these to my family, I will still always want a treat to be of some benefit! Hiding a vegetable in a cookie so that no one will ever know is perfect! My little boy just loves them! I still talk about the fact that even good treats we need to balance with lots of vegetables and proteins etc, and I try to teach him the difference between a bought cookie and one that mummy makes! Mummy’s have a healthier sweetener, and a small amount at that, and nuts that will make him strong etc!

I’ve used about 100g pumpkin puree in this recipe. You can actually increase the pumpkin to 200g with no problems. They are just a little more crunchy with 100g, whereas with 200g they are a little more moist in the middle! Completely up to you! If you have a whole lot of pumpkin to use, go the whole 200g! I just steamed the pumpkin in the Thermomix for about 15 minutes/Varoma/Speed 2, then pureed for about 5 Sec/Speed. I steamed about 300g. Depending on the pumpkin it will probably reduce by 1/3.

The walnuts just make them! After all, pumpkin and walnuts is such a beautiful marriage. But you could use whatever nut you fancy!

I hope you enjoy these cookies as much as we are!

photo0

Paleo Pumpkin & Walnut Chocolate Chip Cookies
Yields 28
A deliciously moist, subtly spicy pumpkin cookie!
Write a review
Print
Prep Time
10 min
Cook Time
15 min
Prep Time
10 min
Cook Time
15 min
Ingredients
  1. 120g Coconut Palm Sugar
  2. 450g Roasted Almond Butter
  3. 2 Organic Eggs
  4. 1/4 tsp Cinnamon
  5. 1/8 tsp Allspice
  6. 1 tsp Bicarb Soda
  7. 100g Pumpkin Puree
  8. 50g Chocolate Chips (naturally sweetened, dairy free)
  9. 50g Walnuts (roughly chopped)
Instructions
  1. Preheat the oven to 180°C. Line large baking trays with baking paper or lay your oven Thermomat on a tray.
  2. Place the sugar into the Thermomix and mill 10 Sec/Speed 9.
  3. Add the almond butter, the eggs, spices, bicarb, & pumpkin and mix 10 Sec/Speed 5.
  4. Add the chocolate chips and walnuts and mix a further 10 Sec/Speed 5.
  5. Once combined, place Tbsp sized amounts onto your baking sheet. Flatten out a little with your fingers to form a more flattened disc.
  6. Place into the hot oven and bake for 10-15 minutes or until the edges turn golden brown.
  7. Remove from the oven and whilst warm top with a few extra chocolate chips if you desire.
  8. Let cool on the trays for 5-10 minutes, before transferring to a cooling rack to cool completely.
  9. Store in an airtight container.
Kitch'n Thyme https://kitchnthyme.com.au/

Paleo Lunchbox Squares – Pear & Coconut

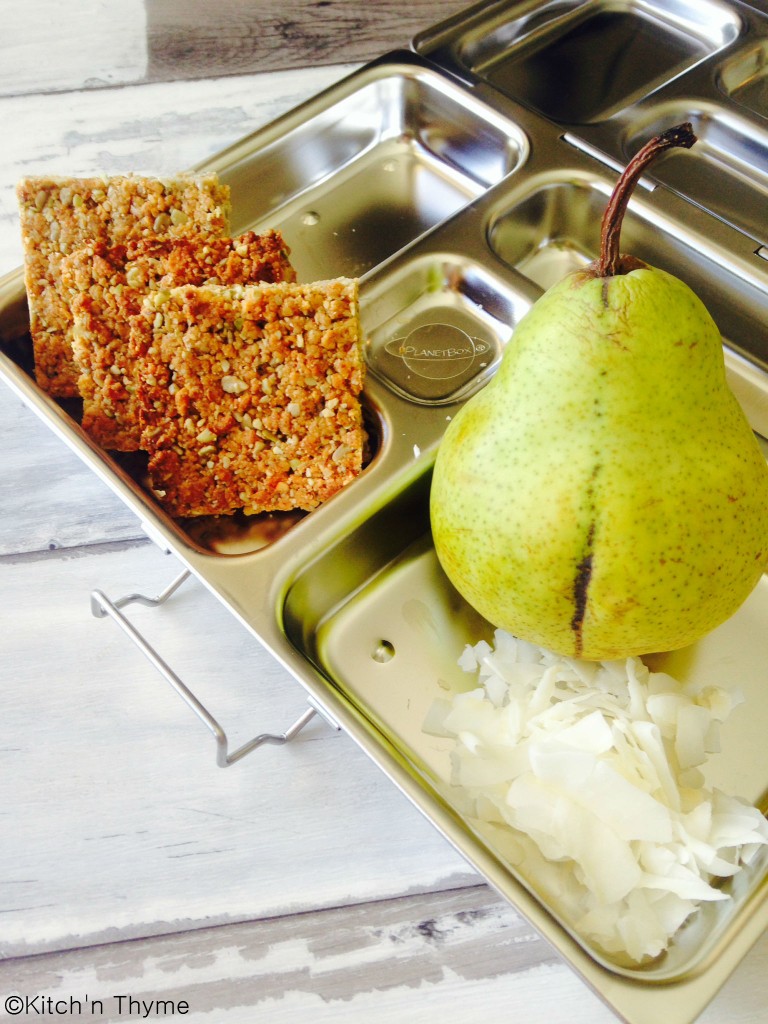
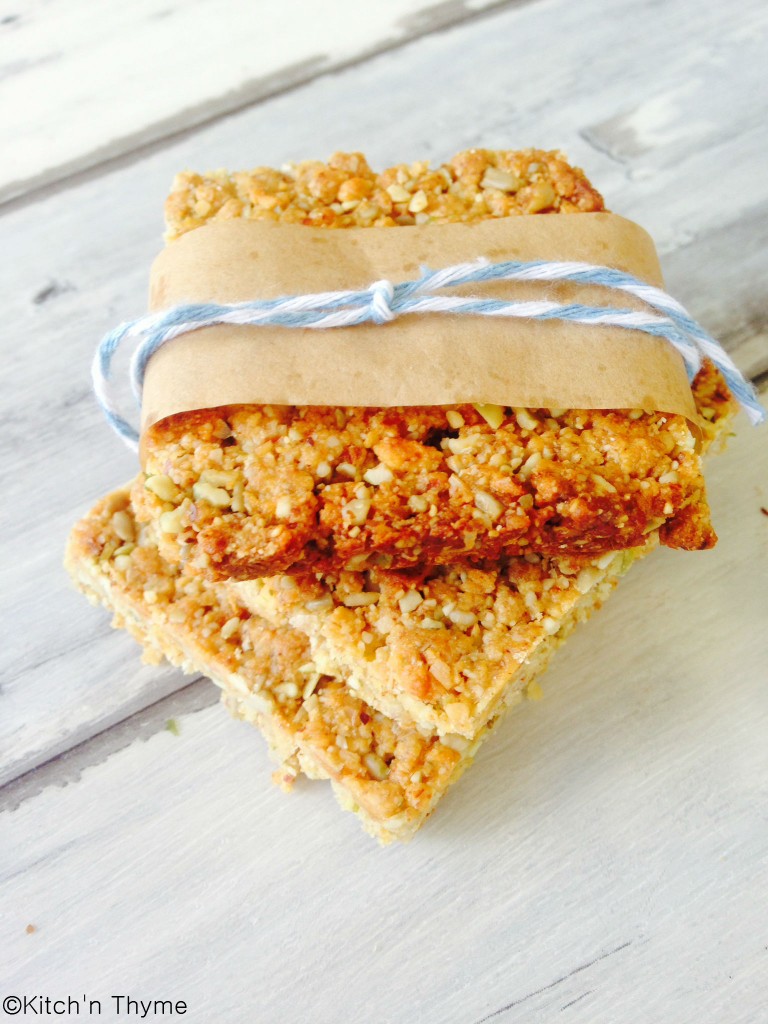
Paleo Slice © Coming into the New Year, mums will be beginning to think about school lunches all too soon! But it needn’t be stressful! With these delicious bars, children should feel happily surprised when they open their lunchboxes! 

They are gluten free, dairy free, egg free, refined sugar free and super easy to make!

Sweetened with just a little honey and the dried fruit they are a great little snack! I made these a few years ago and now that I have a family they are the perfect thing to have ready made in the cupboard! My little boy really enjoys them!

You can cut them into long muesli bar type shapes, but I’ve gone for something a little different! You can also double the mixture if you want them a bit thicker. They are quite chewy when made the way pictured, and a little more ‘cakey’ if made thicker.

Play around with the flavours. you could add cranberry and  pistachios or chocolate chips (naturally sweetened) etc. Paleo Slice  2 ©

Paleo Lunchbox Squares
Yields 12
Golden, crunchy, guilt-free lunchbox squares.
Write a review
Print
Ingredients
  1. 30g Dried Apple
  2. 30g Dried Pear
  3. 80g Almonds
  4. 20g Shredded Coconut
  5. 20g Pepitas
  6. 40g Sunflower Seeds
  7. 1 tsp Vanilla Essence
  8. 40g Coconut Oil
  9. 40g Honey
Instructions
  1. Preheat the oven to 170°C. Line a small rectangular slice tin with baking paper and set aside.
  2. Place the apple & pear into the Thermomix and chop 2 Sec/Speed 9. Set aside.
  3. Place the almonds into the Thermomix and mill 10 Sec/Speed 9.
  4. Add the remaining ingredients, including the reserved apple and pear and process 10 Sec/Speed 6/Reverse.
  5. Once mixture has come together place into the baking tray and pat down evenly with a spatula.
  6. Bake for 20 minutes or until golden brown. Cool in the tray for 5 minutes, then completely on a wire rack before cutting into squares.
Kitch'n Thyme https://kitchnthyme.com.au/

Spice Roasted Mixed Nuts

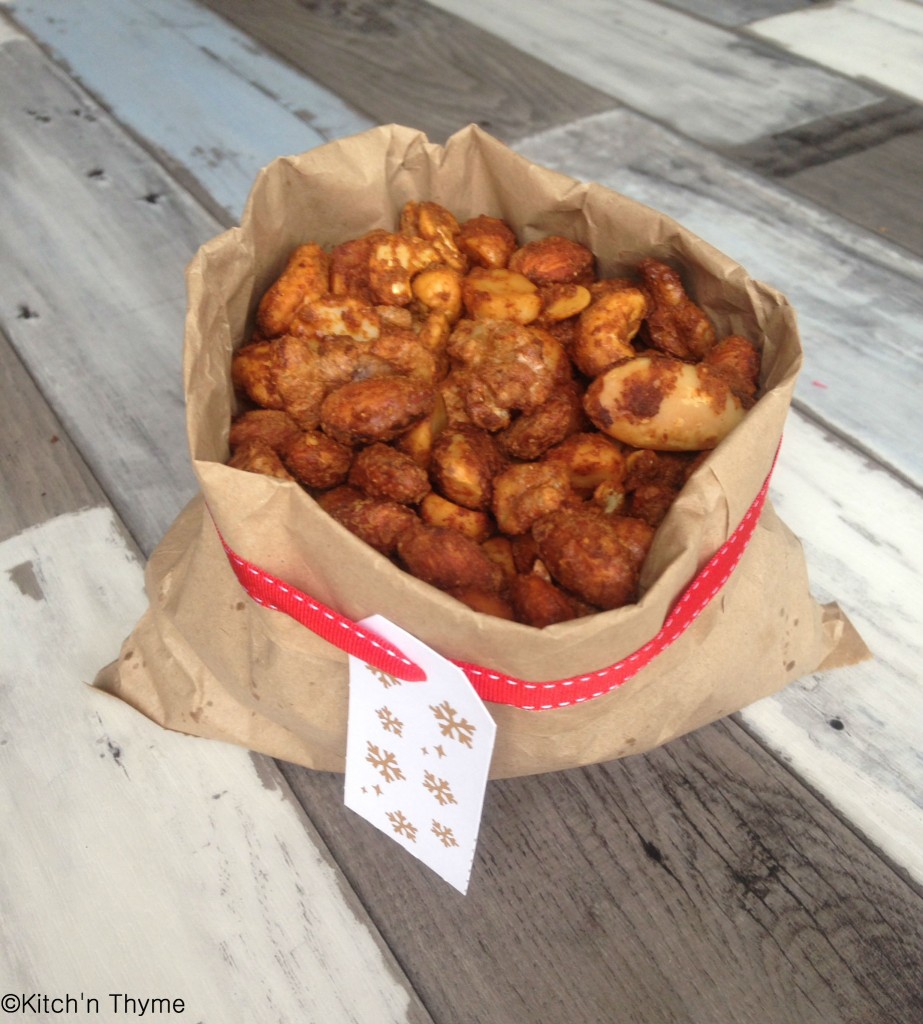
I’ve been making these little gems for years now! These gorgeous nuts are just so more-ish!! Once you eat a couple you can’t help but go back for a whole handful! You won’t ever need to buy those flavoured nuts in the supermarket again!
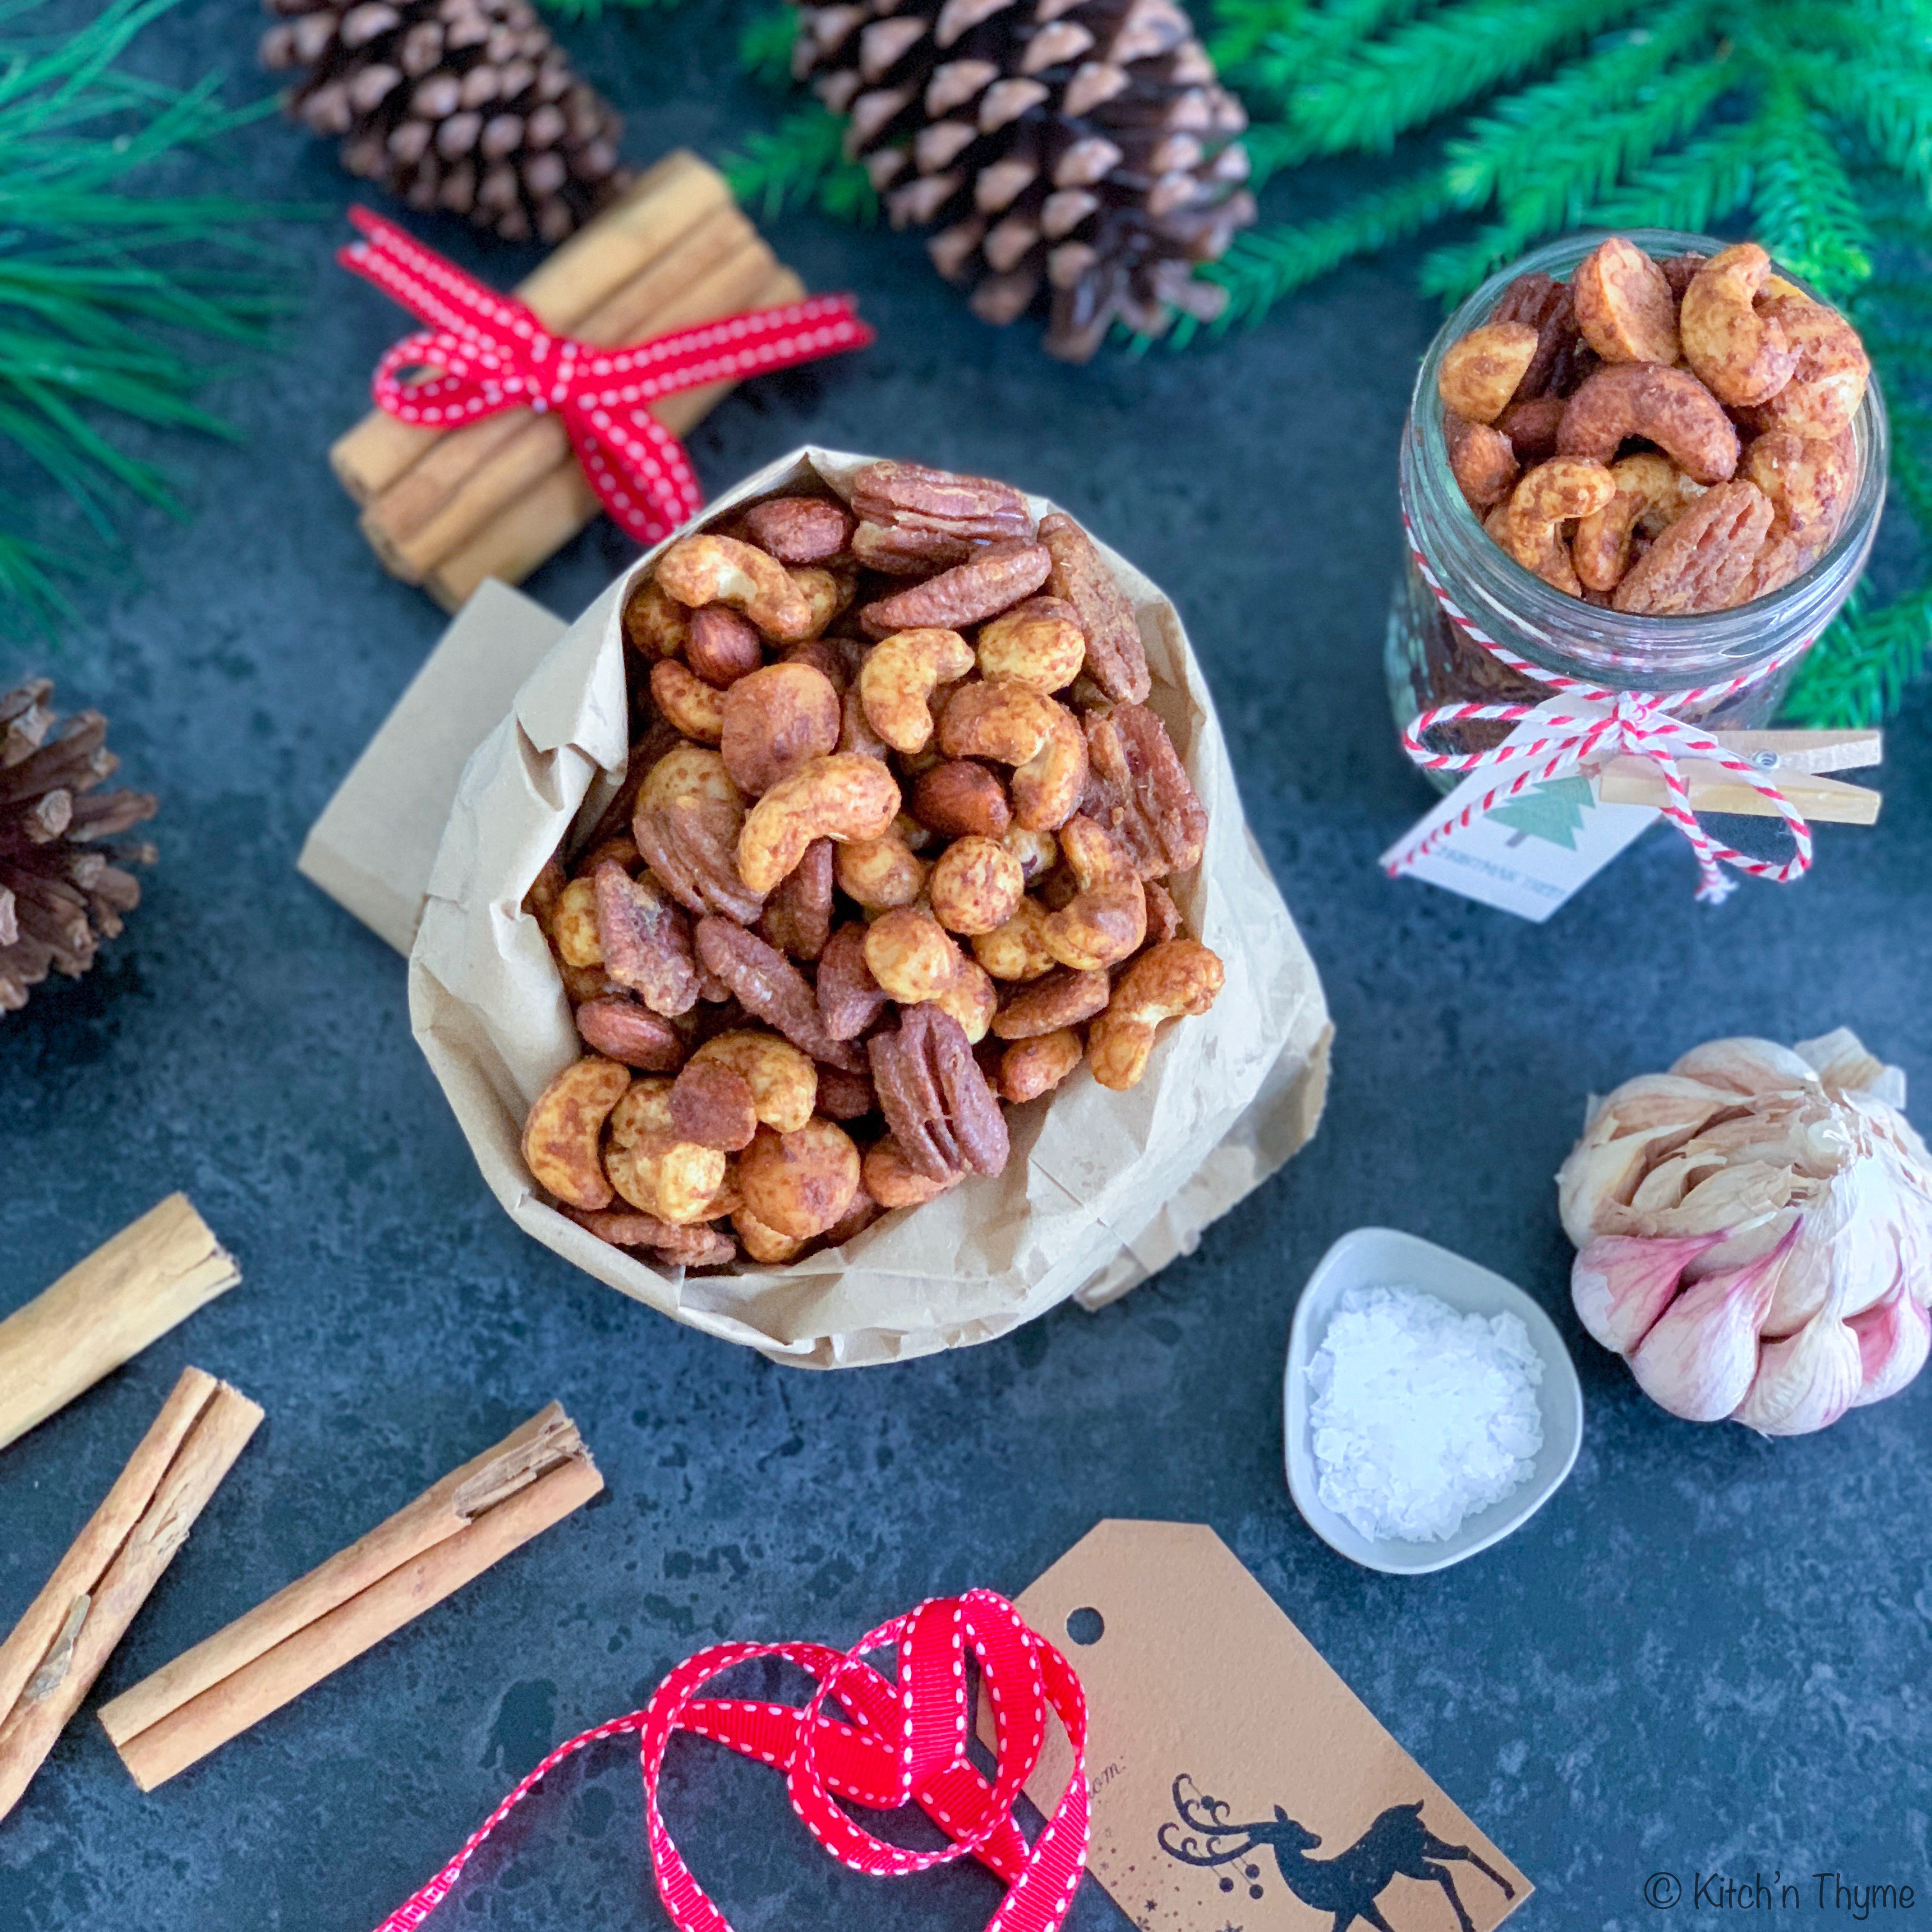
They make gorgeous little gifts in little glass jars with ribbons wrapped around, or just served as an hors de oeuvre at any big gathering or celebration! Or perhaps the perfect side to when you have people over for celebratory drinks! You’

I use a range of different nuts! Whatever you have in the cupboard will work, but I do find some of the nicest are macadamias, cashew, almonds, walnuts, pecans etc. I will say that I don’t usually buy the packets of ‘mixed nuts’ though as the walnuts, pecans and hazelnuts all seem to go rancid quicker than cashews and macadamias do, so they tend to stale the whole packet! Instead, I buy my nuts in bulk and keep them in the fridge or freezer to extend their shelf life. 

You’ll notice I use egg white and you might be wondering why! Well it’s because the egg white helps all the spices stick nicely to the nuts and not fall off! Genius really!!

I do use some coconut or rapadura sugar. This isn’t necessary but it does add a nice sweetness and balance of flavour. If you are avoiding sugars just leave it out. 

Spicy Roasted Mixed Nuts
Delicious golden crunchy spicy bites!
Write a review
Print
Prep Time
5 min
Cook Time
15 min
Total Time
20 min
Prep Time
5 min
Cook Time
15 min
Total Time
20 min
Ingredients
  1. 1 Eggwhite
  2. 20g Rapadura or Coconut Sugar
  3. 2 tsp Cumin
  4. 1 tsp Coriander
  5. 2 tsp Garlic Powder
  6. 2 tsp Onion Powder
  7. 1 tsp Paprika
  8. Sprinkle of Cinnamon
  9. 1/2 tsp Celtic Sea Salt
  10. 2 tsp Tamari (optional)
  11. 1-2 Tbsp Olive Oil
  12. 125g Macadamias
  13. 125g Cashews
  14. 125g Almonds
  15. 125g Walnuts
  16. 125g Pecans
  17. 125g Hazelnuts
Instructions
  1. Line a large baking tray with baking paper and pre-heat the oven to 180º.
  2. Place the egg white in the Thermomix. Add the butterfly and whip 40 Sec/Speed 4 or just until soft peaks form.
  3. Add sugar, spices, salt, tamari, and oil and mix with the butterfly still in 3 Sec/Speed 3.
  4. Leave the butterfly in and add the nuts and mix 10 Sec/Speed 1.5/Reverse.
  5. Place evenly on the baking trays and roast for 15 minutes at 180º, stirring occasionally throughout the cooking process.
  6. Once cooled store in an airtight container.
Kitch'n Thyme https://kitchnthyme.com.au/

Healthy Honey Marshmallows

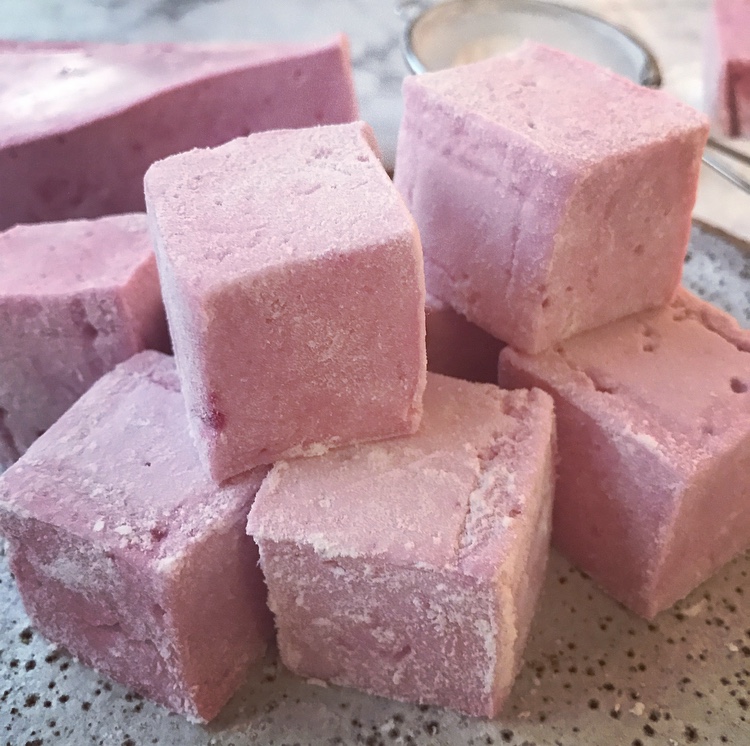
Just LOOK at this colour!!!! It’s NATURAL!!!! Amazing right!!!?????

Using the gorgeous Unicorn Superfoods powders makes it SO easy to create these super fun colours with no nasties attached but rather adding health benefits!! Blue SPIRULINA helps to increase energy and metabolism, boosts immunity and may even improve digestion. Pink PATAYA or DRAGONFRUIT is high in fiber, rich in antioxidants and promotes a healthy gut whilst nourishing hair and skin! You can use Beetroot powder which I have done in the past, but I find the pink pataya gives a more vibrant colour! I love a treat that also has some nutritional benefit to it! Don’t you?!!

Using sustainably sourced gelatine, and honey over sugar, these marshmallows are a great option for a healthy treat, especially at Christmas! I used to use the Great Lakes Pure Protein Gelatin (from iHerb) but now I use a beautiful Australian Grass Fed Gelatin from Nutra Organics. It’s got a really mild aroma and works perfectly!
Gelatin is very beneficial for digestive issues, joint recovery, and helps to promote healthy skin, hair and nails.

Store bought varieties of marshmallows are full of preservatives, sugars, flavours and who knows what else! With these you can have peace of mind that you know exactly what has gone into them. Using honey is a much better option than sugar, however the benefits of raw honey are non existent once heated, and like any sweet treat, it still turns into sugar in the body. However, as part of a balanced diet, and for a special occasion, these are great! I feel good about my children eating something which is somewhat fortified with health benefiting ingredients at the same time as being a treat!


For treats like this, the Thermomix 5 is just brilliant for its accurate temperatures. How fantastic being able to heat it to exactly 120ºC without having to stand there over the stove with a candy thermometer! I get to walk away!

©Marshmallow 2

Play around with your own flavours and colours! How about these pretty Christmas colours! How gorgeous and festive would these look on the table for Christmas!…….And the exciting thing is that I have a delicious Healthy (Superfood enriched) Rocky Road recipe coming to you before Christmas!! Stay tuned!   

Healthy Marshmallows
Yields 50
Naturally coloured, fluffy, naturally sweetened marshmallows!
Write a review
Print
Prep Time
5 min
Cook Time
15 min
Total Time
20 min
Prep Time
5 min
Cook Time
15 min
Total Time
20 min
Ingredients
  1. 185ml Warm Water
  2. 260g Honey
  3. 3 Tbsp Gelatin (grass-fed, unflavoured)
  4. 1 tsp Vanilla Essence
  5. Coconut oil for cutting
Pink Colour
  1. 1 Tbsp Beetroot Juice or 1 tsp Beetroot Powder or 1 Tbsp Pink Dragonfruit Juice or 1 tsp Dragonfruit Powder
Green Colour
  1. 1 Tbsp Liquid Chlorophyll
Instructions
  1. Place 60ml of the water along with the honey into the Thermomix and cook 8-10 Mins/120º/Speed 2, and you may like to place the simmering basket on top of the lid to replace the MC for this step.(If you have a TM31 cook at Varoma temperature).
  2. Whilst that is cooking, combine the other 125ml of warm water with the gelatin in a small bowl. (The easiest way to do this is to rain the gelatine into the water in a steady stream whilst whisking in simultaneously with the other hand. The quicker you get the gelatine incorporated the easier it is.)
  3. When the honey mixture is cooked, let it cool to 70º.
  4. Then add the gelatin mix and stir 1 Min/Speed 2.
  5. Insert the butterfly and whip 10 Mins/Speed 4.
  6. In the last 30 seconds add the vanilla.
  7. Separate 2/3 of the mixture into 2 separate bowls (for colouring) and pour the remaining 1/3 (white colour) into a baking paper lined container to set.
Pink Marshmallows
  1. Powder Method: Stir in the beetroot or dragonfruit powder until well combined and desired colour is achieved. Then pour into a baking paper lined container to set.
  2. Juice Method: Place 1/4 of a small beetroot or dragonfruit into the Thermomix and blend 3 Sec/Speed 7. Scrape down the sides of the bowl and add 2 tsp water. (No need to add water if using the dragonfruit.) Give a quick whiz to combine, then strain the juice into a bowl. Add 1 Tbsp of the juice to the marshmallows and fold through. Then pour into a baking paper lined container to set.
Green Marshmallows
  1. Fold through the liquid chlorophyll and pour into a baking paper lined container to set.
  2. They will need at least 1-2 hours to set. (You can also pop them in the fridge if you need them to set quickly!)
  3. Once set, remove from containers and cut neatly into squares or cut into marshmallow rounds (using a well oiled small round pastry cutter).
  4. Toss in tapioca starch or cornflour for a traditional look. Don't be tempted to roll them in icing sugar. They sweat and become far too wet!
  5. Store in an airtight container for 3-5 days.
Kitch'n Thyme https://kitchnthyme.com.au/

Breakfast Bombs

image
Looking for an alternative to the ‘ol bowl of cereal for breakfast?? Well these are a whole lot better than a bowl full of cereal! Think crispy, fudgey, and smooth!These little bombs are packed with loads of seeds, nuts, butter and coconut oil and are sure to go down a treat!

They have some organic crispy cereal in them and are loaded with all sorts of little superfood boosters. Filled with antioxidants found in the goji berries and the raw cacao, these foods help to stop free radicals damaging the cells.

The good fats from the coconut, butter and nuts are so important for growth development and cell function. They can also be used as a fantastic source of energy, especially for kids!

When my little ones aren’t feeling like eggs or other savoury options, these are fantastic alternative – he loves them!

You can press the mix into a tin and slice it up for something different too! They are best eaten straight from the fridge, as they will get softer as they sit out.

Breakfast Bombs
Yields 15
Write a review
Print
Prep Time
10 min
Cook Time
10 min
Total Time
20 min
Prep Time
10 min
Cook Time
10 min
Total Time
20 min
Ingredients
  1. 120g Cashews or Cashew Butter
  2. 50g Organic Butter
  3. 20g Coconut Oil
  4. 50g Maple Syrup
  5. 10g Raw Cacao Powder
  6. 50g Organic Brown Rice Crispies or Organic Brown Rice Chocolate Koala Crisp! (I use Natures Path brand from Iherb.
  7. 30g Organic Corn Flakes (Fruit Juice Sweetened) - I use Natures Path brand from Iherb
  8. 20g Almond Milk Pulp (or Almond Meal)
  9. 10g Shredded Coconut
  10. 10g Goji Berries
  11. 20g Black Chia Seeds
  12. 10g Sunflower Seeds
  13. 5g Pepitas
Instructions
  1. Roast the cashews for 10 minutes at 180°C or until golden brown.
  2. Place into the Thermomix and mill 10 Sec/Speed 9. Scrape down the edges of the bowl, then process 1 Min/Speed 4. Scrape down the edges of the bowl again and process a further 10 Sec/Speed 6 or until a nut butter consistency is achieved.
  3. Add the butter, oil, maple, and raw cacao to the nut butter and cook 3 Mins/50°/Speed 3.
  4. Add all the remaining ingredients and process 3-5 Sec/ Speed 5, or until it looks similar to a bliss ball consistency, but with some of the cereal still in tact and visible.
  5. Roll into decent sized balls and place into a container lined with baking paper. Refrigerate until set.
Kitch'n Thyme https://kitchnthyme.com.au/

Kale Chips

img_0950

So who’s tried these things?? A wonderful craze of the healthy foodie world! What a seriously brilliant snack though! My 22 month old has been munching on them since around 1 (when it’s ok to introduce collards), and he just loves them! I find it such a fun way of introducing healthy snacks for kids and there are just so many varieties you can make! You just need to get creative!

I spent quite some time playing around with different oven temperatures until I found what I think is the perfect temp! (You can of course use a dehydrator, but this is how you do it in an oven). Some say 200º, others 180º, but I kept finding it was so tricky to not let them burn. I mean only slightly brown on the edges, but I didn’t like the slight bitter flavour that even a brown edge gives. I also love the vibrant green colour of kale and want to preserve that as much as possible! So 150º degrees does it for me! They always come out vibrant green, with no brown edges and are beautiful light crispy ‘chips’.

img_0951

You will notice that it is such a small amount of oil used. It’s really important not to drown the kale in oil as they won’t dry out and get that slightly crispy texture if you use too much. It’s also important to rub it all in as much as possible so you don’t end up with some really drenched leaves and some leaves that completely miss out!

Kale Chips
Delicious crispy guilt-free clean eating chips!!!...Even the kids will love them!
Write a review
Print
Prep Time
5 min
Cook Time
10 min
Total Time
15 min
Prep Time
5 min
Cook Time
10 min
Total Time
15 min
Ingredients
  1. 1 Bunch Kale (Curly Green or Cavalo Nero)
  2. 2 tsp Olive Oil
  3. 2 tsp Savoury Yeast Flakes
  4. 1 tsp Garlic Powder
  5. 1 tsp Onion Powder
  6. sprinkle Celtic Sea Salt
Instructions
  1. Preheat the oven to 150ºC. Line some large baking trays with baking paper and set aside.
  2. Take all the kale off the stalks, being careful not to rip the leaves too much. Wash the kale thoroughly and spin dry.
  3. Break the leaves into small 'chip' size pieces.
  4. Place into a large bowl along with all the other ingredients. Gently massage the oil and powders into the leaves of the kale, making sure that all the surface areas of the leaves are covered.
  5. Lay the kale leaves on the baking trays, leaving gaps between the leaves so they have room to crisp up. Too close and they will stay soggy.
  6. Place into the oven and cook for 8-10 minutes (or until crisp), turning them with tongs once during this time.
  7. Remove from the oven and leave to cool.
  8. Store in an airtight container or jar for 3-5 days.
Kitch'n Thyme https://kitchnthyme.com.au/

Choc Cranberry Crunch Slice

Choc Cranberry Crunch Slice

Gluten Free! Dairy Free! Refined Sugar Free & ‘almost’ Raw!!! This is such a winner and is just yummo!

This delicious slice is perfect for any morning or afternoon tea. It is almost raw, except for the roasted almonds. You can keep the almonds raw for the filling if desired, however the roasted flavour adds amazing dimension to this slice
A classic style raw but THIN almond date base, a delicious coconut caramel almond cranberry filling and a raw chocolate topping! Delicious! And you get that chocolate fix without the guilt!

One of the tricks I find to raw desserts is to keep the ‘biscuit’ base nice and  THIN or it overpowers the flavour of the whole slice and texture isn’t quite right. It all needs to balance nicely.

The coconut caramel filling is just SO creamy and yum! With roasted almonds and cranberries added it’s just perfect!

The chocolate layer is technically still raw as it isn’t heated over 40 degrees. And it is pure raw chocolate goodness with raw cacao butter and raw cacao powder! My favourite raw cacao butter is Absolute Organics brand. Health food stores or some IGA’s stock it. It’s beautifully creamy and mellow in flavour.

The chocolate layer is free of any nasty additives and sweeteners, and full of loads of antioxidants and good fats! This is a fabulous one for kids. My kids devour it!!

Print

Choc Cranberry Crunch Slice

A delicious crunchy, nutty chocolate fix without the guilt!

  • Author: Gabrielle Tobin - Kitch'n Thyme

Ingredients

Base

  • 230g Raw Almonds
  • 150g Dates
  • 10g Shredded Coconut
  • 60g Maple Syrup
  • 35g Coconut Oil

Coconut Caramel Nut Filling

  • 240g Coconut Butter
  • 40g Coconut Oil
  • 160g Maple Syrup
  • 150g Roasted Almonds, halved
  • 40g Dried Cranberries
  • 1 tsp Vanilla Essence
  • pinch celtic salt

Chocolate Layer

  • 225g Raw Cacao Butter
  • 50g Raw Cacao Powder
  • 50g Maple syrup
  • 2 tsp vanilla Essence
  • pinch celtic salt

Cacao Nibs, for topping (optional)

Dried Cornflowers, for topping (optional)

Instructions

Base Layer

  1. Spray and line a 9×13″ rectangle slice tray with baking paper, allowing for an overhang on the sides to easily remove the slice after setting time. (Try to make the baking paper as neat as possible on the sides, creasing the paper where necessary to make it sit flat. The straighter the baking paper sides, the neater the edges of your slice will be.) Set aside.
  2. Place all the base ingredients into the bowl of the Thermomix and process for 10-15 Seconds/ Speed 7. 
  3. Press the mixture evenly into the lined slice tray and refrigerate for 30 minutes to set (or freeze for 15 minutes).

Coconut Caramel Nut Layer

  1. Place the coconut butter, coconut oil, maple syrup and vanilla into the bowl of the Thermomix and melt 1-2 Mins/50°/Speed 3.
  2. Add the chopped almonds, cranberries & salt and mix together 5 Seconds/Speed 3/Reverse.
  3. Once combined, pour the mixture evenly over the set base. Return to the fridge for a further 30 minutes to set (or the freezer for 15 minutes.)

Chocolate Layer

  1. Place the cacao butter into the bowl of the Thermomix and mill 10-15 Seconds/Speed 9.
  2. Melt the cacao butter for 10 minutes/37°/Speed 2 scraping down the sides of the bowl and around the blades closer to the finish time.
  3. Add the cacao powder, maple syrup, vanilla & salt and continue cooking for a further 5 minutes/37°/Speed 2.
  4. Pour over the slice as the final layer. Refrigerate for 10 minutes, then sprinkle with cacao nibs and dried flower petals just as the chocolate is beginning to set (make sure the topping is beginning to set – if you top with the decorations too early, they will all sink into the chocolate filling) then refrigerate a further 20 minutes or until set. Chop into small squares and serve.


Choc Peppermint Creams


These delicious cookies are an absolute winner with my friends! Chocolate, peppermint, and a much healthier alternative to the original – what’s not to love!! You will need my Coconut Butter recipe to make these cookies.

Choc Peppermint Creams
Yields 20
Delicious melt-in-the-mouth little morsels!
Write a review
Print
Prep Time
15 min
Cook Time
10 min
Prep Time
15 min
Cook Time
10 min
COOKIE DOUGH
  1. 100g Organic Dark Chocolate
  2. 150g Organic Butter, softened
  3. 120g Rice Malt Syrup
  4. 90g Rapadura Sugar
  5. 230g Unbleached Spelt Flour, sifted
  6. 25g Raw Cacao powder, sifted
  7. 1 tsp Bicarb Soda, sifted
PEPPERMINT CREAM FILLING
  1. 75g Cashews
  2. 75g Macadamias
  3. 160g Coconut Butter
  4. 30g Rice Malt Syrup
  5. 1 tsp Vanilla Essence
  6. 6 Drops Peppermint Essential Oil
COOKIE DOUGH
  1. Preheat the oven to 180°C and line a large baking tray with baking paper. Place the chocolate into the bowl of the Thermomix and chop briefly 2 times/Turbo speed. Set aside.
  2. Place the butter, rice malt syrup & sugar into the bowl of the Thermomix and cream 30 seconds/Speed 5.
  3. Add the flour, cacao powder, and bicarb and mix 10 Seconds/Speed 6.
  4. Add the chopped chocolate and mix 5 Seconds/Speed 5/Reverse.
  5. Place small tablespoons (approx. 15g) sized balls onto a tray lined with baking paper & bake for 8-10 minutes. It will make approximately 40 individual cookies (about 20 sandwiched peppermint creams). Cool on a wire rack.
PEPPERMINT CREAM FILLING
  1. Place the cashews and macadamias into the bowl of the Thermomix and process for approximately 1 minute/Speed 8 or until nut butter consistency is achieved.
  2. Add the coconut butter, rice malt syrup, vanilla and peppermint oil and process for a further 10 Seconds/Speed 5. Place filling in the fridge for 15 or so minutes to chill.
ASSEMBLY
  1. Once chilled, roll tablespoon sized amounts into a ball and press onto the flat underside of a cookie. Top with another cookie to create a sandwich. Serve.
Notes
  1. NB. They will keep in an airtight container for 3 or so days, however I like to keep mine in the fridge. They will go all fudgy once in the fridge.
Kitch'n Thyme https://kitchnthyme.com.au/